When it comes to pizza, Mama Rita knows best. This is her no-knead recipe from Naples, Italy with fast prep and only 5 ingredients. Make REAL pizza from scratch with zero effort – let’s go!
“My mom would make a cross on the dough. It’s for good luck of a well risen dough“
In this post you’ll learn
No knead to stress about this pizza!
Literally. No kneading required. We’ve made this recipe about as hands off as you can get – and if you’re using a stand mixer – even more so. Just start your dough by lunch, proof it during the afternoon, and it’ll be ready by dinner!
We’ve made this faster than most yeast based pizza dough recipes too. How? A little more yeast helps to speed up the rising process AND a quick rise means it’s ready in 5 hours instead of overnight.
Related: Pizza Fritta / Pizza Cob Loaf
The not Neapolitan pizza recipe from Naples, Italy
We first learned this recipe from Mama Rita during our wandercooking through Naples, Italy, which is renowned as the ancestral home of pizza.
Those familiar with traditional Neapolitan pizza will note our recipe is not a copycat of the official Neapolitan pizza recipe, which has many strict rules and regulations.
According to Rita, her recipe is the ‘original and the best’ way to make make pizza dough at home! One major difference between her recipe and Neapolitan pizza is that she includes olive oil, which she says helps create a stretchier dough that’s crispier once cooked.
Ingredients and substitutes
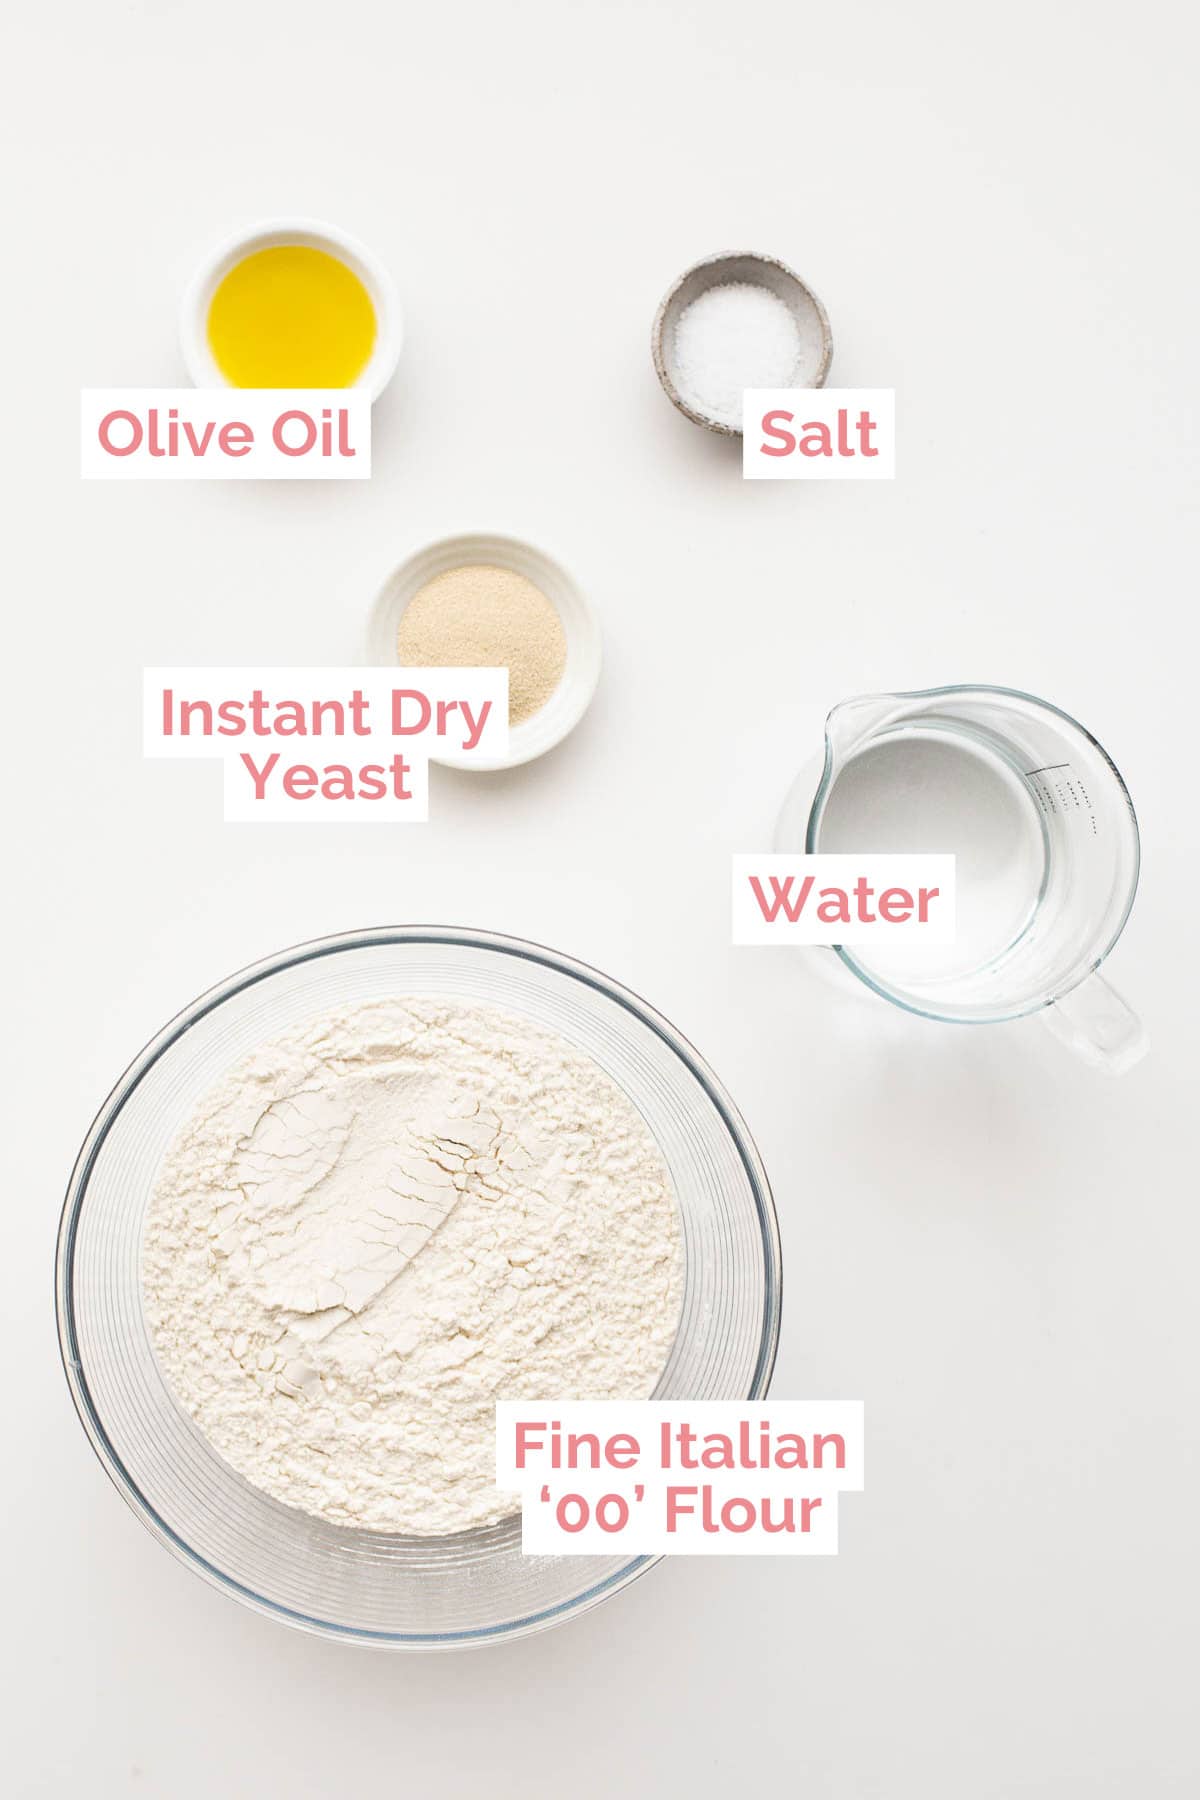
- Flour – Caputo’s 00 Flour is the best choice according to Rita, however you can use any kind of pizza flour, baker’s flour, bread flour or all purpose flour as an easy substitute and still achieve great results.
- Yeast – We use active dry yeast which doesn’t require warm water to rise. You’ll find this at most supermarkets.
- Cold Water – The secret to allowing extra delicious flavours to develop as the pizza dough proofs.
- Olive Oil – For the best flavour use high quality extra-virgin olive oil. This adds flavour and makes the dough easier to stretch without creating any holes. You won’t find this in any official Neapolitan pizza dough recipe, but it’s more commonly used in Italian households for homemade pizza dough. If you prefer not to use it, just leave it out.
- Salt – Along with flavouring the dough, salt helps to tighten the gluten structure and strengthen the dough. Myth alert – adding the salt with the yeast won’t kill it.
Let’s get cooking!
Prepare the dough
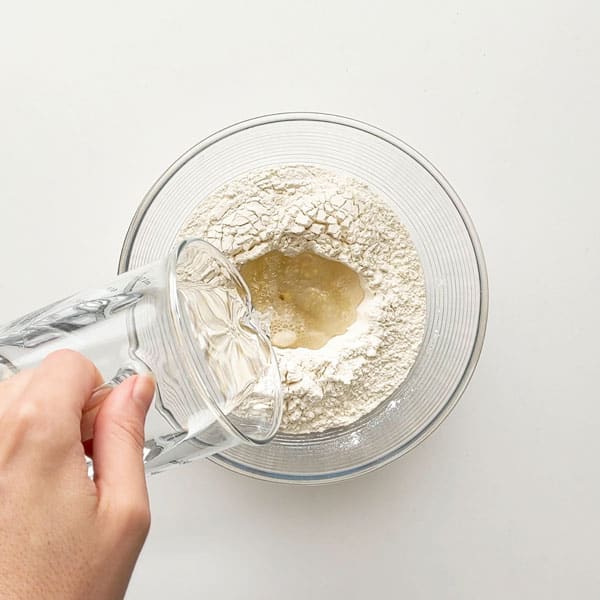
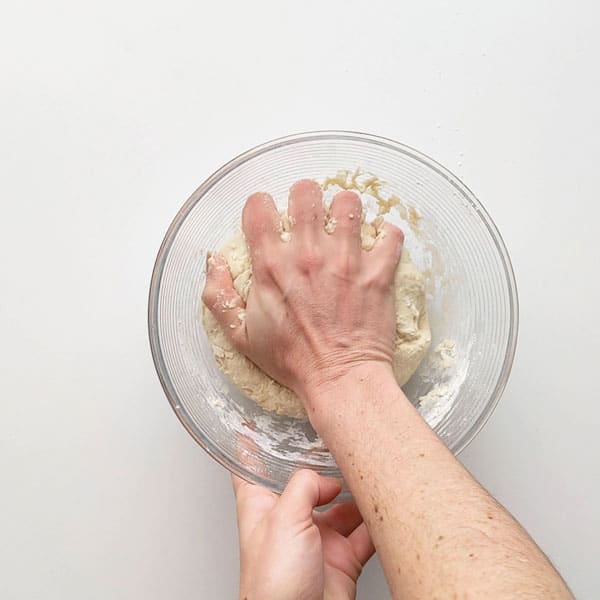
- Add flour into a large mixing bowl. Make a well in the centre, then add the salt, active dry yeast, olive oil and water.
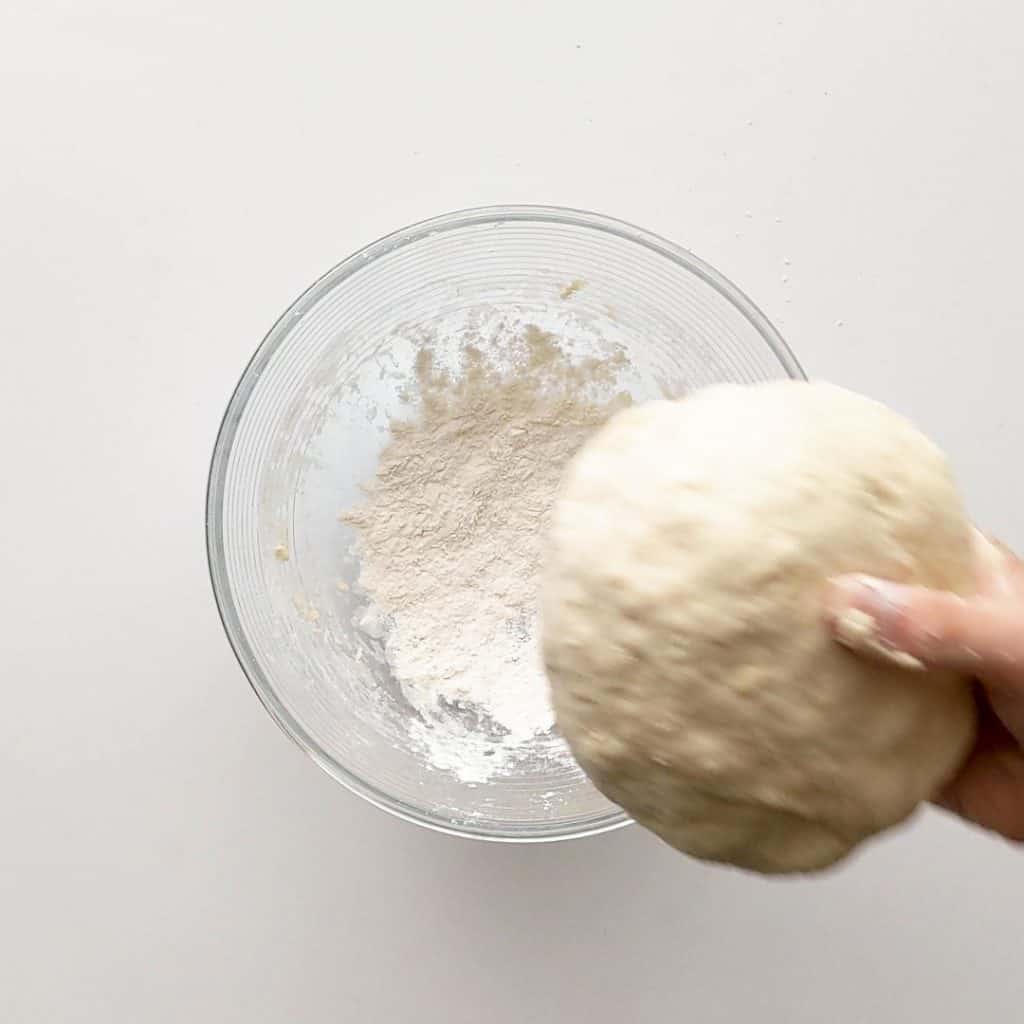
- Use your hands to mix the flour in large circles. Combine just enough until you have created a pillow of dough in the centre of the bowl and there’s no remaining flour. This should take a couple of minutes. Tip: You can freeze the dough here if you’re making a batch to cook in advance to cook another time.
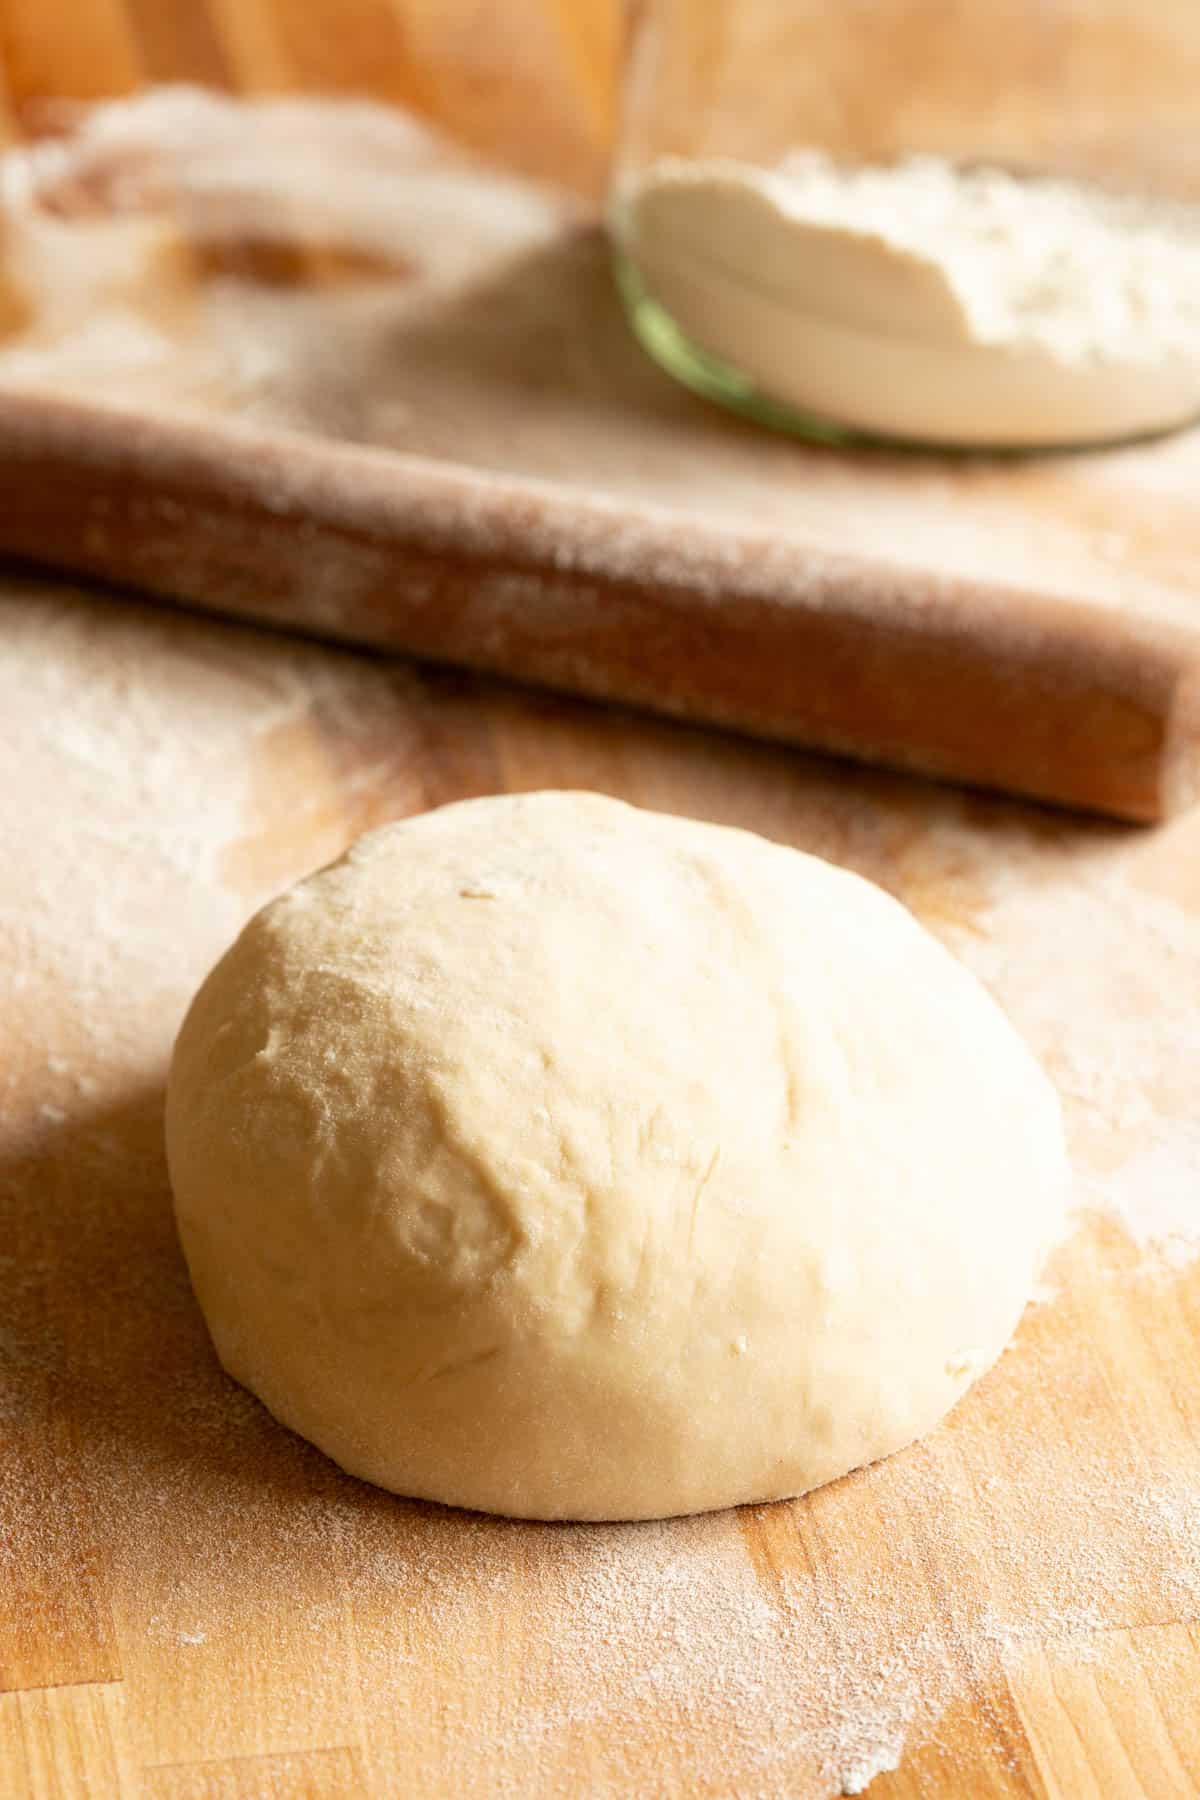
- Lift the dough and add extra flour underneath to prevent the dough from sticking while resting. Score an ‘X’ shape on the top of the dough. Cover with a towel and rest to proof for 3 hours (or until doubled in size).

Roll out the dough
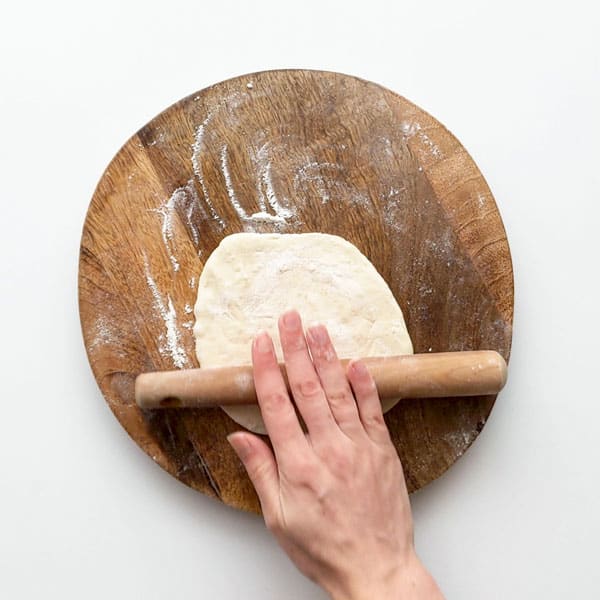
- After the dough has risen, spread plenty of flour onto your rolling surface and rolling pin. Divide the dough into the number of portions you desire. (Ie you could make 2-3 large pizza bases or 8 smaller bases with this amount of dough.)
- Roll the dough portions out into circular bases, using your fingers to stretch out into shape. Don’t worry if the dough is quite thin at this stage, it will continue to rise until it’s time to cook.
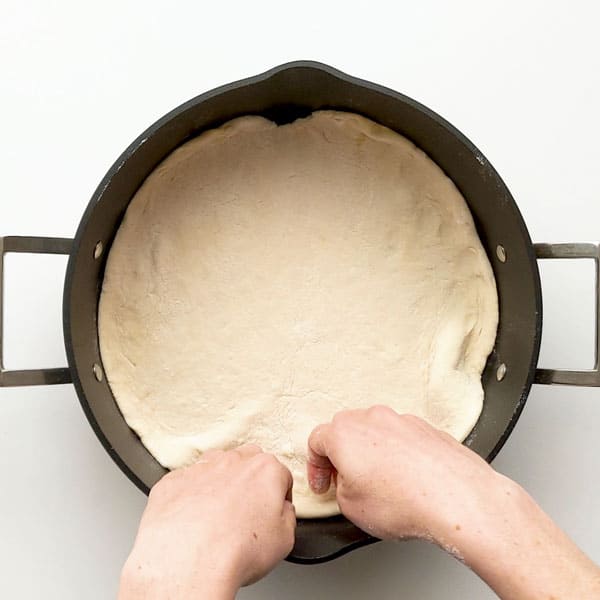
- Spread a thin layer of olive oil over each pizza tray (aluminium trays work best for an extra crispy base). Place the dough on the trays and push out to the rim to cover the pan. Be sure to press gently at this stage so as not to push out too much air. Cover and rest again for around 1-2 hours until nice and puffy.
Cooking the pizza + topping ideas
- Preheat the oven to 250˚C / 480˚F.
- Prepare your pizza toppings, but don’t add the cheese yet!
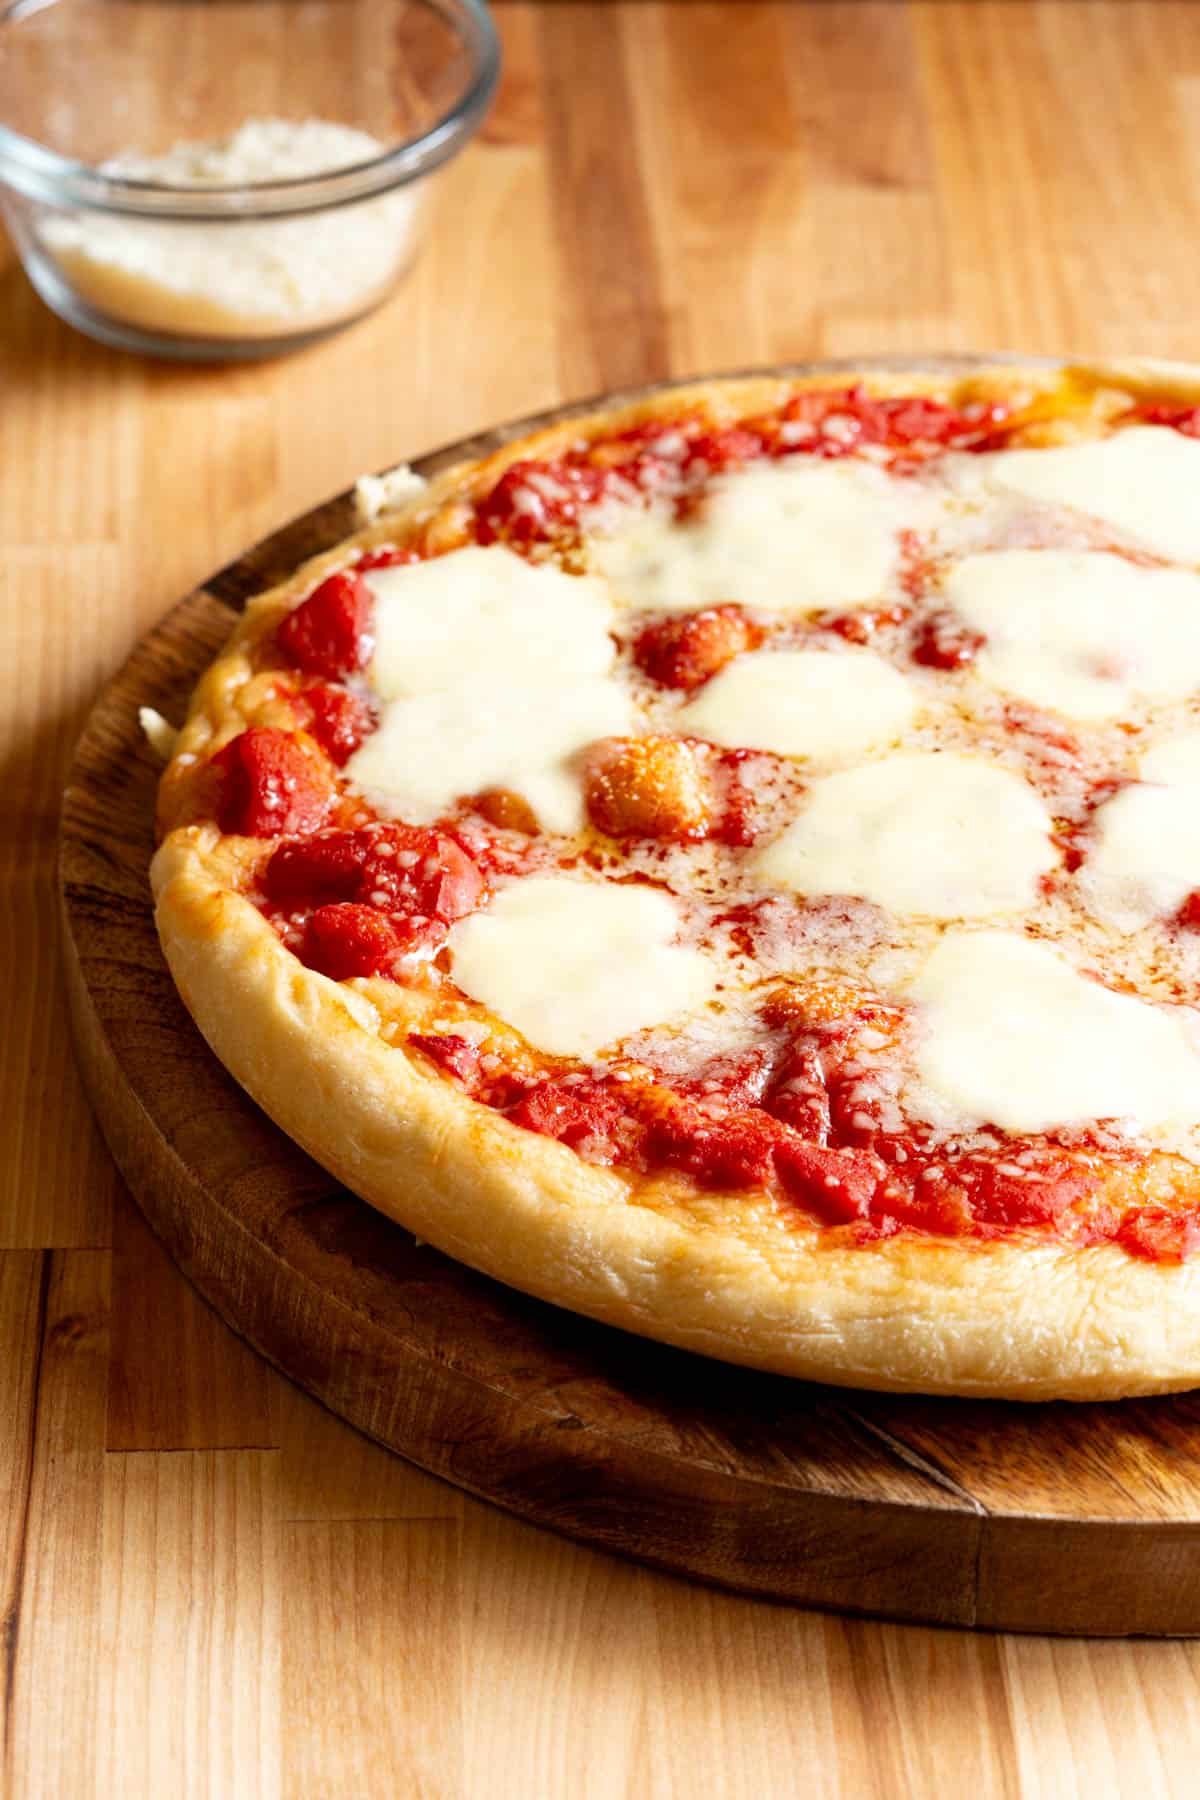
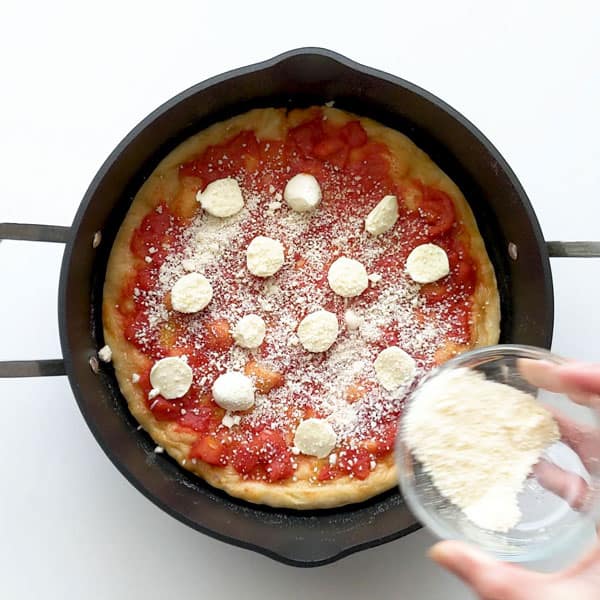
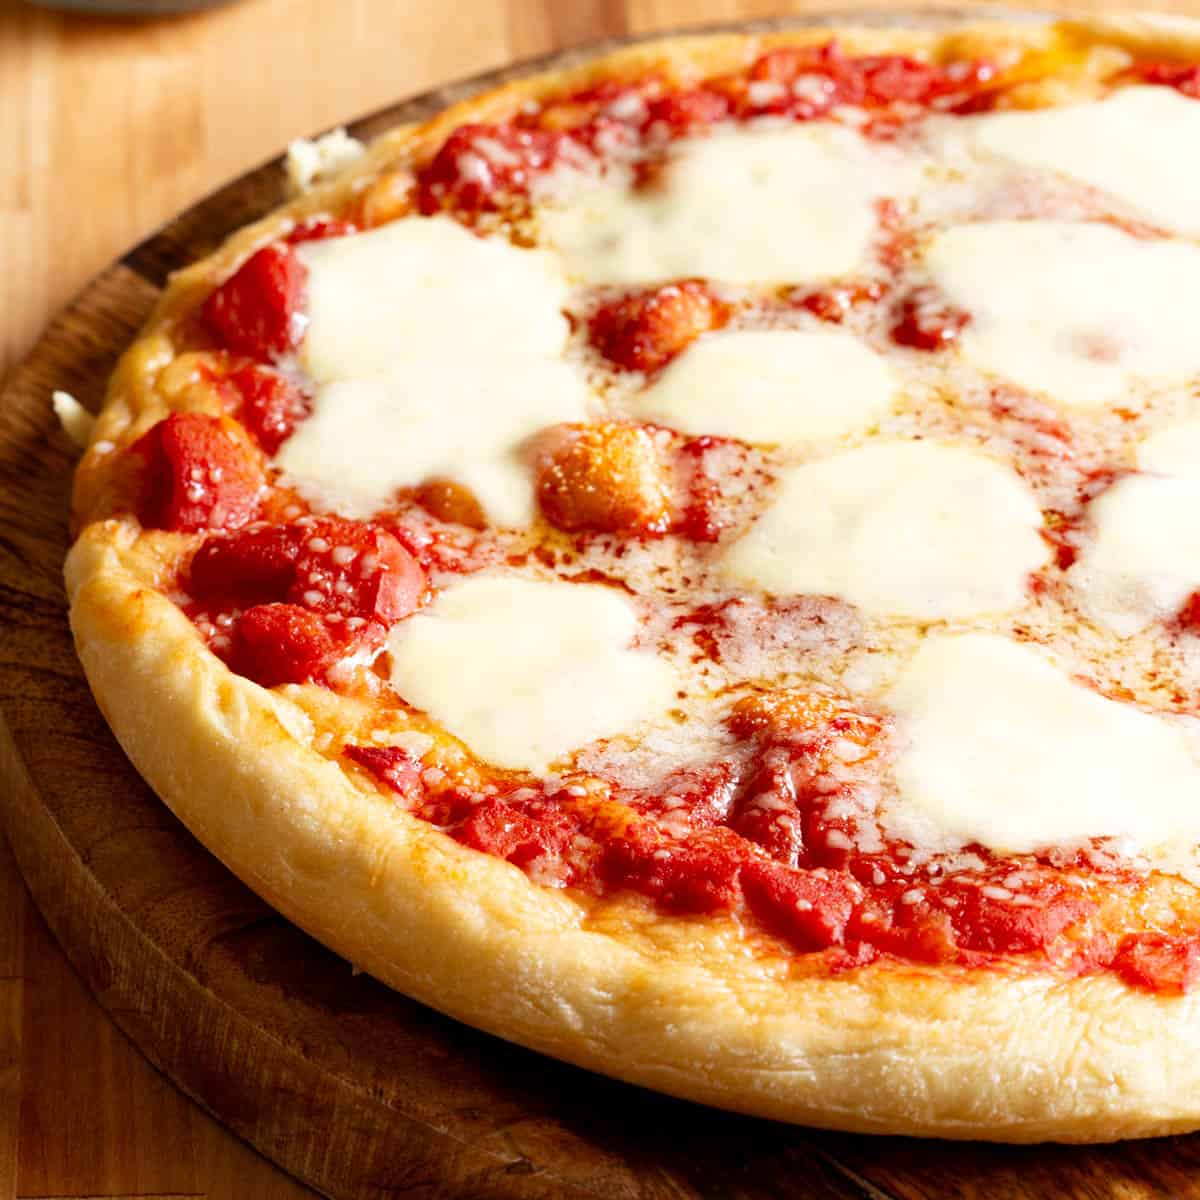
For Margherita: Top pizza bases with crushed tomatoes or passata (or your favourite pizza sauce) and drizzle with olive oil.
For Zucchini & Prosciutto: Layer pizza bases with grated zucchini only (not the prosciutto yet) and drizzle with olive oil.
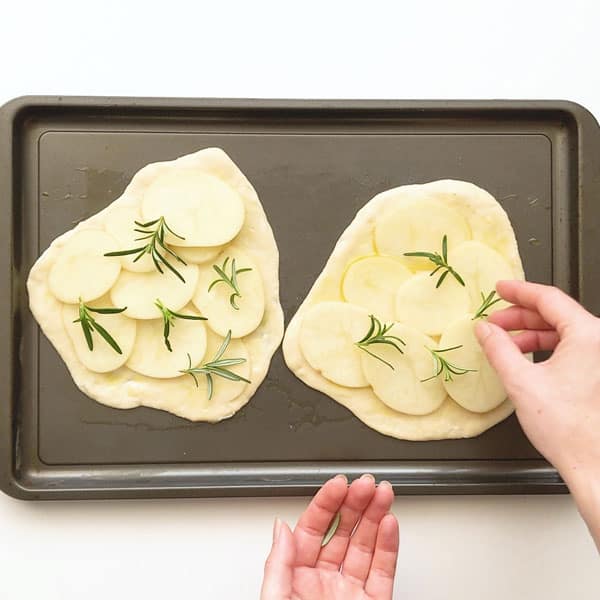
For Potato & Rosemary: Drizzle pizza bases with olive oil and layer with thin slices of potato. Top with fresh rosemary and season with salt and pepper. - Bake in the oven for 10 minutes or so until the first topping layer has cooked through nicely. The dough should be just starting to brown at this stage.
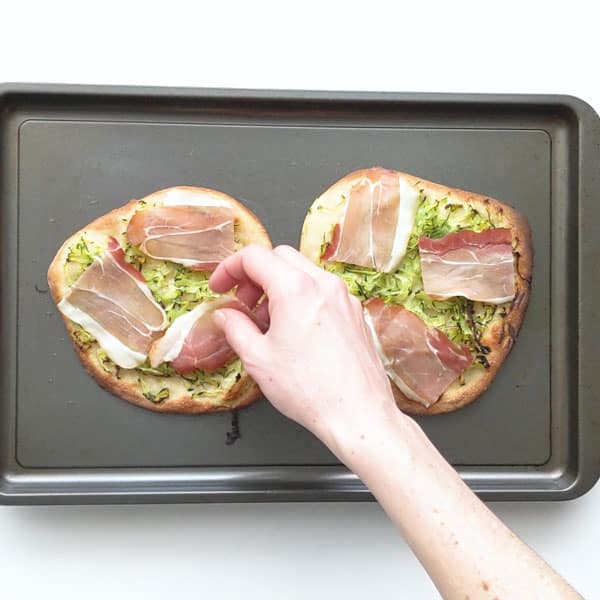
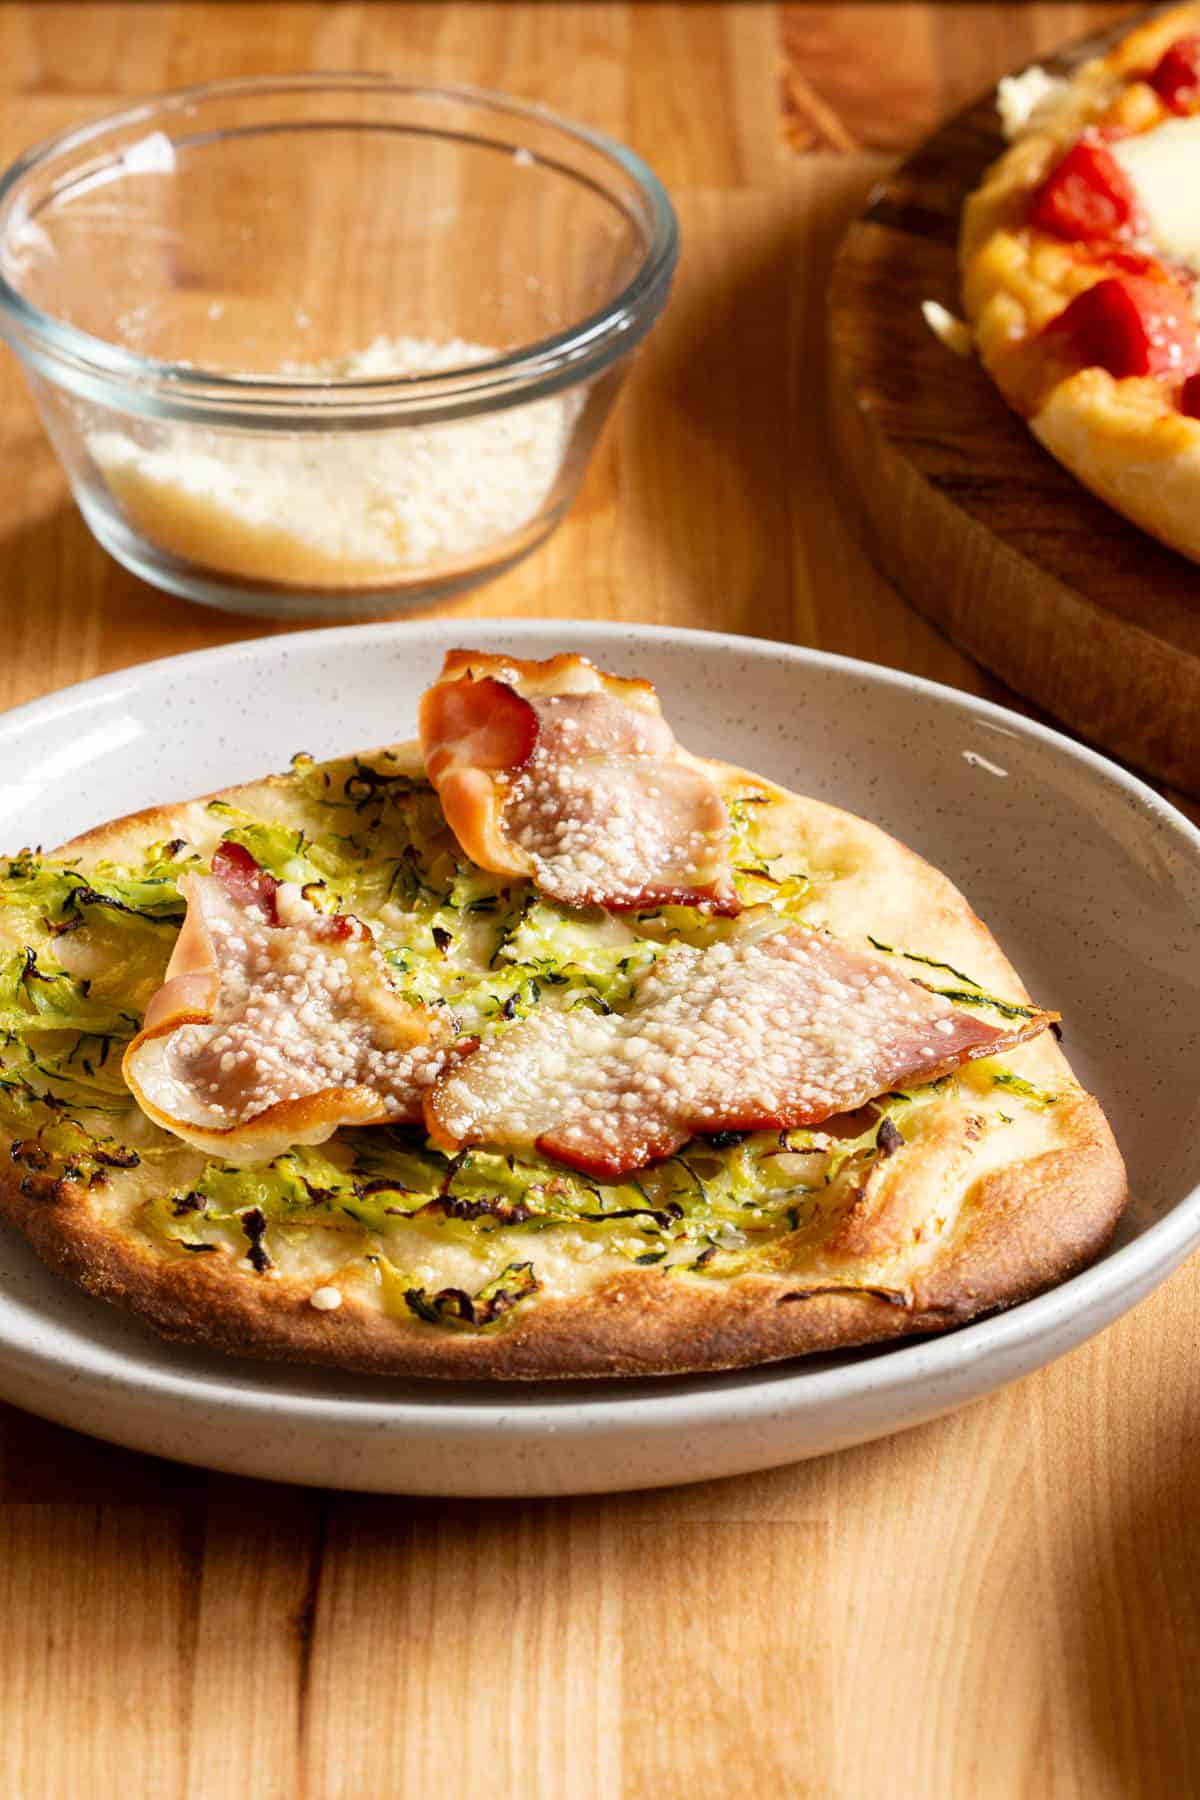
- Take out of the oven and sprinkle each pizza with Parmesan cheese and small chunks of mozzarella cheese. Add the prosciutto to the zucchini pizza(s).
- Place pizzas back in the oven and cook for another 5-10 minutes or so until the cheese has melted and the bases are nice and crispy.
Timing your dough for a 6:00pm dinner
- 12:45pm – 1pm: PREP – Start dough.
- 1pm – 4pm: 1ST RISE – Cover, allow the dough to rise in a warm location.
- 4pm – 4:15pm: PREP – Roll out your pizza bases.
- 4:15pm – 5:15pm: 2ND RISE – Add pizza bases to trays, cover again and leave out on the counter to rise for one more hour.
- 5:15 – 5:45pm: PRE-HEAT OVEN – Turn on the oven and add toppings to pizza.
- 5:45pm – 5:55pm: COOK – Get those pizzas in the oven!
- 5:55pm – 6pm: ADD – Take out your pizzas and add your final layer of cheese and meat toppings. Cook for 5 more minutes or until cheese is melted.
- SERVE!
Quick Tips
Storage
You can freeze the dough straight after you’ve mixed the ingredients but BEFORE allowing it to rise. Portion it out into how many pizzas you’d like and freeze separately in airtight containers to stop the dough portions sticking together.
To thaw, pop the dough portions out on the counter for 2 hours to bring up to room temperature. If it hasn’t risen as it’s thawed, let it sit for another 1 – 2 hours.
Once the pizzas are cooked, you can cut them into slices and store in the fridge for 2-3 days or in the freezer for around a month or so. We like to reheat by popping them in the air-fryer or oven on a lower setting so it heats up without burning the toppings.
FAQs & Troubleshooting
Actually that’s a myth that’s been proved incorrect. It’s had no effect on our baking and our dough always rises fine as you can see in our recipe video.
Check your active dry yeast is still in date and that it was stored in a cool and sealed environment. If it gets too old or hot, this can kill the yeast and make it unusable.
If it’s risen a little, but not doubled, you may need more time and patience – especially in a cooler climate. Just give the dough more time to rise or what we usually do is move it to a warmer area such as your oven (warm it up on its lowest setting for 5 minutes before).
You can definitely use a stand mixer here. Place all your ingredients in the mixing bowl and attach the dough hook. Pop your mixer on low speed to medium speed – around 3 or 4 – and allow the dough to form over a few minutes. If it’s sticking to the bowl, sprinkle with extra flour.
Once dough has incorporated, take out the hook and form a ball with the dough and continue with the recipe.
Throwing an Italian themed night?
Try serving up your pizza with other Italian favourites such as fennel and orange salad, pasta al forno or classic beef and pork ragu.
If you’re looking for a dessert or two, bake a lemon polenta cake and a batch of lingue di gatto to finish things off.
Guests still hungry? A jar of crunchy almond cantucci never goes astray alongside their cup of coffee!
Try these amazing recipes next:
★ Did you make this recipe? Please leave a comment and a star rating below!
Equipment
Ingredients
For the Dough
- 400 g ‘00’ flour 3 cups / 14.1 oz, sub baker's flour / all purpose flour PLUS extra for rolling the bases out
- 250 ml cold water 1 cup / 8.45 fl oz
- 20 ml olive oil 4 tsp / 0.67 fl oz, PLUS 1-2 tbsp oil per pizza tray
- 10 g salt 2 tsp / 0.35 oz
- 9 g instant dry yeast 3 tsp / 0.31 oz
For the Toppings – we used the following as 'standard' topping ingredients on each of our pizzas.
- pinch salt and pepper
- olive oil dash
- parmesan cheese sprinkle
- mozzarella cut into small chunks
Margherita
- tomatoes crushed or diced from a tin
Zucchini & Prosciutto Pizza
- 2 zucchini grated
- 2 slices prosciutto roughly chopped, or bacon
Instructions
Prepare the dough
- Add flour into a large mixing bowl. Make a well in the centre, then add the salt, active dry yeast, olive oil and water.400 g ‘00’ flour, 250 ml cold water, 20 ml olive oil, 10 g salt, 9 g instant dry yeast
- Use your hands to mix the flour in large circles. Combine just enough until you have created a pillow of dough in the centre of the bowl and there’s no remaining flour. This should take a couple of minutes. Tip: You can freeze the dough here if you’re making a batch to cook later.
- Lift the dough and add extra flour underneath to prevent the dough from sticking while resting. Score an ‘X’ shape on the top of the dough. Cover with a towel and rest to proof for 3 hours (or until doubled in size).
Roll out the dough
- After the dough has risen, spread plenty of flour onto your rolling surface and rolling pin. Divide the dough into the number of portions you desire. (Ie you could make 2-3 large pizza bases or 8 smaller bases with this amount of dough.)
- Roll the dough portions out into circular bases, using your fingers if needed to stretch out into shape. Don’t worry if the dough is quite thin at this stage, it will continue to rise until it’s time to cook.
- Spread a thin layer of olive oil over each pizza tray (aluminium trays work best for an extra crispy base). Place the dough on the trays and push out to the rim to cover the pan. Be sure to press gently at this stage so as not to push out too much air. Cover and rest again for around 1-2 hours.
For the toppings
- Preheat the oven to 250°C / 480°F.
- Prepare your pizza toppings, but don’t add the cheese yet!
- For Margherita: Top pizza bases with crushed tomatoes or passata and drizzle with olive oil.tomatoes, pinch salt and pepper
- For Zucchini & Prosciutto: Layer pizza bases with grated zucchini and drizzle with olive oil.olive oil, 2 zucchini, pinch salt and pepper
- For Potato & Rosemary: Drizzle pizza bases with olive oil and layer with thin slices of potato. Top with fresh rosemary and season with salt and pepper.olive oil, 3 potatoes, 1 tsp rosemary, pinch salt and pepper
- Bake in the oven for 10 minutes or so until the first topping layer has cooked through nicely. The dough should be just starting to brown at this stage.
- Take out of the oven and sprinkle each pizza with Parmesan cheese and small chunks of mozzarella cheese. Add the prosciutto to the zucchini pizza(s).parmesan cheese, mozzarella, 2 slices prosciutto
- Place pizzas back in the oven and cook for another 5-10 minutes or so until the cheese has melted and the bases are nice and crispy.
Timing the recipe for a 6pm dinner:
- 12:45pm – 1pm: PREP – Start dough.
- 1pm – 4pm: 1ST RISE – Cover, allow the dough to rise in a warm location.
- 4pm – 4:15pm: PREP – Roll out your pizza bases.
- 4:15pm – 5:15pm: 2ND RISE – Add pizza bases to trays, cover again and leave out on the counter to rise for one more hour.
- 5:15 – 5:45pm: PRE-HEAT OVEN – Turn on the oven (250°C / 480°F) and add toppings to pizza.
- 5:45pm – 5:55pm: COOK – Get those pizzas in the oven.
- 5:55pm – 6pm: ADD – Take out your pizzas and add your final layer of cheese and meat toppings. Cook for 5 more minutes or until cheese is melted.
- SERVE!
Video

Recipe Notes
- Sticky Dough – If the dough mixture is too sticky, sprinkle more flour to the outside of the dough. You can also do this to help remove sticky dough from your fingers.
- Portions – You can use this dough to make large pizzas, small mini pizzas or pizza fritta (fried pizzas). Just portion out to the sizes you like.
- Rising the Dough – Keep the dough covered in a warm area. If it’s a cold day, pop your oven on its lowest setting or ‘Keep Warm’ setting for 5 minutes to warm the oven. Then switch it off and pop the covered dough in with the oven door shut. We don’t use plastic wrap since we prefer to avoid waste where possible, and find a kitchen towel is enough.
- Storing in Fridge – Once risen, you can leave the dough in the refrigerator overnight in an airtight container. Take it out to rest on your kitchen counter an hour to come up to temperature before using . Cold air slows down the dough rising significantly. If storing in the fridge, use within a few days or freeze immediately after mixing.
- Batch Cook – If you’re entertaining and want to make extra pizza bases, you can easily double the recipe and follow the same steps.
- Aluminium Trays – Aluminium trays are awesome for cooking pizza! Not only are they lightweight, they’re also super thin and transfer heat perfectly for crispy and delicious pizza crusts.
- Cutting the Pizza – You can use a regular knife, a pizza wheel or slice it the traditional Naples way – with kitchen scissors!
Nutrition
This recipe was originally published on 07/07/2015. It has since been republished with new content, photos and an updated recipe. Recipe is adapted from Rita in Naples, Italy.


6 Comments
Vivian
08/08/2021 at 11:48 amThis was so tasty….I made it in my cast iron skillet. I preheated the skillet on a burner while I put the toppings on. It was crispy and had a great texture. I only made half the recipe because I wanted to taste it before I made more. This will definitely be my go to crust from now on. Thank you!
Wandercooks
10/08/2021 at 9:46 amSounds wonderful Vivian. Thanks for the feedback!
kim
28/06/2021 at 12:06 amLooks great, and so easy! I would have loved to have seen pics of the cut pie with closeups of the crust both edge and underside to see thickness and texture, as i’m on a mission to find the perfect crust. Oh well, guess I’ll just have to make it! Thanks for the recipe!
Wandercooks
30/06/2021 at 9:16 amHey Kim! Timing with your comment, we just made these again on the weekend too. Hope you enjoyed yours! Thanks for the recommendation re: the crust edge and underside, next batch I’ll take a pic and add it in. 🙂
Catherine
06/02/2021 at 2:41 amHi, I’ve made this dough 4 or 5 times now, and I love it, but I’m curious about the 250 degrees temperature for the oven. It seems low, and I’ve been cooking the pizza at 450, which seems just right, especially to cook vegetable toppings. Could this be a mistake, or is it just me?
Wandercooks
08/02/2021 at 12:14 pmHello! Oh that’s so good to hear! For the oven temps, it’s 250 degrees Celsius as we’re in Australia. So for Fahrenheit, you could crank your oven up to 480 instead of 450 to cook them a little quicker. 🙂 I’ve also updated the recipe to avoid this confusion in the future. Happy cooking!