Craving a chocolate fix? You’re just 5 minutes and 4 ingredients away from this decadently Easy Chocolate Mousse with cocoa powder. No stress, no mess, just light and fluffy dessert goodness!
Why We Love This
There’s so many reasons why we love this recipe!
- It’s egg-free – no need to worry about raw eggs or egg allergies. No need to separate whites and yolks. No need to whip them or ever-so-carefully fold them in!
- It’s made without gelatin – so no need to worry about it clumping up your mousse mix or waiting for it to set.
- No need to grate or melt chocolate – we’ll be using cocoa powder (or hot chocolate powder) which blends through the cream super easily.
- It’s dangerously easy – Just like mochi rice cakes, you can whip this up in minutes for a sweet treat after dinner with (almost) zero effort.
We’ve taken out all the messy, stressy, delicate steps to leave you with the EASIEST no-fuss chocolate mousse you can whip up when your next chocolate craving strikes.
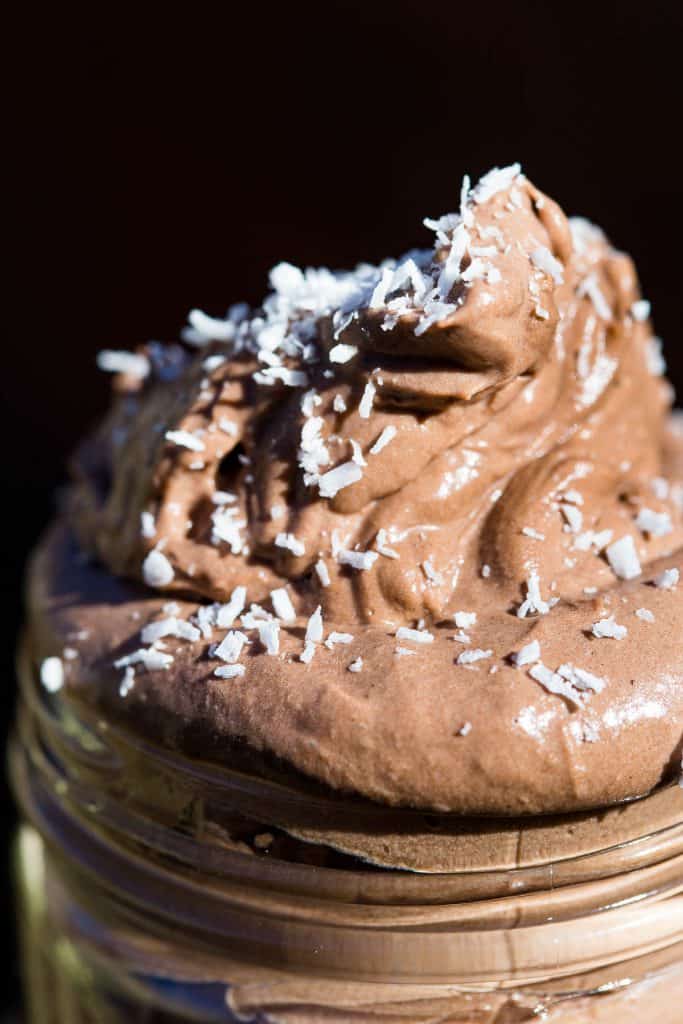
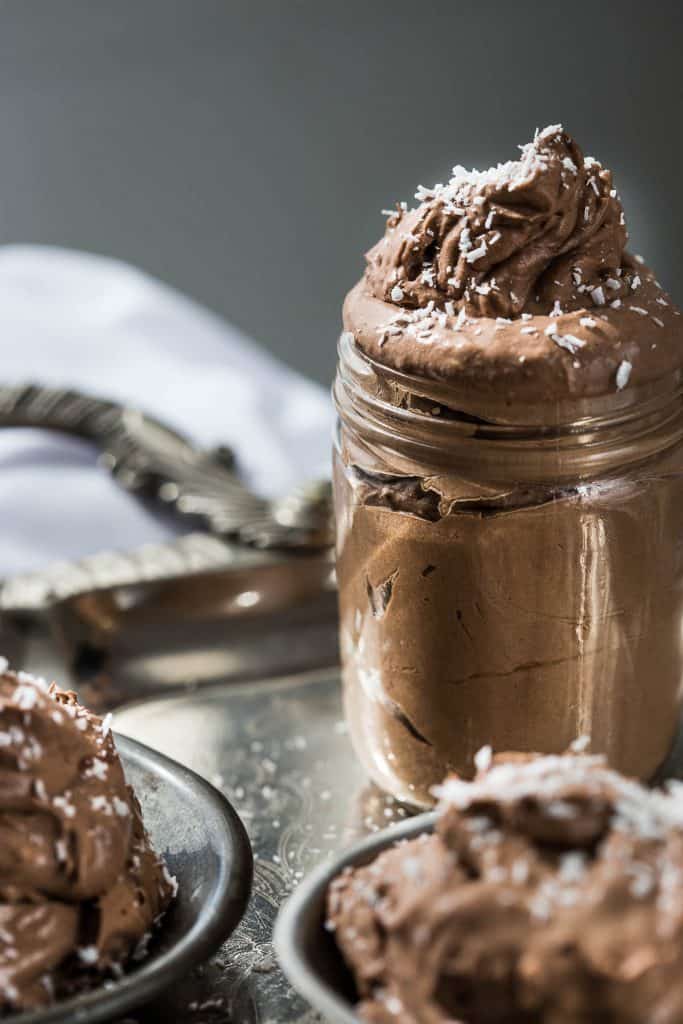
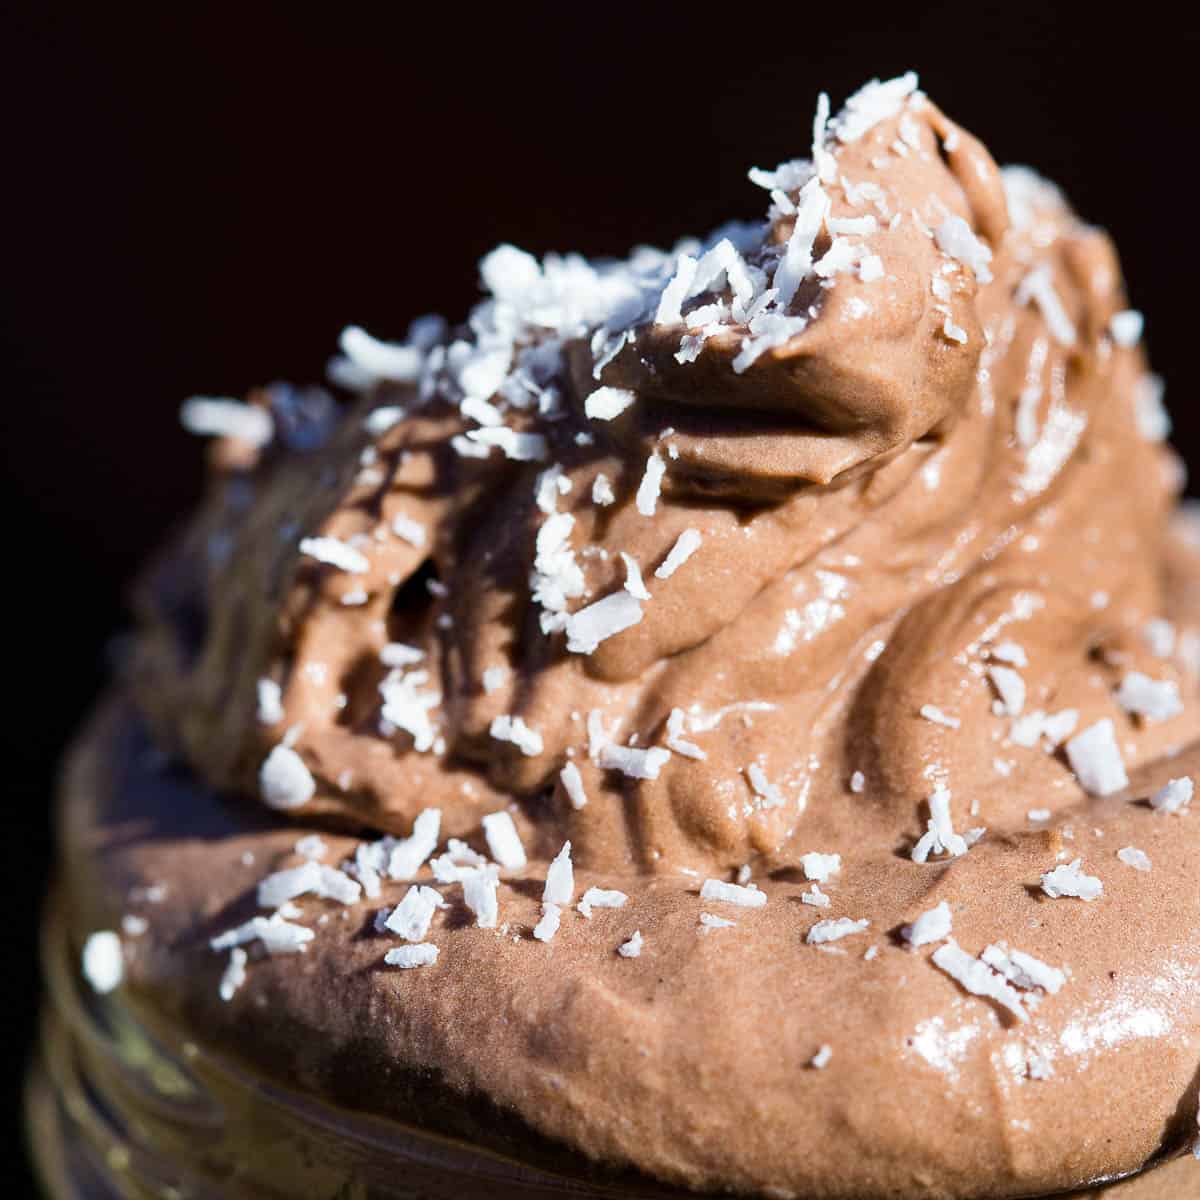
It’s lusciously thick, yet deliciously light and chocolatey mousse guaranteed to be super tasty and impossible to stop eating until your bowl is well and truly licked clean.
Why not double the recipe and enjoy more tomorrow night, or freeze to make homemade ice cream?
Related: Matcha Ice Cream / Ice Cream Pudding
What is Chocolate Mousse?
Mousse means ‘foam’ in French and usually refers to light and fluffy desserts made with cream or egg whites.
The traditional French-meringue method is similar to desserts like pavlova or tres leches milk cake, where egg whites are whipped until they’re light and fluffy, then carefully folded into the rest of the ingredients.
Today’s method is ultra-simplified, using cocoa powder and thickened cream / heavy cream as the base. We’ve skipped the whipping, melting and fiddly folding techniques so you can make it in minutes for a quick and easy dessert. Now you can enjoy the smooth and fluffy mousse-like texture with just a fraction of the ingredients, time and stress of making “real” chocolate mousse.
Incidentally, being eggless it’s suitable for vegetarian diets. (Check out the Variations section for how to make it vegan friendly too.)
So while today’s recipe could humbly be called “chocolate whipped cream”, we still call it chocolate mousse because it has the fluffy, bubbly texture we know and love.
What You’ll Need
- Cream – Always use thickened cream / heavy cream / double cream (it goes by lots of different names depending on where you live). It should have a higher fat content than regular cream, which will give your mousse a firmer whippy texture.
- Sugar – We usually use raw sugar but you can use any kind of sugar you have on hand. You could even swap for a sweetener such as stevia to make it diabetic friendly.
- Cocoa Powder – Use a high quality, unsweetened, powder with a high percentage of cocoa for rich chocolate flavour.
- Desiccated Coconut (Optional) – This adds an extra subtle flavour and texture to the mousse. You can whip it into the mousse itself, or sprinkle it over the top as garnish.

Wandercook’s Tips
- Choose Quality – Quality ingredients will always give you better flavour and texture, especially in such a simple recipe. For example, any cocoa powder with less than 50% cocoa is basically chocolate flavoured sugar.
- Avoid Bitterness – Always use high quality cocoa powder for the best flavour. Sometimes dark chocolate or dark cocoa powder can be overly bitter, so use a brand you trust or go for a sweetened cocoa powder to avoid this if you’re unsure.
- Chill The Mixing Bowl – Pop it in the freezer for 15-30 mins before you whip for better texture in the whipped cream.
- Sift the Cocoa Powder – For a smoother, more even end result. It’s not essential, but will help distribute the cocoa more evenly and avoid little clumps of chocolate powder through your mousse.
- Stir Cocoa Through – Give it a quick stir before blending so it doesn’t flick up in your face!
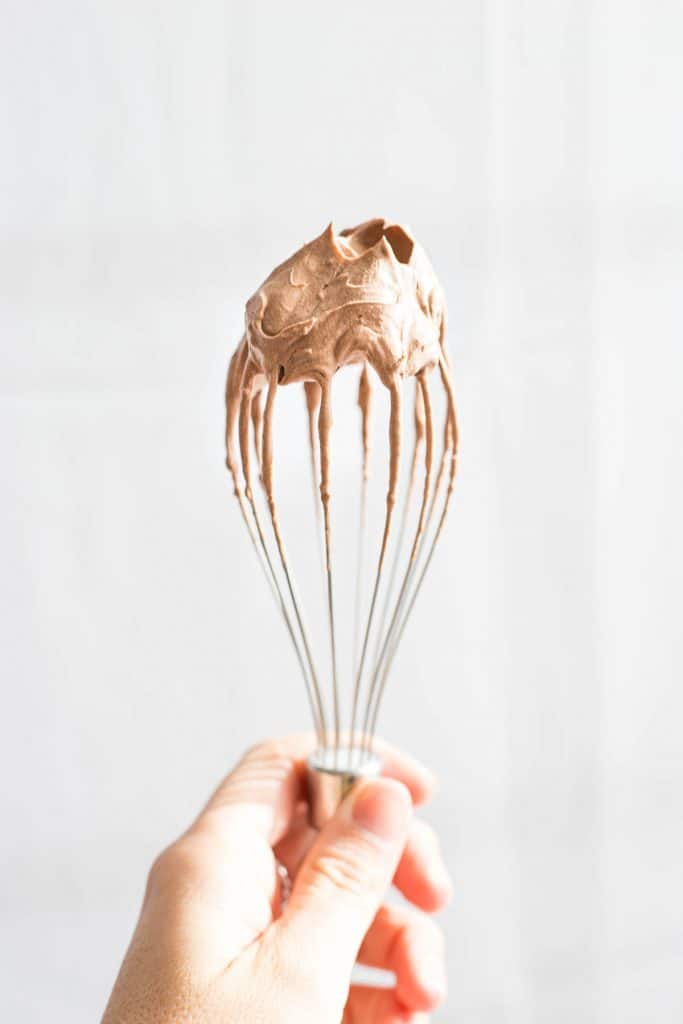
- Don’t Over-Whip – Look for stiff peaks when you’re whipping the cream (where the mixture holds its shape and doesn’t collapse in on itself). If you keep going after this point, you’ll just end up with chocolate flavoured butter!
- Extra cocoa? Make our Australian Lamingtons or English Chocolate Concrete cake next!
FAQs
You can make it up to a day in advance. Store it in the fridge (covered with plastic wrap to stop the surface drying out) until you’re ready to serve.
Yes you can! This will turn it into chocolate ice cream, yum. Always cover it in the freezer to stop the top from icing over.
It could be because the cream wasn’t cold enough. Starting with cold cream will help trap the air while whipping and give you that classic mousse texture. It’s a good idea to freeze the mixing bowl for 15-30 minutes before use and always use cream straight from the fridge.
Look for “stiff peaks” as you’re whipping the cream – this is when the mixture holds its shape without collapsing back down into itself. Stop here to avoid over-whipping or you may just end up with chocolate flavoured butter!
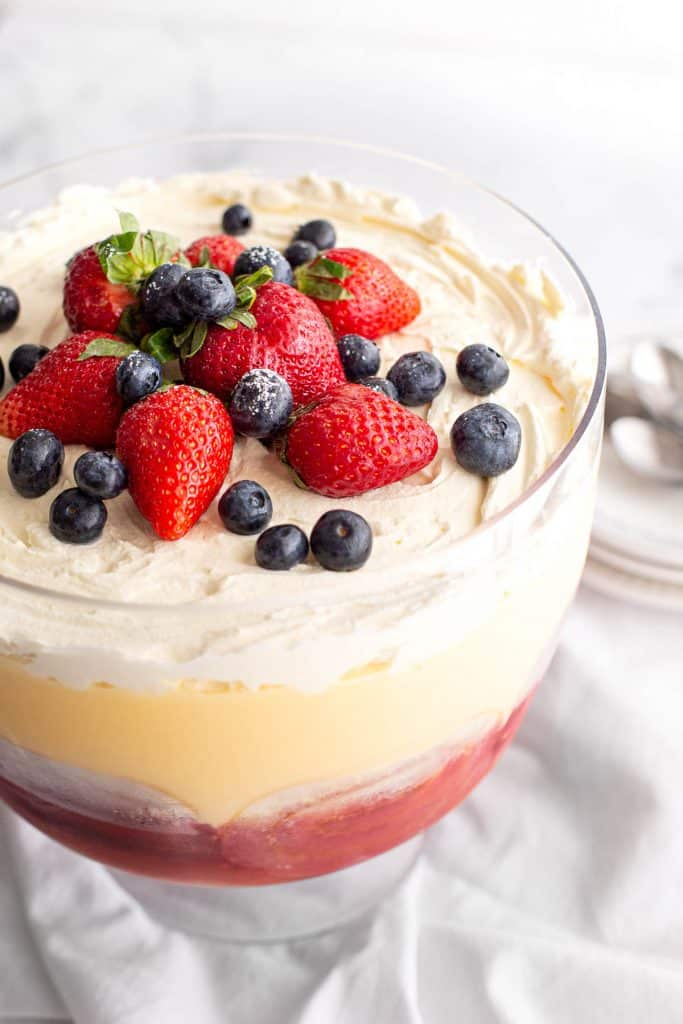
Use it however you’d use regular whipped cream! As a topping for pancakes, waffles, crumbles, trifle or pavlova. As a chocolate dip for a fruit platter. Serve it alongside a slice of Aussie crunch for extra chocolate decadence.
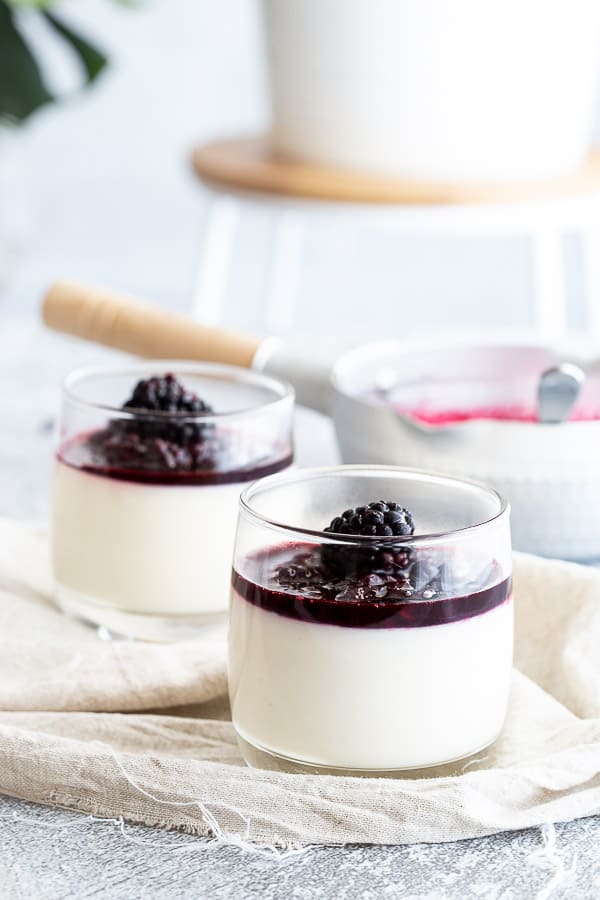
Texture and ingredients. Mouse is lighter and fluffier due to the trapped air from the whipped cream. Pudding is made from simmering milk and sugar with cornstarch as a thickener. If you’re keen to make pudding, try our French vanilla pudding (with easy homemade blackberry coulis!) instead.
Variations
- Extra Intense Dark Chocolate – Look for a dark Belgian chocolate powder with a high percentage of cocoa (70% will give you a rich bittersweet flavour).
- White Chocolate Mousse – Swap the cocoa powder for white chocolate powder.
- Decadent Dessert – Serve with fresh berries and regular whipped cream, garnished with cocoa powder, for the ultimate decadent treat.
- Garnish Ideas – Top with fresh mint leaves, grated orange peel, chocolate chips, strawberries crushed biscuits or homemade crumble topping.
- Add Flavour – Add a nip of your favourite liqueur or essence – hazelnut, almond, coconut, vanilla, instant coffee, rum or Baileys would all be amazing!
- Make it Vegan – Swap the cream for an equal amount of coconut cream. Make sure to use the solid part at the top, not the liquid.
- Presentation – Use a piping bag (or a homemade version from a plastic ziplock bag with the corner snipped off) to pipe the mousse into individual pots or glasses for serving. You could use glass jars, cups, ramekins or simple dessert bowls, or just leave it all in one big bowl and scoop out portions as you need. It’s up to you!
- Leftover cream? Make it into matchsticks or a ripple log!
Try these deliciously cooling desserts next:


★ Did you make this recipe? Please leave a comment & star rating below!
Equipment
Ingredients
- 500 ml thickened cream / heavy cream 2 cups, also called heavy cream or double cream
- 70 g sugar 1/3 cup, white, raw, or sub with stevia sweetener
- 2.5 tbsp cocoa powder unsweetened
- 3 tbsp desiccated coconut + extra for garnish
Instructions
- Add the cream, sugar, cocoa powder and desiccated coconut into a large mixing bowl. Beat with a hand mixer until stiff peaks form – pull the beater out and the mixture holds its shape without collapsing in on itself. The mousse should be nice and thick at this point.500 ml thickened cream / heavy cream, 70 g sugar, 2.5 tbsp cocoa powder, 3 tbsp desiccated coconut
- Spoon or pipe into individual serving bowls or glasses. Garnish with extra desiccated coconut.
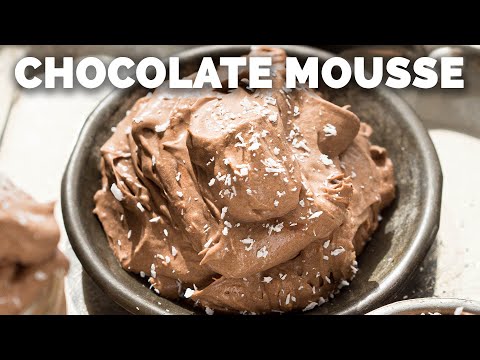
Video
Recipe Notes
- Cream – Always use thickened cream / heavy cream / double cream (it goes by lots of different names depending on where you live). It should have a higher fat content than regular cream, which will give your mousse a firmer whippy texture.
- Sugar – We usually use raw sugar but you can use any kind of sugar you have on hand. You could even swap for a sweetener such as stevia to make it diabetic friendly.
- Cocoa Powder – Use a high quality, unsweetened, powder with a high percentage of cocoa for rich chocolate flavour.
- Desiccated Coconut (Optional) – This adds an extra subtle flavour and texture to the mousse. You can whip it into the mousse itself, or sprinkle it over the top as garnish.
- Choose Quality – Quality ingredients will always give you better flavour and texture, especially in such a simple recipe. For example, any cocoa powder with less than 50% cocoa is basically chocolate flavoured sugar.
- Avoid Bitterness – Always use high quality cocoa powder for the best flavour. Sometimes dark chocolate or dark cocoa powder can be overly bitter, so use a brand you trust or go for a sweetened cocoa powder to avoid this if you’re unsure.
- Chill The Mixing Bowl – Pop it in the freezer for 15 mins or so before you whip for better texture in the whipped cream.
- Sift the Cocoa Powder – For a smoother, more even end result. It’s not essential, but will help distribute the cocoa more evenly and avoid little clumps of chocolate powder through your mousse.
- Stir Cocoa Through – Give it a quick stir before blending so it doesn’t flick up in your face!
- Don’t Over-Whip – Look for stiff peaks when you’re whipping the cream (where the mixture holds its shape and doesn’t collapse in on itself). If you keep going after this point, you’ll just end up with chocolate flavoured butter!
- Variations:
- Extra Intense Dark Chocolate – Look for a dark Belgian chocolate powder with a high percentage of cocoa (70% will give you a rich bittersweet flavour).
- White Chocolate Mousse – Swap the cocoa powder for white chocolate powder.
- Decadent Dessert – Serve with fresh berries and regular whipped cream, garnished with cocoa powder, for the ultimate decadent treat.
- Garnish Ideas – Top with fresh mint leaves, grated orange peel, chocolate chips, strawberries crushed biscuits or homemade crumble topping.
- Add Flavour – Add a nip of your favourite liqueur or essence – hazelnut, almond, coconut, vanilla, instant coffee, rum or Baileys would all be amazing!
- Make it Vegan – Swap the cream for an equal amount of coconut cream. Make sure to use the solid part at the top, not the liquid.
- Presentation – Use a piping bag (or a homemade version from a plastic ziplock bag with the corner snipped off) to pipe the mousse into individual pots or glasses for serving. You could use glass jars, cups, ramekins or simple dessert bowls, or just leave it all in one big bowl and scoop out portions as you need. It’s up to you!
Nutrition


21 Comments
Ashes
24/02/2017 at 10:40 amWhat is the yield on this?
Wandercooks
28/02/2017 at 3:47 pmHi Ashes! We actually didn’t measure our final batch haha – too busy eating! The mousse thickens quite a bit as you whip it, and filled our medium size mixing bowl nicely before portioning out. You should have plenty for dessert for six people at least. Probably more! (But I guess it depends how hungry you are) 😉
Fiona Jardine
22/12/2016 at 7:00 amIs it single cream or double cream ? How many ounces is a cup ?
Wandercooks
22/12/2016 at 4:52 pmHey Fiona, thanks for stopping by. Definitely use double cream (I’ll update the recipe to include that) – it’s much better for whipping. Single cream is better for soups or sauces where you want the texture to remain quite thin. In terms of ounces to cups – we use Australian cup measurements so that means you’ll need 16oz (ie 2 cups or 500ml)
Sonja
19/12/2016 at 12:46 amThis sounds amazing! Speaking as not the biggest coconut fan– would it work if I left the flakes out? Or replaced them with something else..?
Wandercooks
21/12/2016 at 10:32 amAbsolutely Sonja, feel free to leave out the coconut if you prefer. You’ll still end up with a deliciously thick chocolate mousse, the coconut just gives it an extra subtle flavour and texture. Enjoy!
Shawna MacKay
03/08/2016 at 2:16 pmCan this be made the night before and sit in the fridge over night?
Wandercooks
03/08/2016 at 2:19 pmSure thing Shawna, just be sure to keep it in a sealed container.
Shawna
04/08/2016 at 2:33 amSo i made this last night and it is bitter do u have a suggestion on how to fix it?
Wandercooks
04/08/2016 at 8:01 amHey Shawna, perhaps your cocoa is making it bitter? Try adding extra sugar to make it sweeter or maybe experiment with a drinking chocolate powder – they’re usually less bitter and quite sweet! 🙂
Marisa Franca @ All Our Way
03/05/2016 at 12:51 amDibs on licking the whisk!! Oh! You’ve already washed it? Well, darn it looks so good I wanted to lick it clean. YUM!!The recipe sounds fantastic. This is certainly a must make. Have a great day!!
Wandercooks
03/05/2016 at 10:31 amHey Marisa 😀 not going to lie, that whisk was delicious. Now it’s just an excuse to make it at home so you can have all the chocolate whisk goodness next time!
The Food Hunter
03/05/2016 at 12:48 amI love how easy and delicious this sounds
Patricia @ Grab a Plate
02/05/2016 at 11:37 pmI love/hate that this is so easy to make 😉 Looks amazing and I can only imagine how delicious! I’m sure I’ll have this today!
Wandercooks
03/05/2016 at 1:02 pmSounds good Patricia, any excuse for mousse! 😉 Hope you enjoy!
Sarah @ Champagne Tastes
02/05/2016 at 10:53 amThis looks fantastic, and I love that there’s no raw egg!! And coconut.. Yum!!
Wandercooks
02/05/2016 at 4:08 pmVegetarian friendly and super delish – win win! 😀
Kristy @ Southern In Law
01/05/2016 at 7:52 amUmm so, forget sharing this! I feel like I could eat the whole lot 😛
Yay for simple but oh so delicious recipes!
Wandercooks
02/05/2016 at 9:36 amYep yep yep! We’re all for simply delicious awesomeness. Enjoy 😉
Jolina - The Unlikely Baker
01/05/2016 at 4:10 amI cannot believe how easy this is. It’s an awesome way to spend 5 minutes! And I would most likely eat have this on a Sunday night, I have a serious case of oh-no-Monday-is-almost-here that desperately needs curing!
Wandercooks
02/05/2016 at 9:13 amYep haha, we know that feeling! Hopefully this will help you feel a bit better and ready to face the new week. (With maybe a little left over for a Monday morning pick-me-up 😛 )