What’s not to love about Coconut Ice – a deliciously sweet, milky coconut treat – and we do mean SWEET! This kid-friendly recipe is only 4 ingredients and prepared in 10 minutes. No cook means no risky boiling required like the old fashioned version.
Why We Love This
A super easy coconut ice recipe you can whip up in 10 minutes using easy pantry staples!
Coconut ice keeps amazingly well and is easily batchable. Double or triple the recipe for extra homemade edible gifts or as a make ahead sweet for picnics or parties.
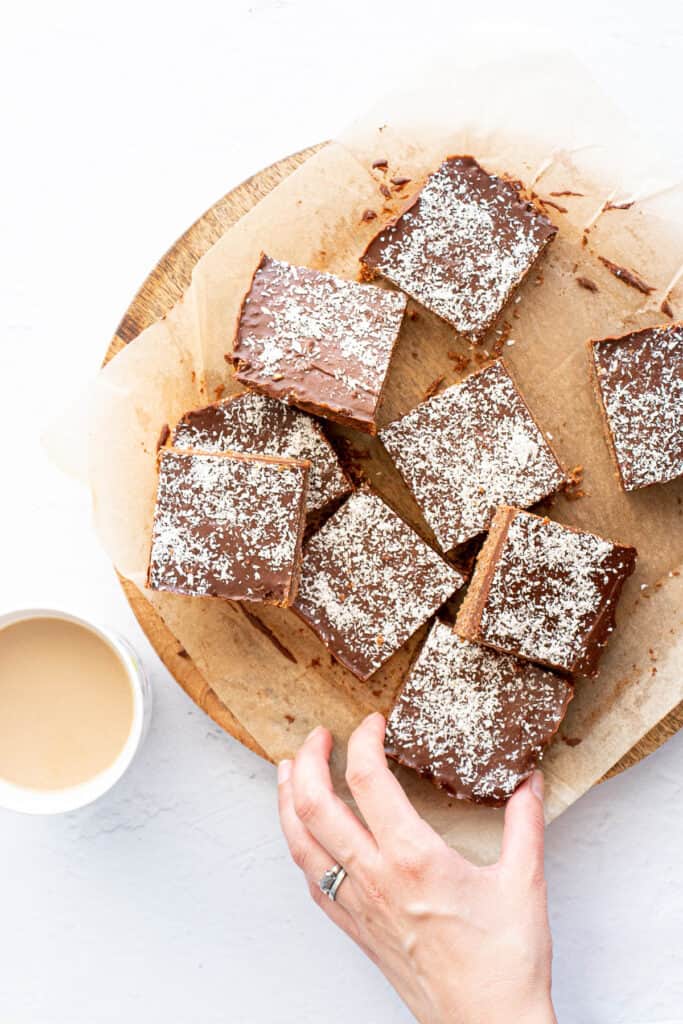
Related: Easy Choc Coconut Balls / Chocolate Concrete
What is Coconut Ice?
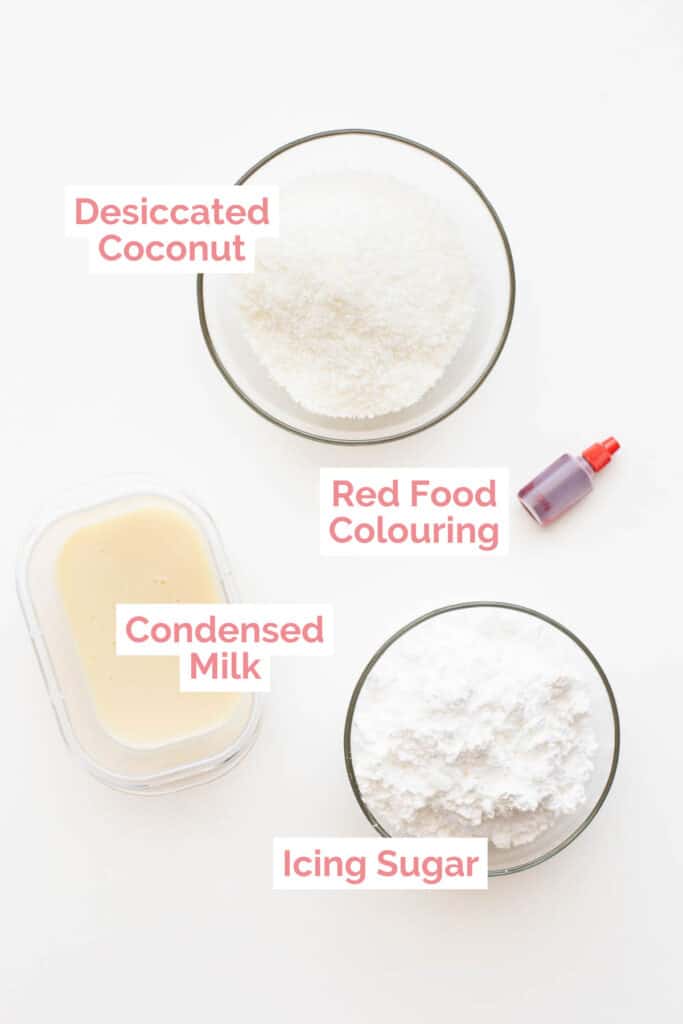
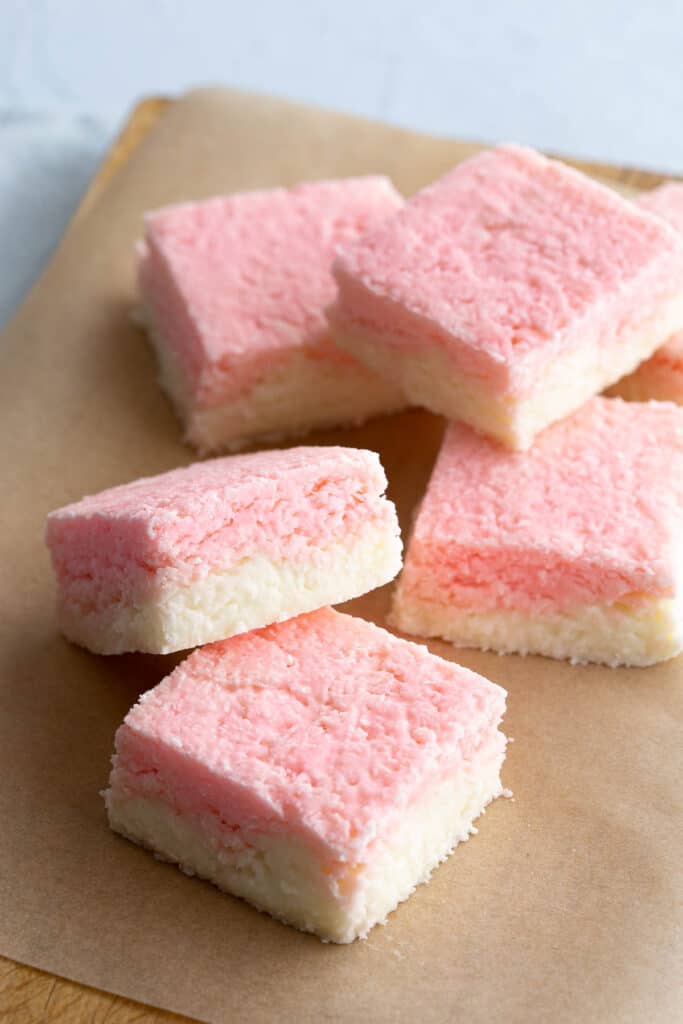
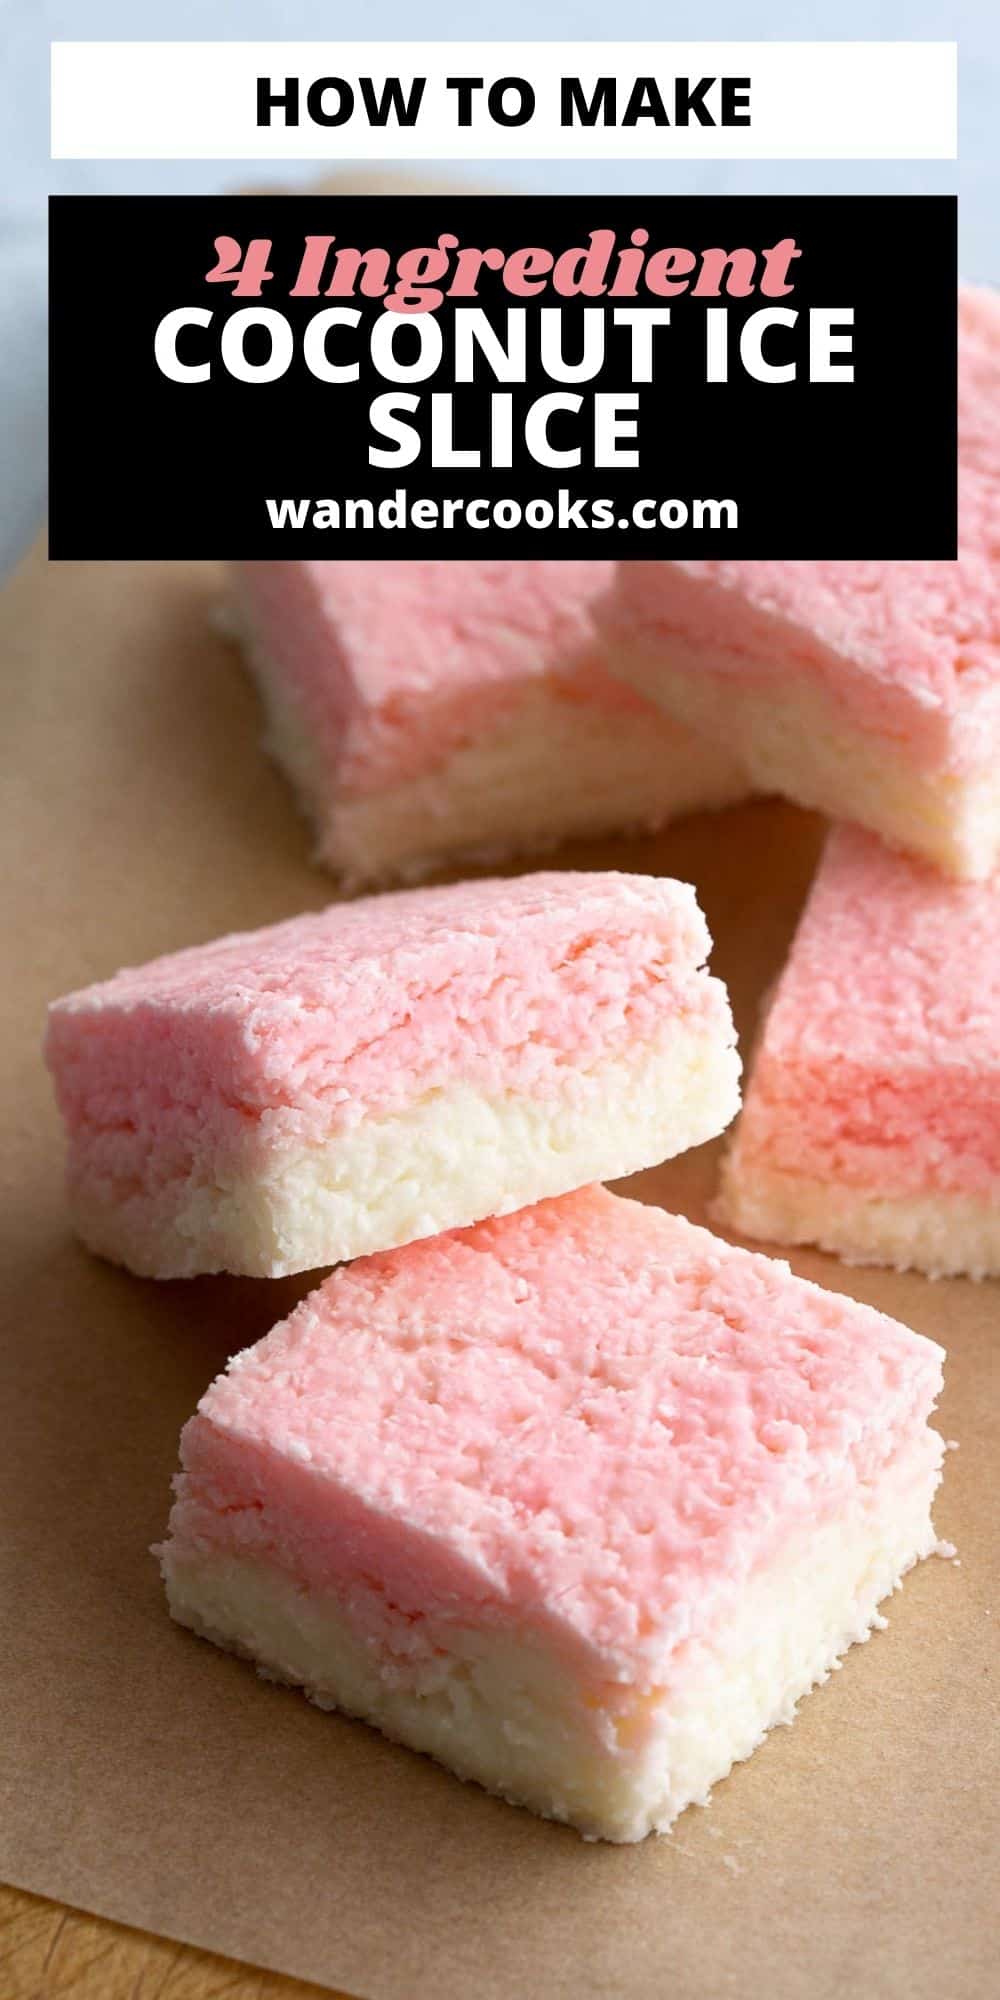
Despite its name, there’s no ice in coconut ice – just icing sugar, condensed milk, desiccated coconut and red food dye. That’s it!
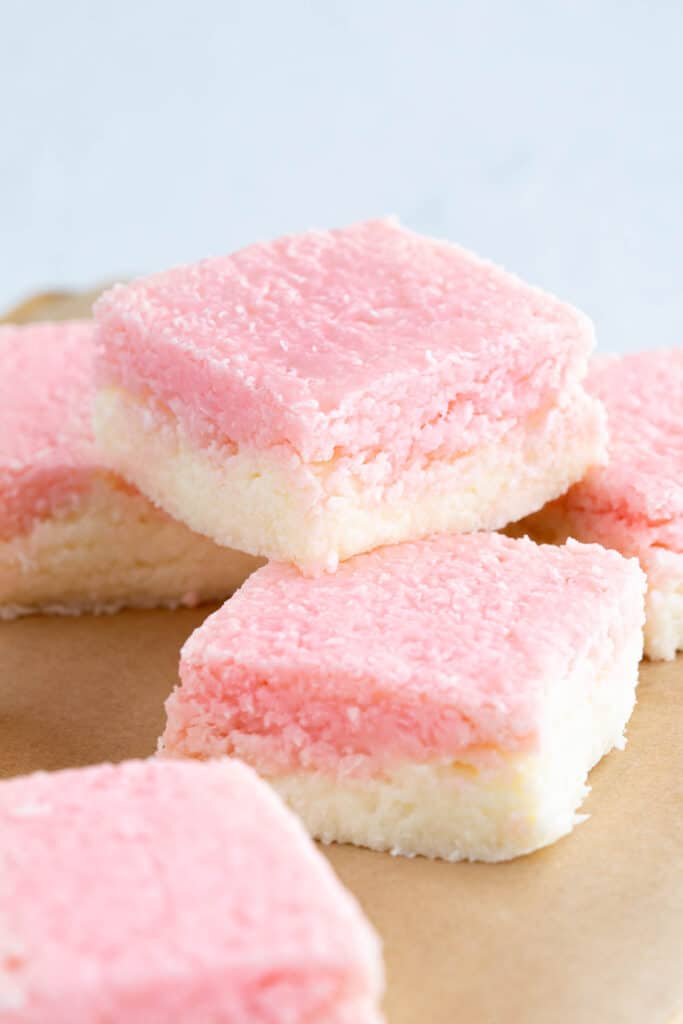
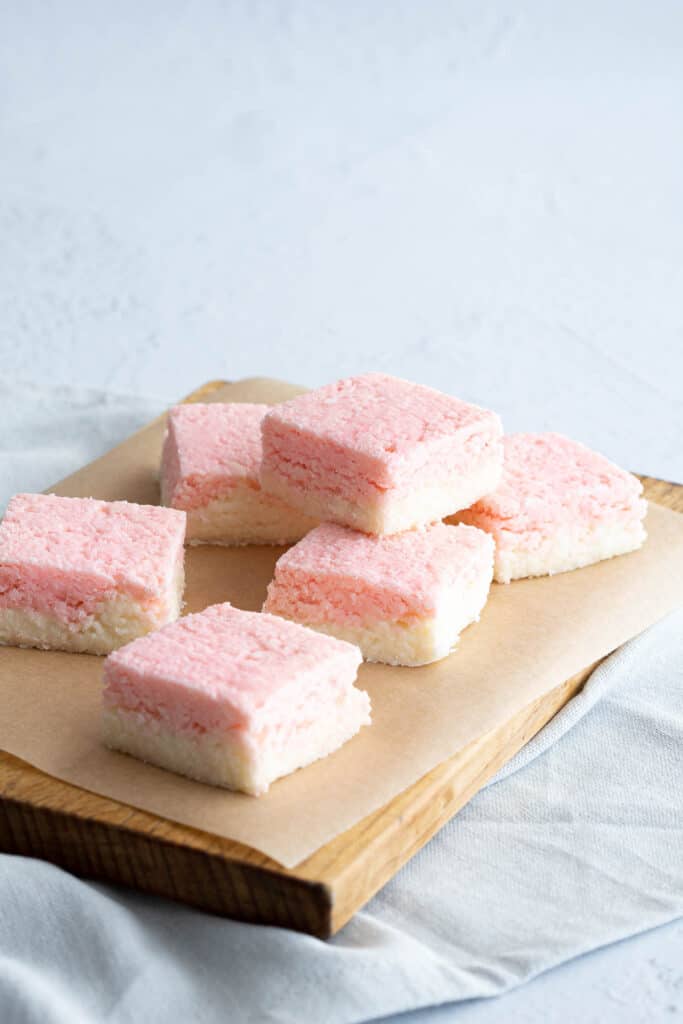
This sweet and colourful fudge is traditionally made in two layers, with a white layer on the bottom and a pale pink layer on top.
Soft, chewy and sweet, this old fashioned confectionery is similar to another classic South Australian treat called candy spuds, with a slightly grainy texture like Scottish tablet.
The original Coconut ice recipe originated in Britain and the method involved boiling sugar and milk to dissolve the sugar and set the slice. From there, early Australian recipes adapted to use copha (vegetable fat shortening), however this version is made with condensed milk to make it an easier no-cook, no-bake treat.
These days you’ll most likely find it popping up on Christmas tables and as a chocolate free Easter treat. Since it lasts for around a month, it’s perfect to make in advance for bake sales or fetes.
What You’ll Need
- Icing Sugar – Also known as powdered sugar or confectioner’s sugar. You can also use icing mixture in this recipe, which has cornstarch added to stop it from going lumpy. Don’t be tempted to use regular grainy sugar as this will make the slice too grainy.
- Desiccated Coconut – We use finely grated desiccated coconut to keep the slice quite smooth and help it to set perfectly. We don’t recommend grated coconut as the pieces can be too large and can cause the slice to crumble.
- Condensed Milk – Also known as sweetened condensed milk. Sub with coconut condensed milk for a vegan friendly version (with even more coconut flavour).
- Red Food Colouring – Just a few drops for the traditional pale pink, or add more for a bolder colour. Sub with any colour you like, or skip this step for a plain white version to make it a 3 ingredient slice.
How to Make Coconut Ice
First, gather your ingredients: See recipe card below for measurements.
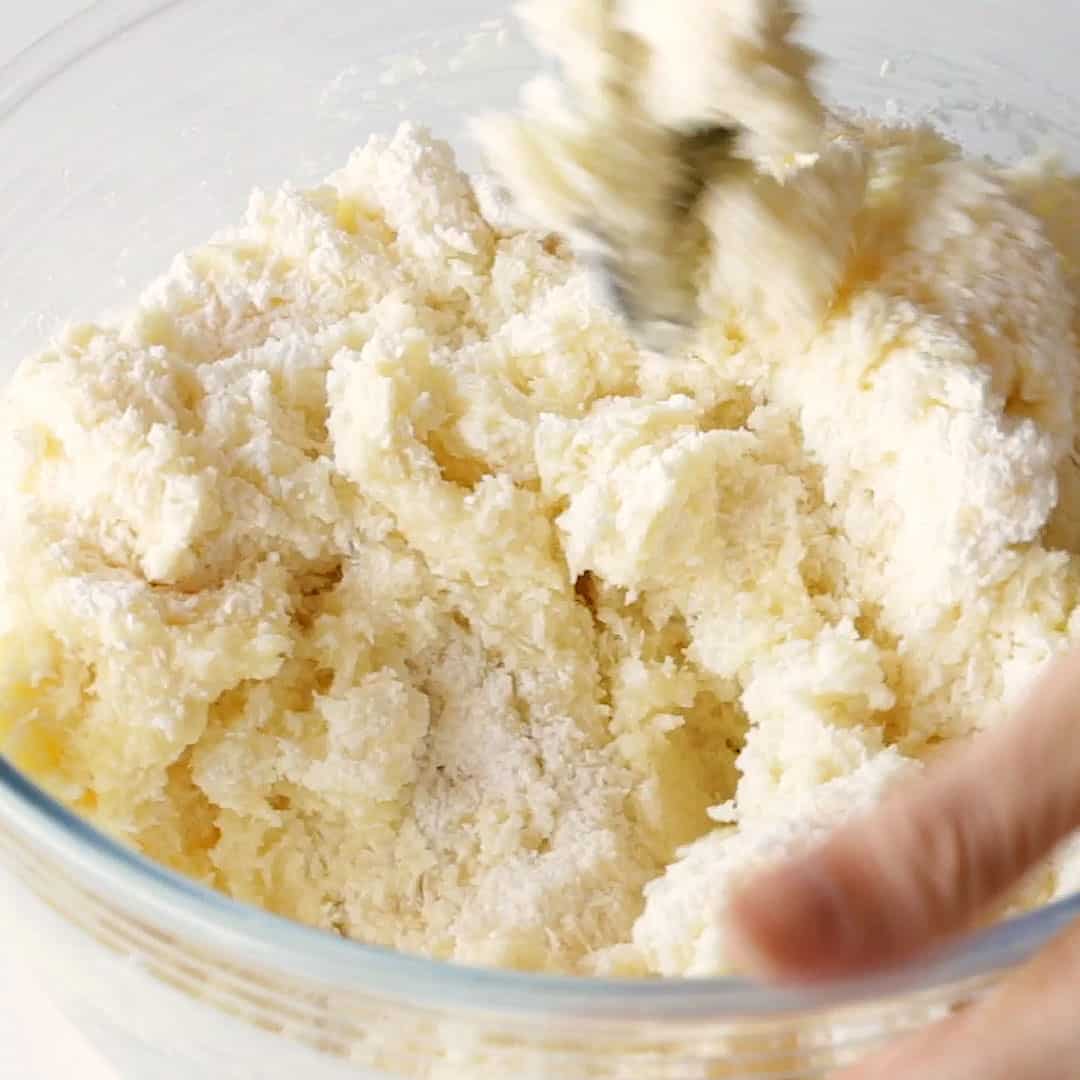
- Pour the icing sugar, desiccated coconut and condensed milk into a large mixing bowl. Mix with a spoon, then with your hands, into a firm dough.
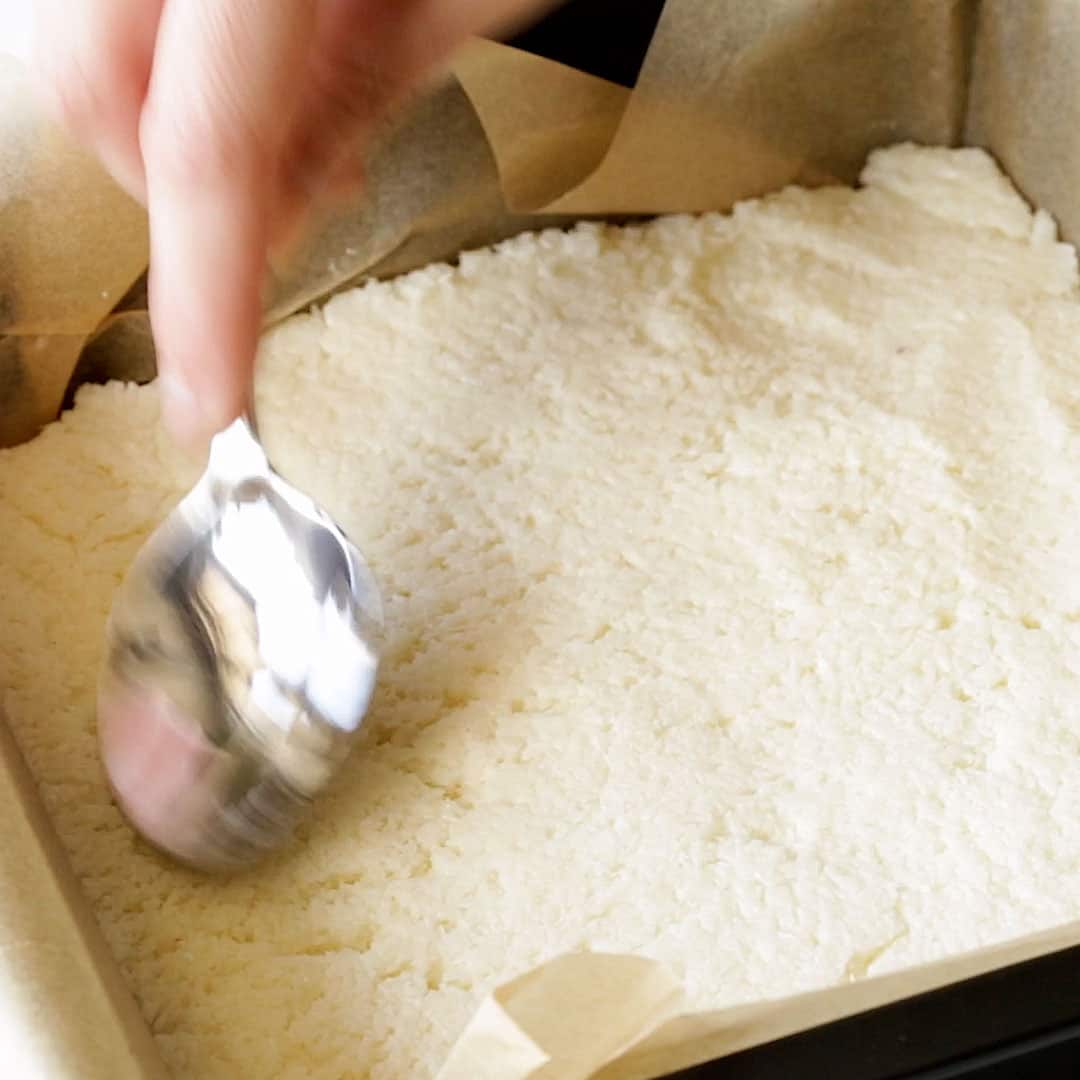
- White Layer: Transfer half the dough into a square tin lined with baking paper and press out with your hands or a spatula until flat and even.
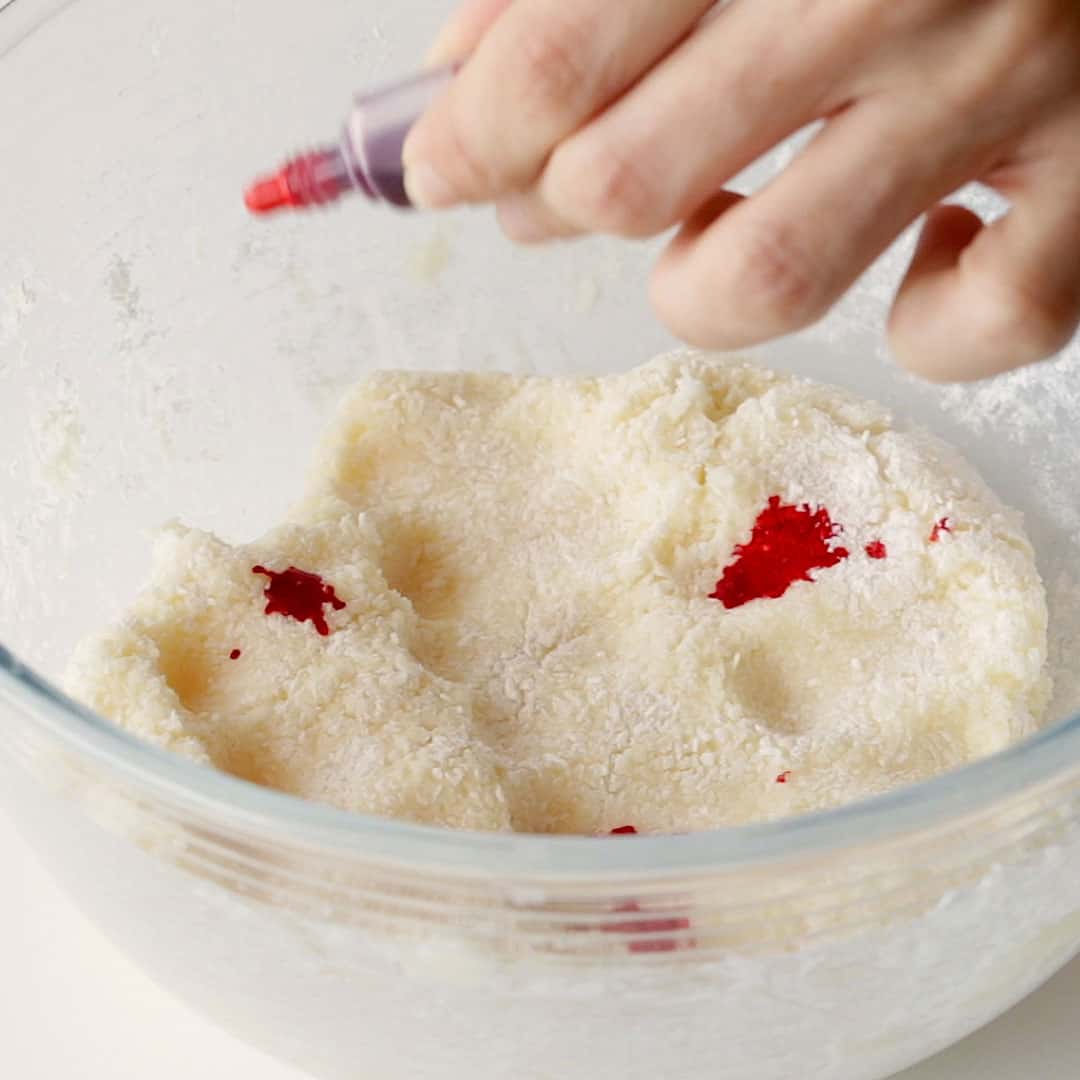
- Pink Layer: Add red food colouring to the remaining dough and use your hands to knead until you achieve an even pink colour.
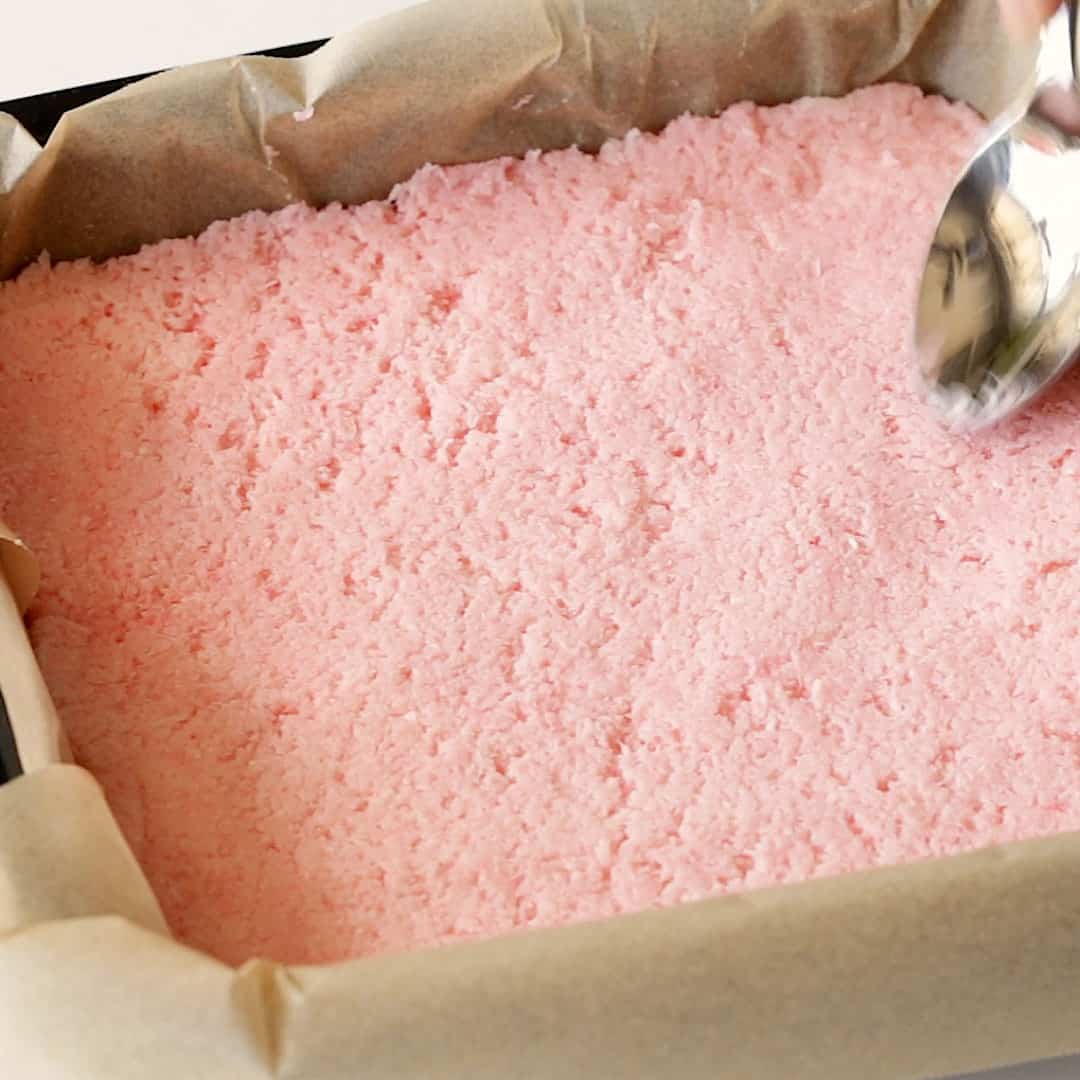
- Spoon out portions of the pink mixture over the white layer, and use a fork to lightly scrape and even out first, THEN use your hands or spatula to press out and flatten. This helps you achieve more even layers.
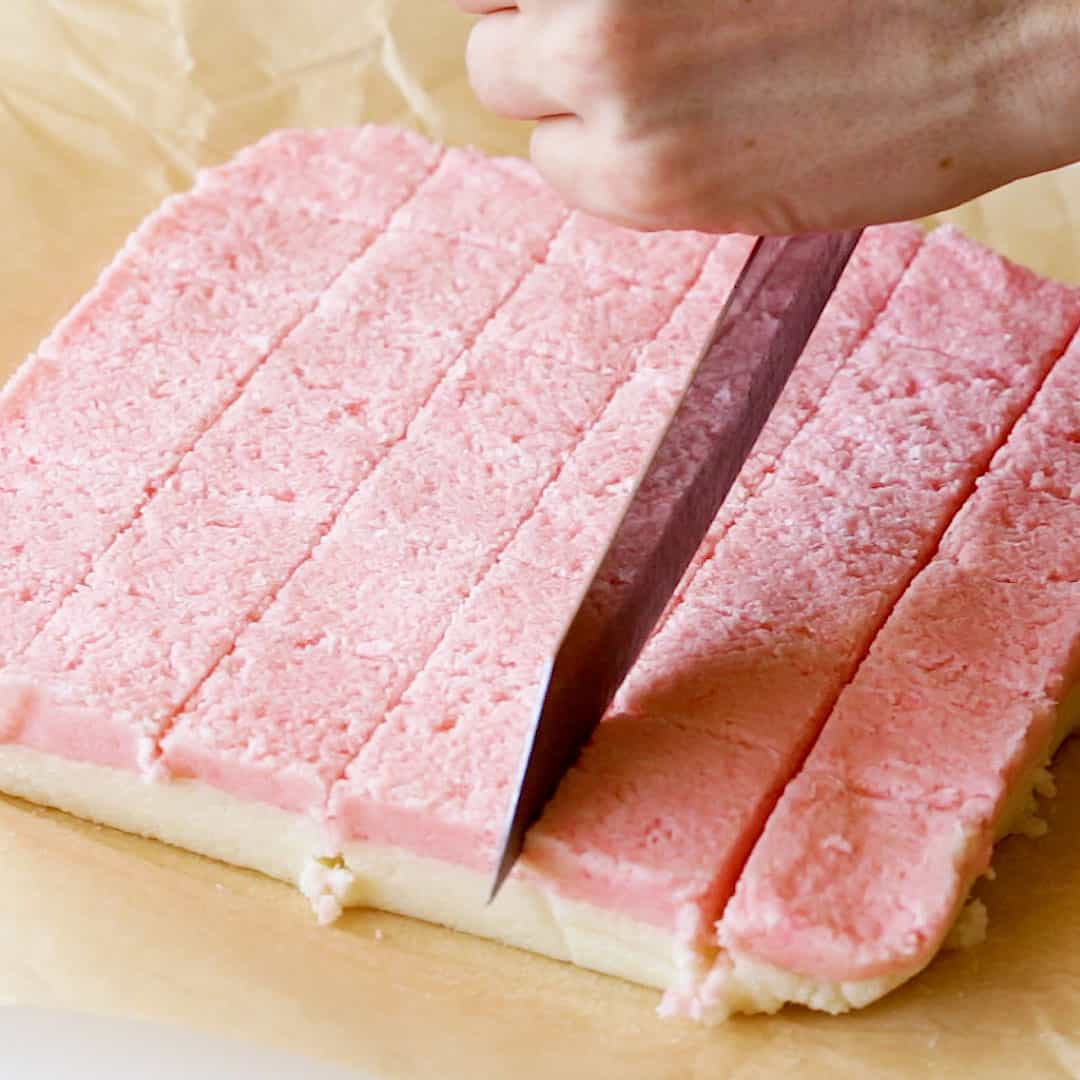
- Chill for 1-2 hours in the fridge until set. Slice into small 2.5 cm / 1 inch squares as they are quite a sweet treat!
Wandercook’s Tips
- Mixing – Wear a kitchen-safe glove if you prefer not to get the mixture on your hands.
- Slicing – Don’t skip the chill time, it’s much easier to slice into neat cubes once the slice has fully set. For best results, use a long sharp knife.
- Size – You can make them as large or small as you like, however we recommend small bite sized pieces so it’s not too much of a sugar hit all at once!
- Storage – For softer slices, pop them in an airtight container and keep them on the counter. For harder slices, keep them in an airtight container in the fridge.
FAQs
The ratio of icing sugar and condensed milk is what helps the slice to set perfectly, so we don’t recommend reducing the sugar.
With the high sugar content in this sweet treat, coconut ice will last for 3-4 weeks in an airtight container.
Yes, you can freeze coconut ice for up to 3 months. Though you can technically freeze it in a whole slab, it’s much easier to store in bite sized pieces for a quick treat. It’s even nice to nibble on while still partially frozen, especially in the summer!
Variations
- Make it Festive – Swap the traditional pink and white layers for green and red instead.
- Add Flavour – Add a few drops of peppermint, almond, cherry or vanilla extract. You can also try it with lemon juice and zest for a citrus version.
- Love Sweet Slices? – Try our festive Caramilk White Christmas slice.
More classic slices and treats to try next:

★ Did you make this recipe? Please leave a comment and a star rating below!

Equipment
- 24cm (9×9 inch) square cake tin
Ingredients
- 200 g icing sugar 2 cups
- 300 g desiccated coconut 3.5 cups
- 400 ml condensed milk one tin
- 3 drops red food colouring
Instructions
- Pour the icing sugar, desiccated coconut and condensed milk into a large mixing bowl. Mix with a spoon, then with your hands, into a firm dough.200 g icing sugar, 300 g desiccated coconut, 400 ml condensed milk
- White Layer: Transfer half the dough into a square tin lined with baking paper and press out with your hands or a spatula until flat and even.
- Pink Layer: Add red food colouring to the remaining dough and use your hands to knead until you achieve an even pink colour.3 drops red food colouring
- Spoon out portions of the pink mixture over the white layer, and use a fork to lightly scrape and even out first, THEN use your hands or spatula to press out and flatten. This helps you achieve more even layers.
- Chill for 1-2 hours in the fridge until set. Slice into small 2.5 cm / 1 inch squares as they are quite a sweet treat!
Video

Recipe Notes
- Mixing – Wear a kitchen-safe glove if you prefer not to get the mixture on your hands.
- Slicing – Don’t skip the chill time, it’s much easier to slice into neat cubes once the slice has fully set. For best results, use a long sharp knife.
- Size – You can make them as large or small as you like, however we recommend small bite sized pieces so it’s not too much of a sugar hit all at once!
- Storage – For softer slices, pop them in an airtight container and keep them on the counter. For harder slices, keep them in an airtight container in the fridge.
- Make it Festive – Swap the traditional pink and white layers for green and red instead.
- Add Flavour – Add a few drops of peppermint, almond, cherry or vanilla extract. You can also try it with lemon juice and zest for a citrus version.
Nutrition


8 Comments
Mercia Potgieter
08/03/2024 at 6:37 amLove it…so easy to make. Thank you❤
Wandercooks
12/03/2024 at 8:25 amYou’re very welcome Mercia, so glad you enjoyed!
Colin Murtha
26/01/2024 at 9:40 pmHow many grams is 400 ml condensed milk?
I looked on google, 517g.
Is that right? Seems an awful lot.
Wandercooks
28/01/2024 at 4:12 pmHey Colin, it’s one regular can of condensed milk, 400g. 🙂 It is quite a sweet recipe!
Stephan
04/10/2023 at 11:33 pmThis mixture was extremely dry, did not even bind. Even after adding another halftin condensed milk it was more pliable, but it set rockhard, really not nice. Double check quatities listed here??
Wandercooks
06/10/2023 at 1:33 pmQuantities are correct Stephan, but it’s always best to go by weight where possible and see if that helps next round? Also, they will harden in the fridge, but let them sit at room temperature to soften before eating for the best results. 🙂
Lea
09/12/2022 at 6:20 amSoft and sweet. My adult kids said it took them back to being kids
Wandercooks
09/12/2022 at 7:07 pmHey Lea, that’s awesome! So glad the “kids” enjoyed it as well hehe. We love a good nostalgic treat. 😁