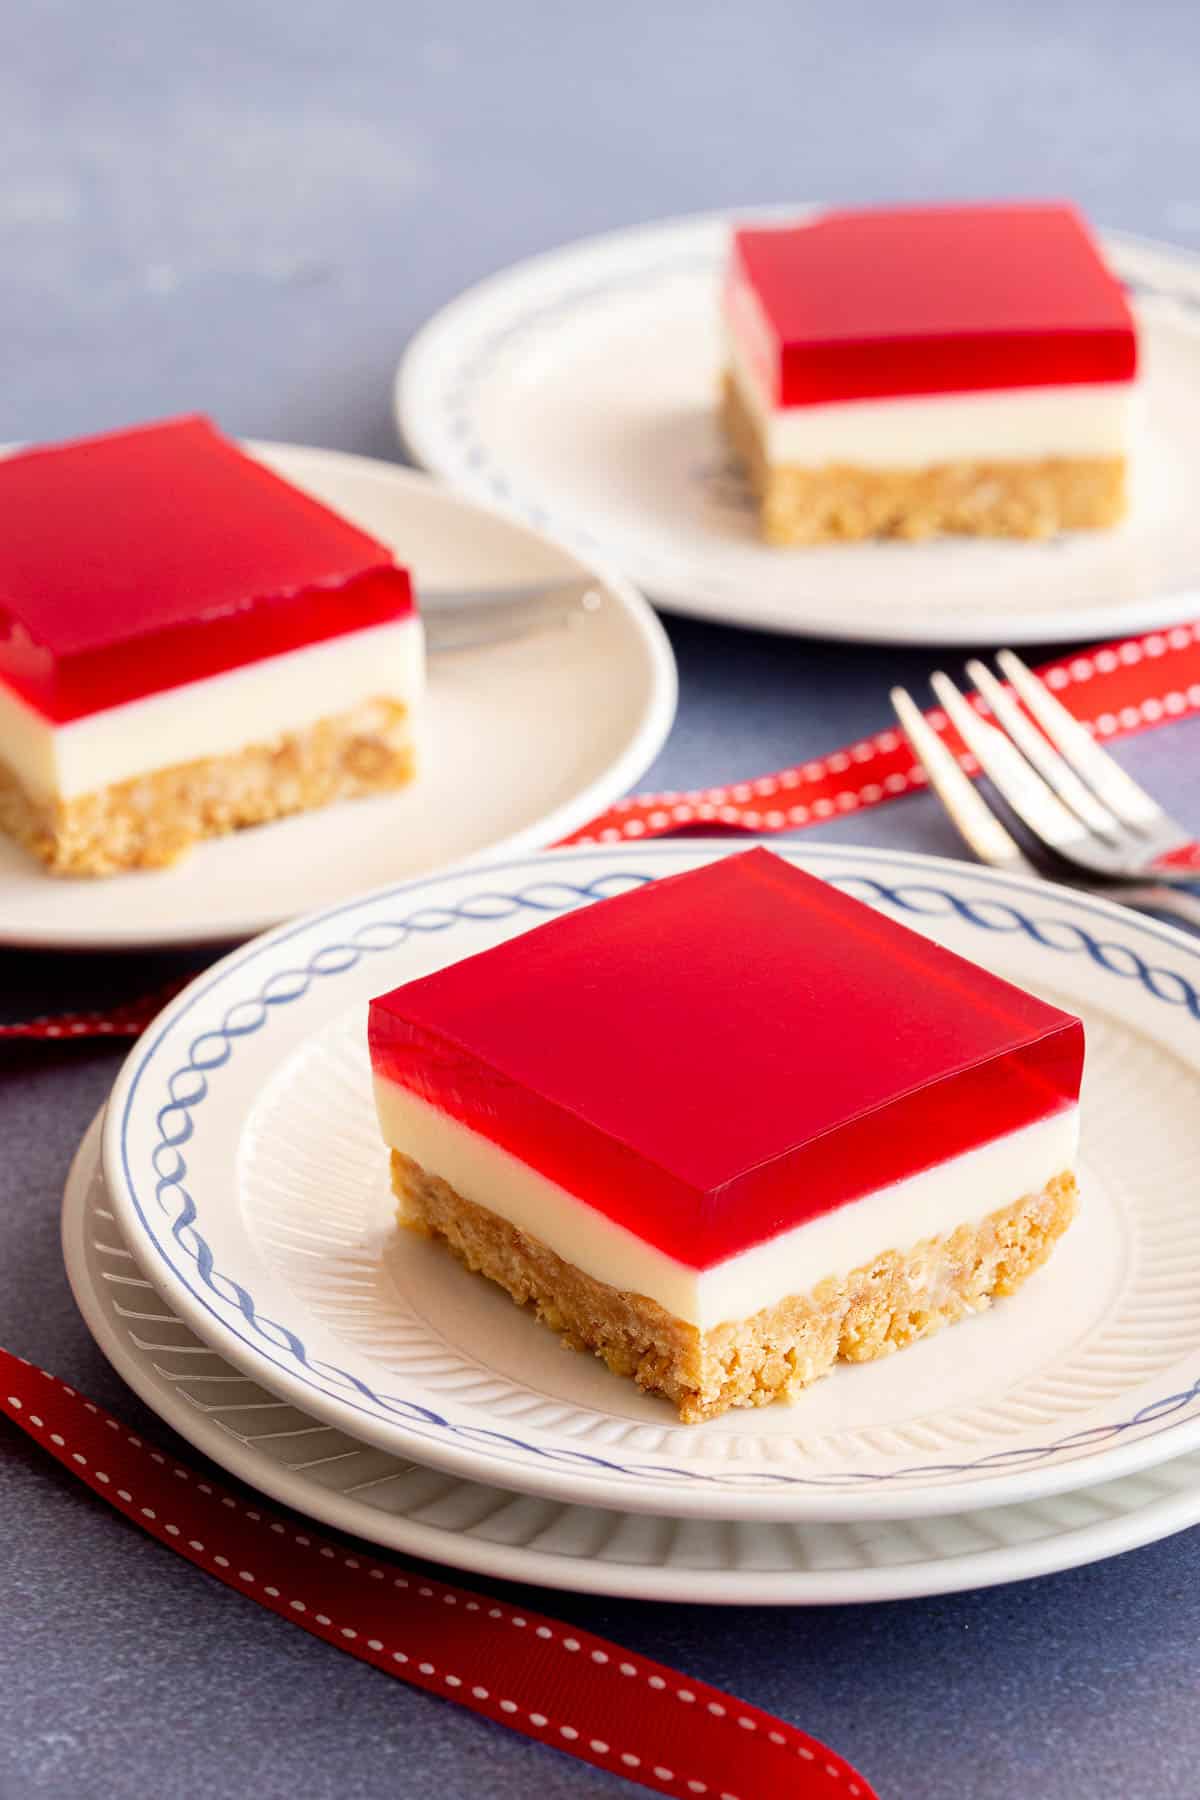
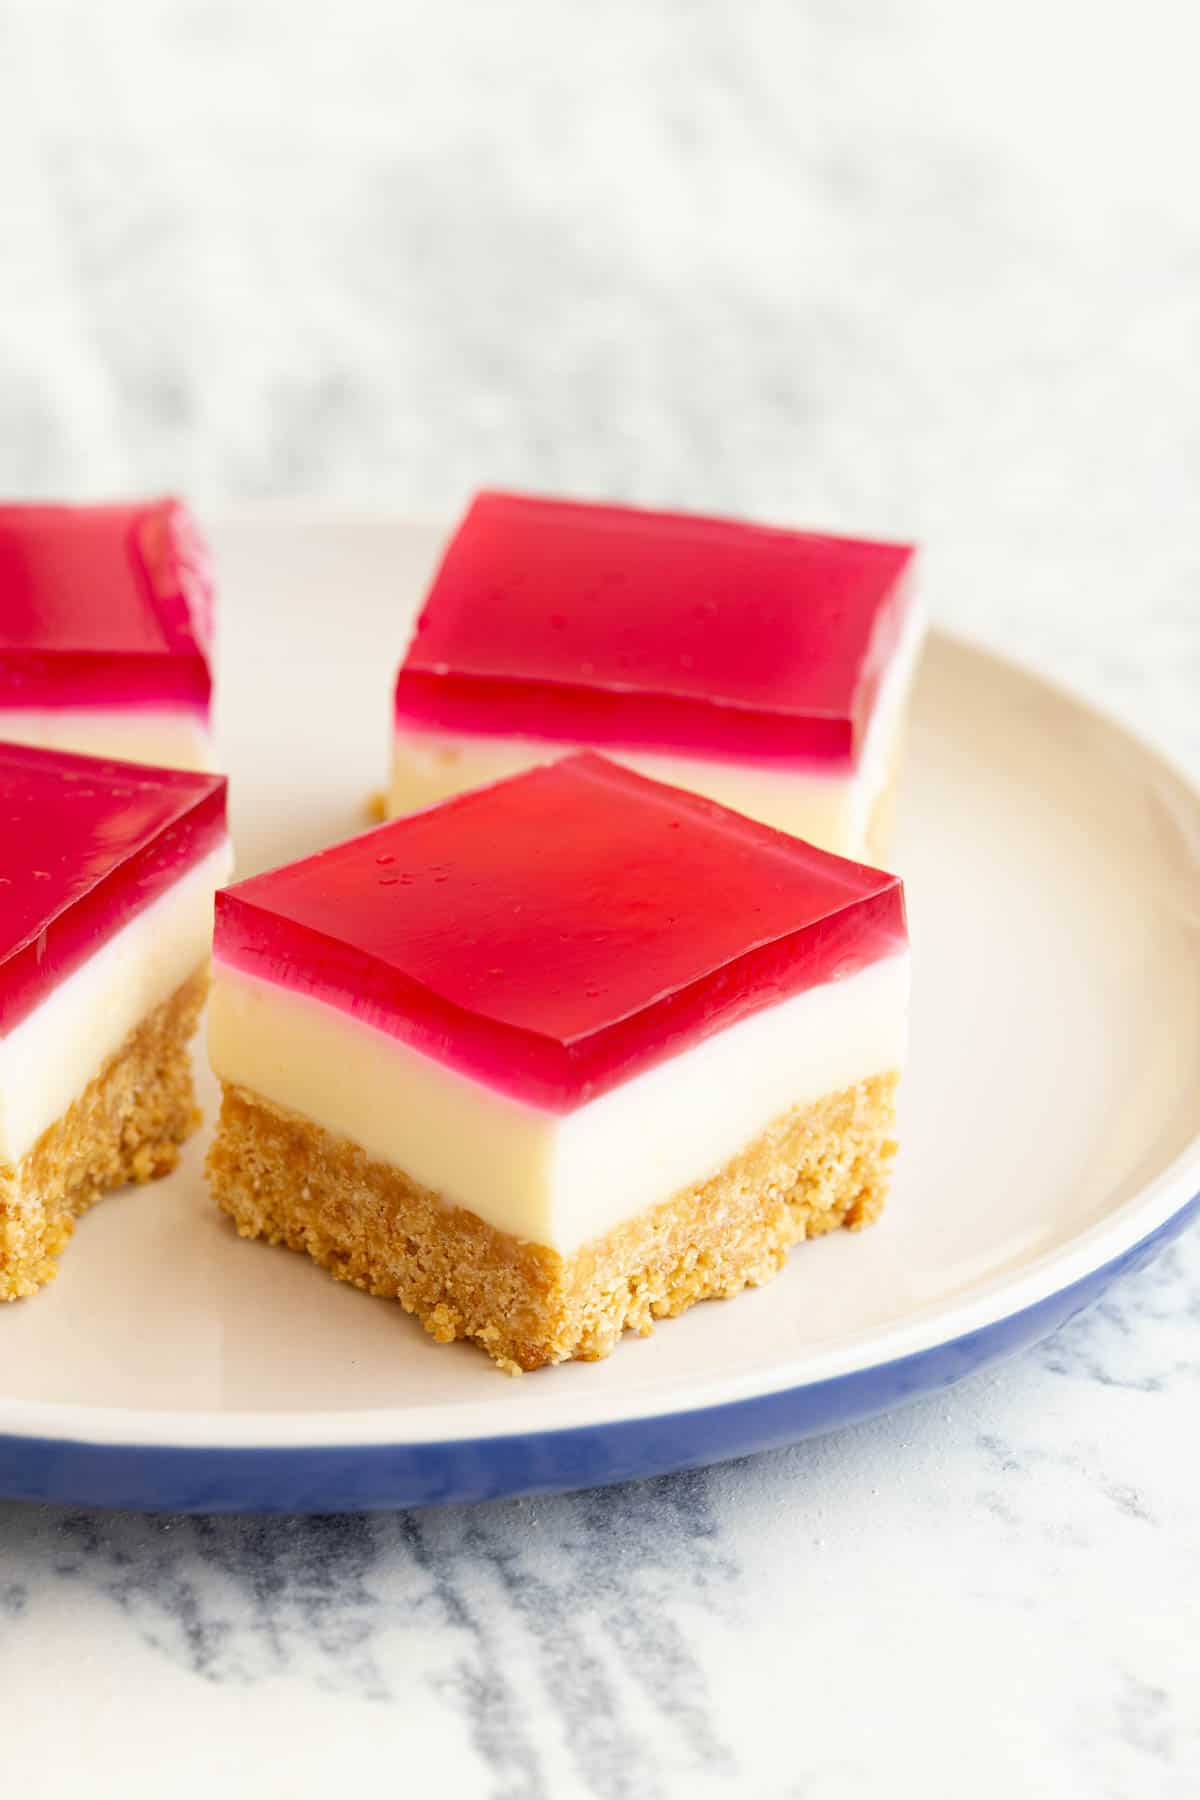
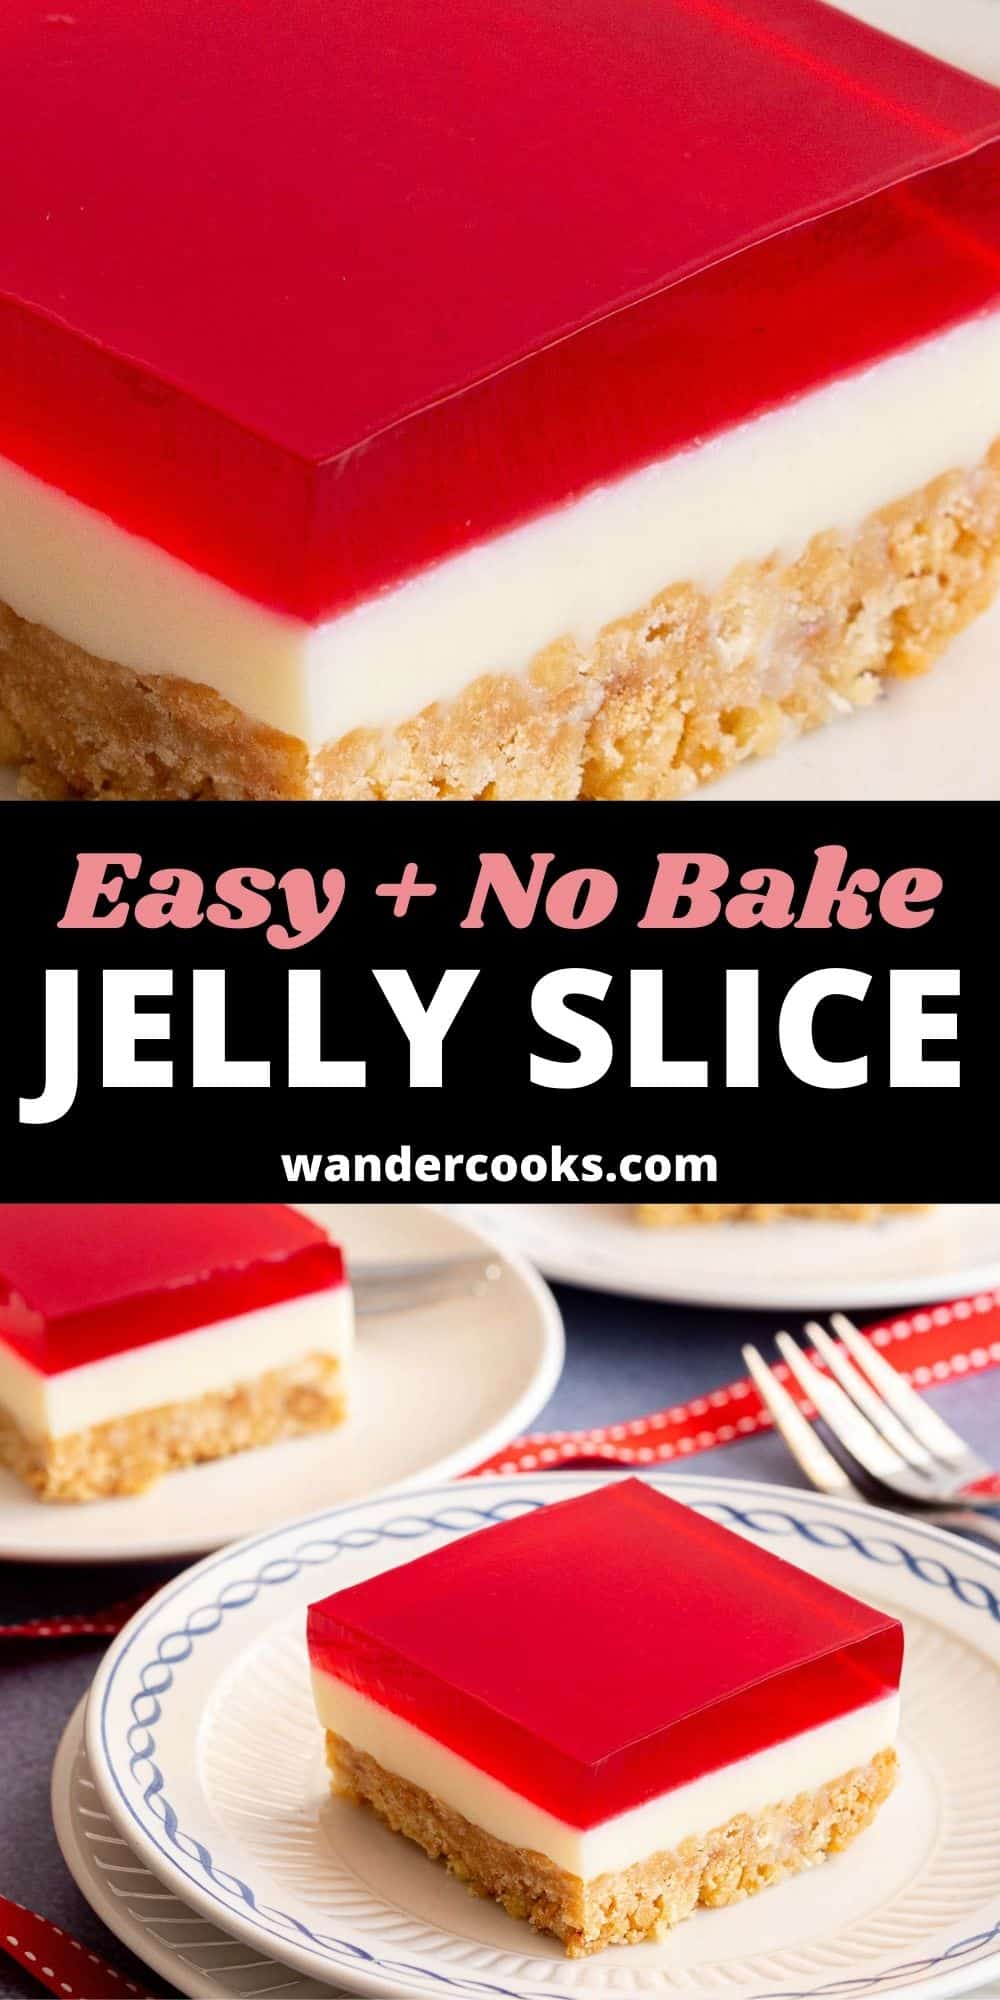
Jelly slice is a sweet and stunning treat for parties and gatherings, guaranteed to disappear the instant it hits the table! This super easy Aussie recipe features the iconic three layers – biscuit base, condensed milk and red jelly – and only 7 ingredients.
“I had these so much as a kid, one of my favourite treats my mum made.”
@Daleymop
In This Post You’ll Learn
Why We Love This
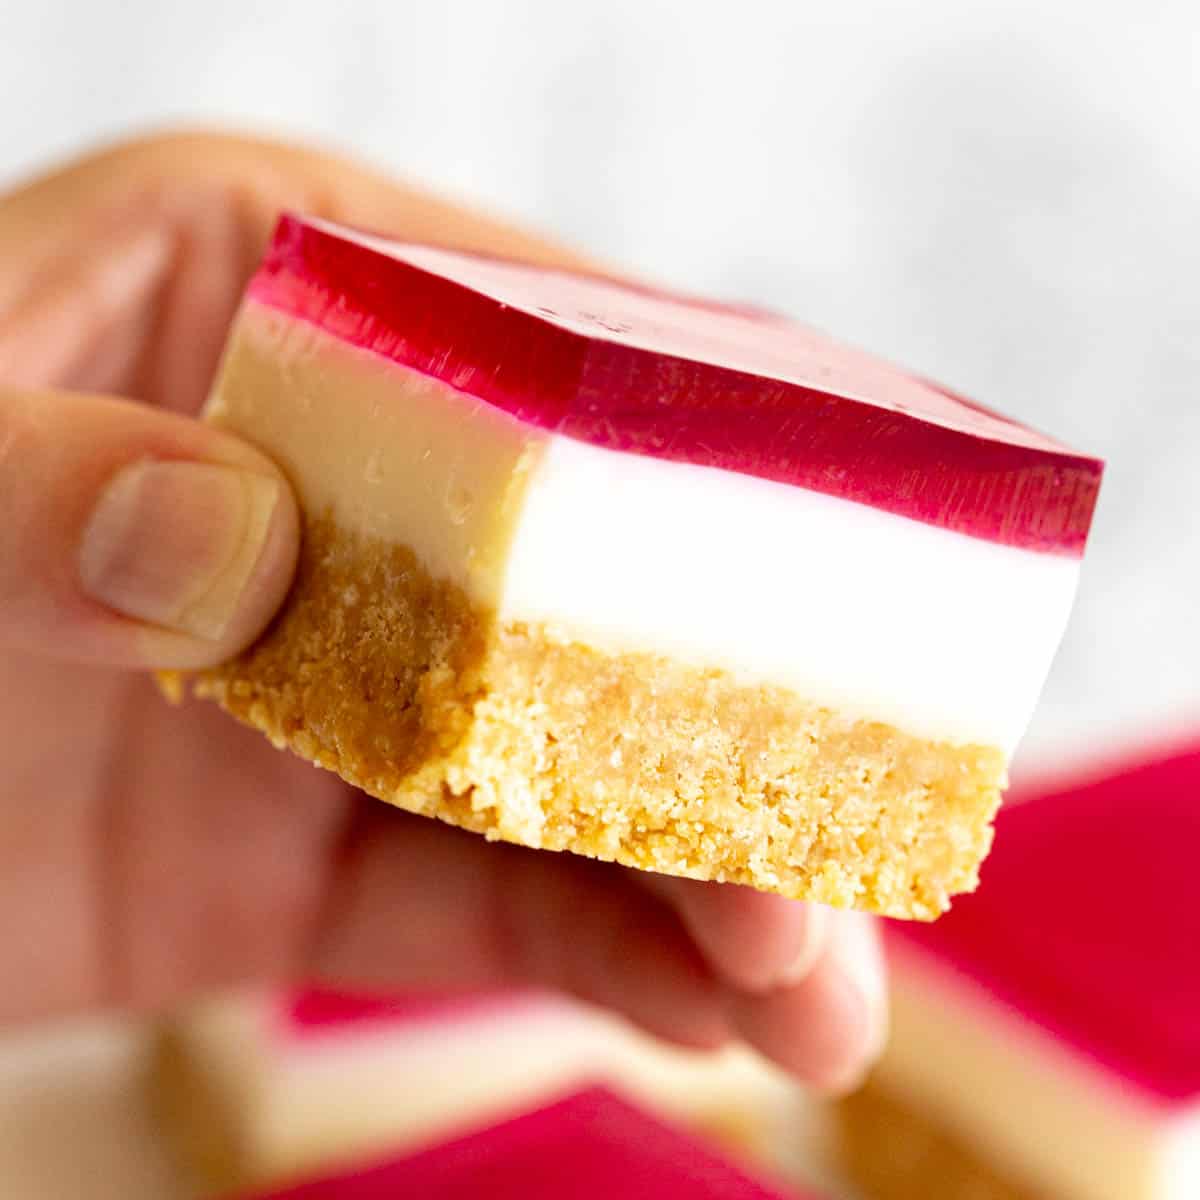
Jelly slice is a classic Australian dessert or sweet treat, especially at Christmas time. The bright red and white jelly layers have that perfect jelly texture set on a crumbly biscuit base.
It looks so impressive, yet is super easy to make. You can also customise your jelly slice recipe with your favourite flavours or colours to suit your celebration.
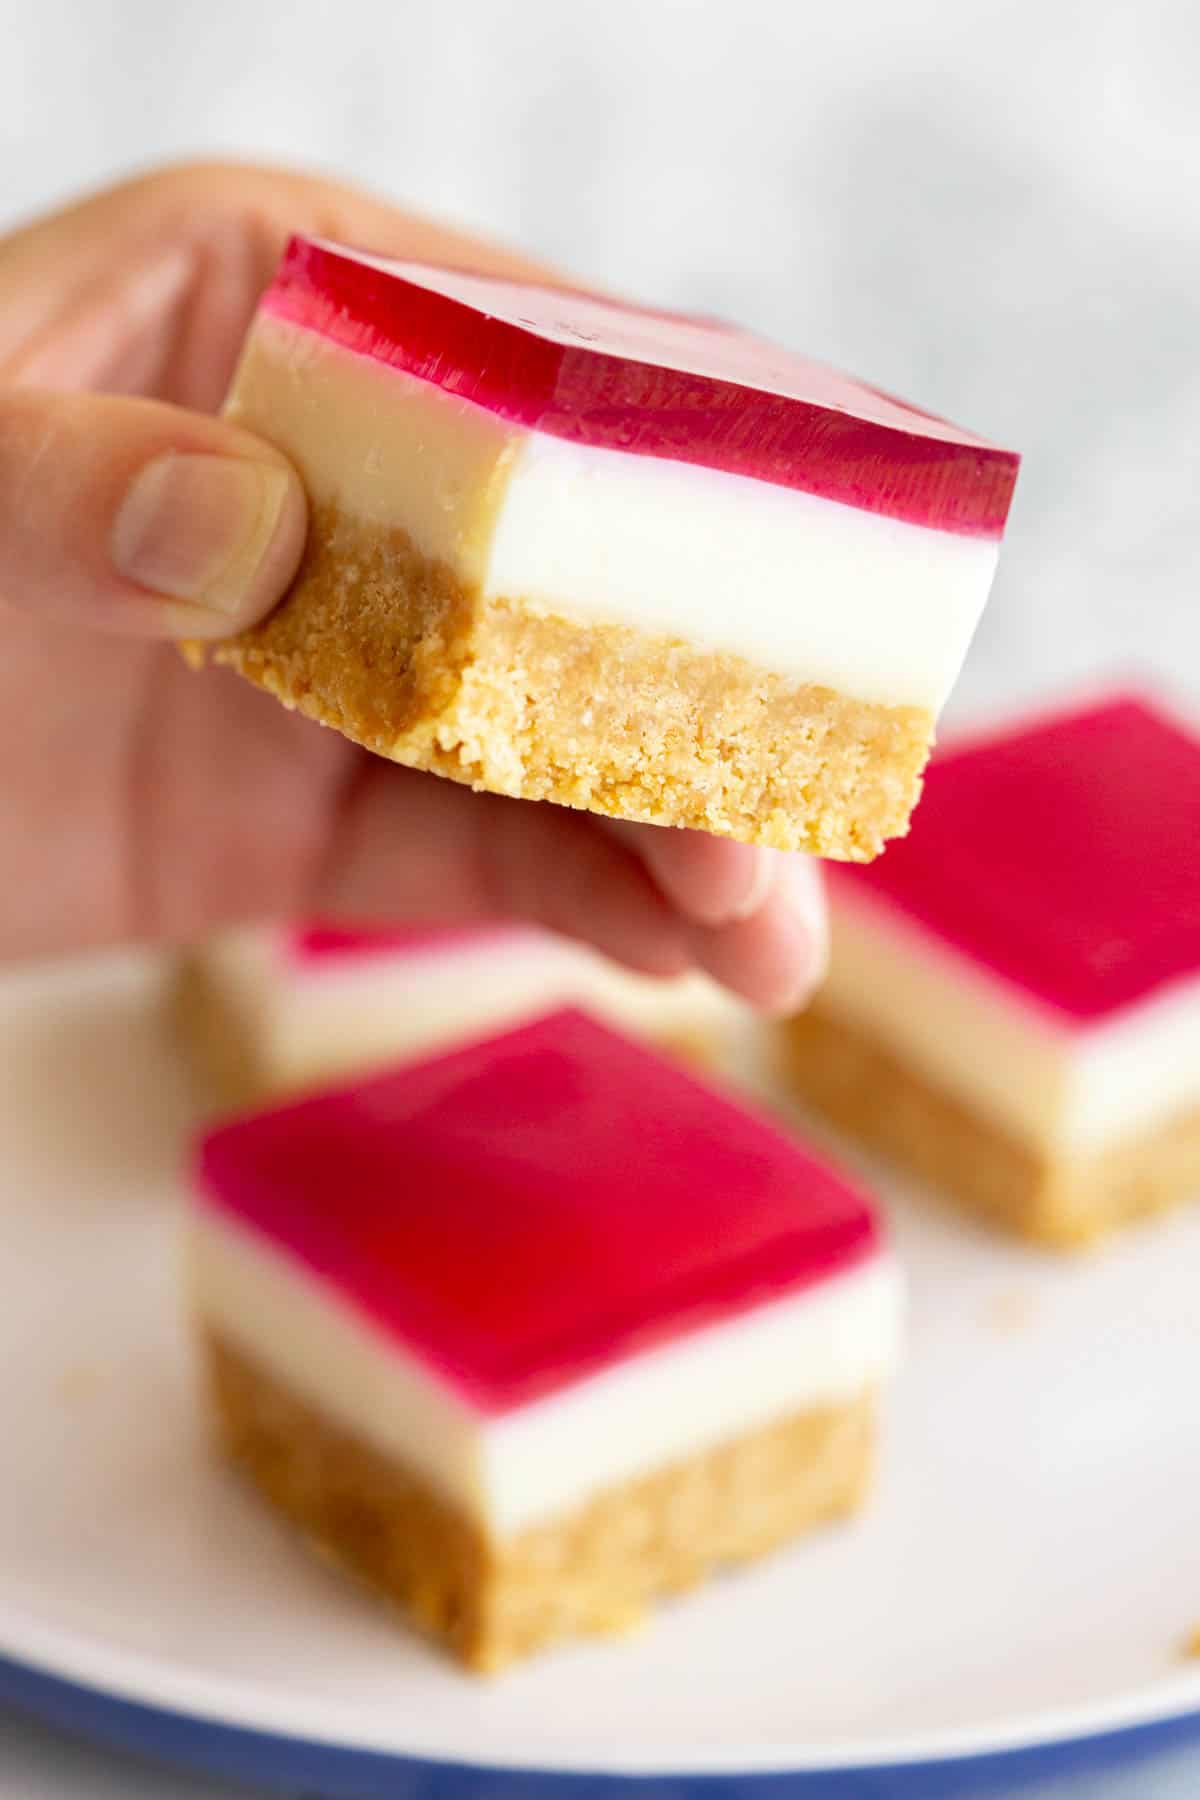
Each layer is set to perfection for easy slicing into perfect bite size pieces ready for sharing.
Related: Coconut Ice / Lemon Weetbix Slice
Healthy Swap – Yoghurt Vs Condensed Milk!
Today’s tip is from reader, Marija – “Yummy and very interesting 😁 made it with yogurt instead of condensed milk, works perfectly and has less calories!”
What is Jelly Slice?
Jelly slice is a traditional Australian no bake dessert usually consisting of three layers:
- 1st Layer: Crushed biscuits blended with butter.
- 2nd Layer: Milk jelly made with sweetened condensed milk and gelatine.
- 3rd Layer: Regular jelly – usually bright red raspberry or green lime jelly.
Red or green jelly slice is most popular at Christmas and Easter celebrations, alongside recipes like pavlova roll, choc ripple log and trifle.
That said, it really can be served for any celebration or get-together. It’s the old school recipe our mums and grandmas used to make (in Laura’s family, her Aunty Glenda is the jelly slice queen!)
While the traditional dessert is made with gelatin, you can make a vegetarian friendly version by using clear agar agar powder for the middle layer, and a coloured agar agar jelly for the top layer.
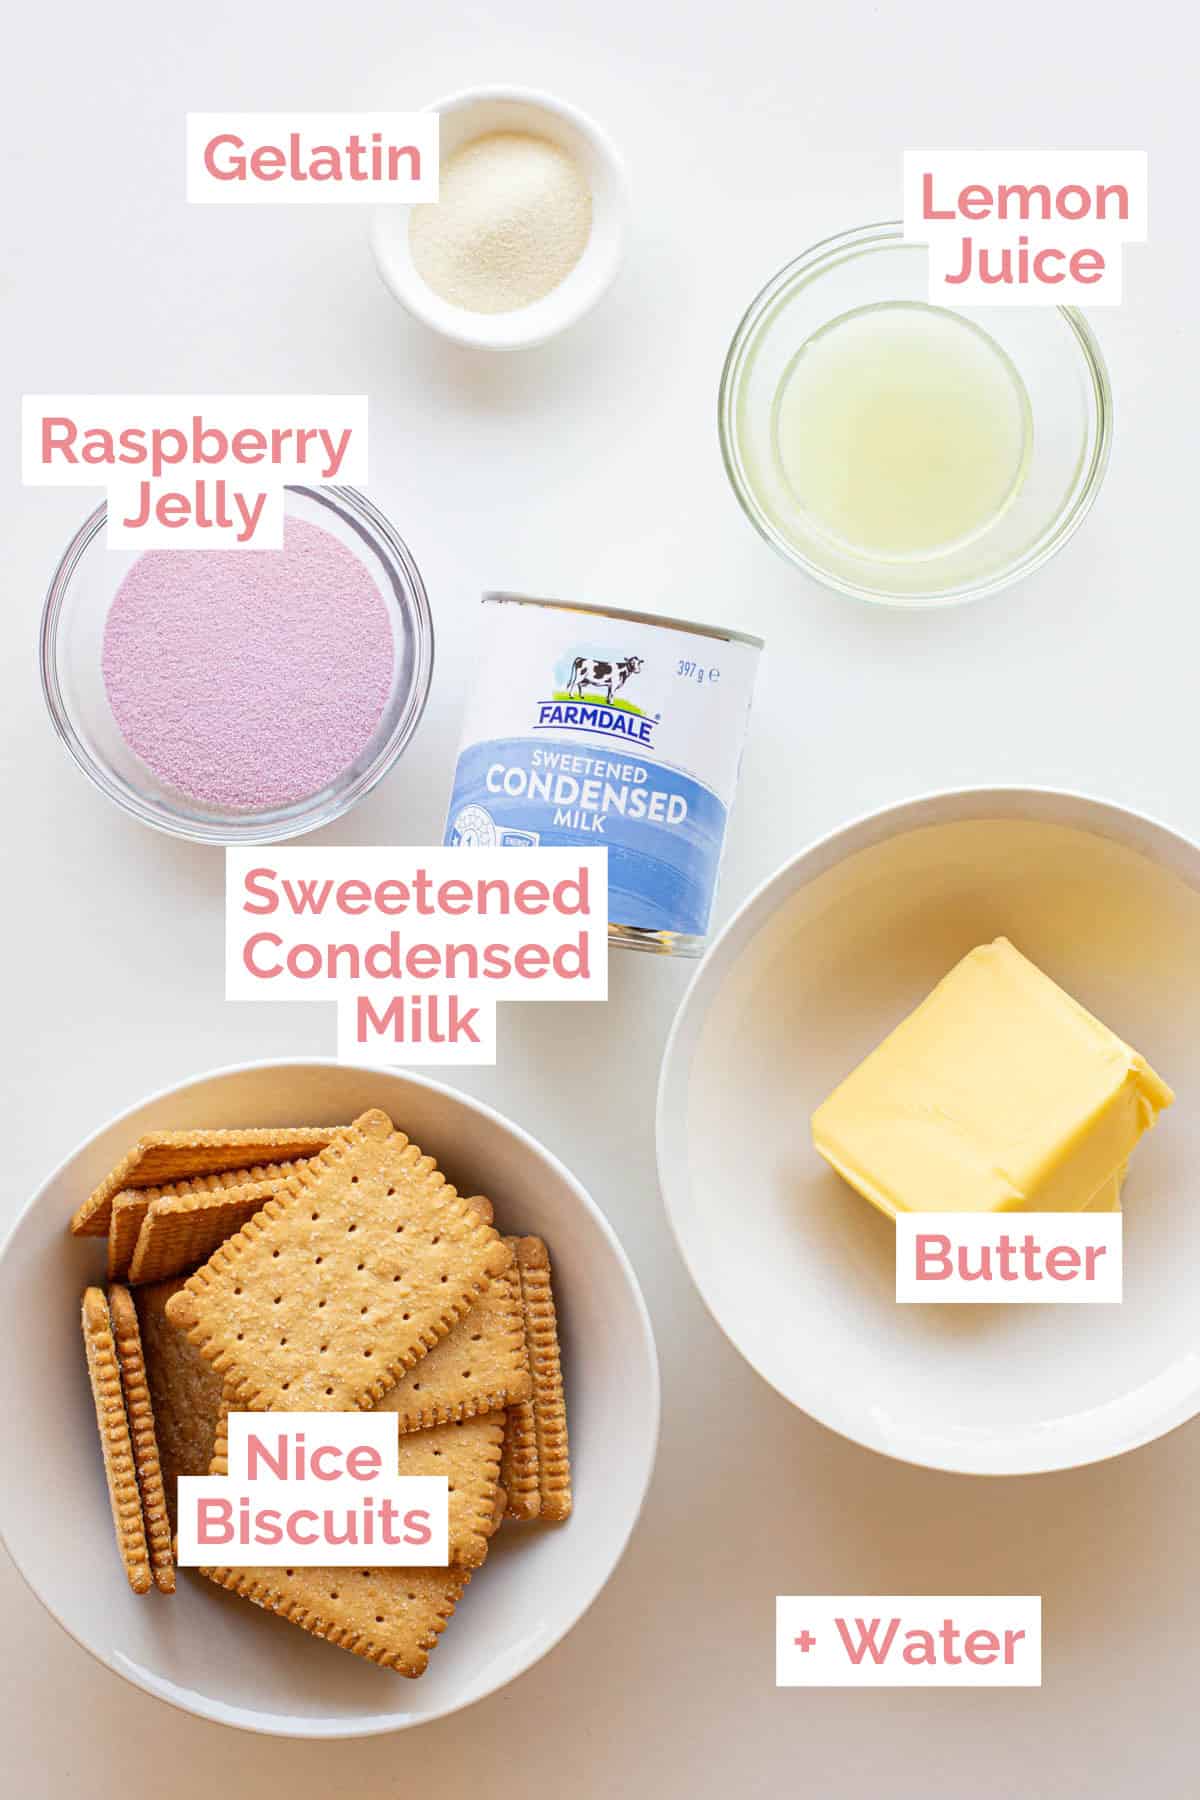
What You’ll Need
- Jelly Crystals – For the traditional bright red colour, use raspberry or strawberry jelly crystals. Other popular flavours are port wine, grape or lime. Sub with your favourite colour or flavour to make it your own.
- Sweetened Condensed Milk – Sub with light condensed milk for a less sweet slice or plant based alternative such as condensed coconut milk to make it vegan (alongside agar agar). You can also use yoghurt for the healthier option.
- Gelatine Powder / Gelatin – For a vegetarian version, sub with agar agar powder.
- Lemon Juice – Either fresh or reconstituted lemon juice will be fine. You can also use lime juice in a pinch.
- Biscuits – We use Arnott’s ‘Nice’ biscuits, but you can sub with arrowroot biscuits for less sweetness. This recipe also works well with Marie biscuits, scotch finger biscuits, digestives or butternut snap cookies. Crush them with a rolling pin, mortar and pestle or use a food processor for even less effort!
- Butter – Both salted or unsalted work well – we often use salted butter for a little extra zing.
How to Make Jelly Slice

First, gather your ingredients: See recipe card below for measurements.
For the first layer:
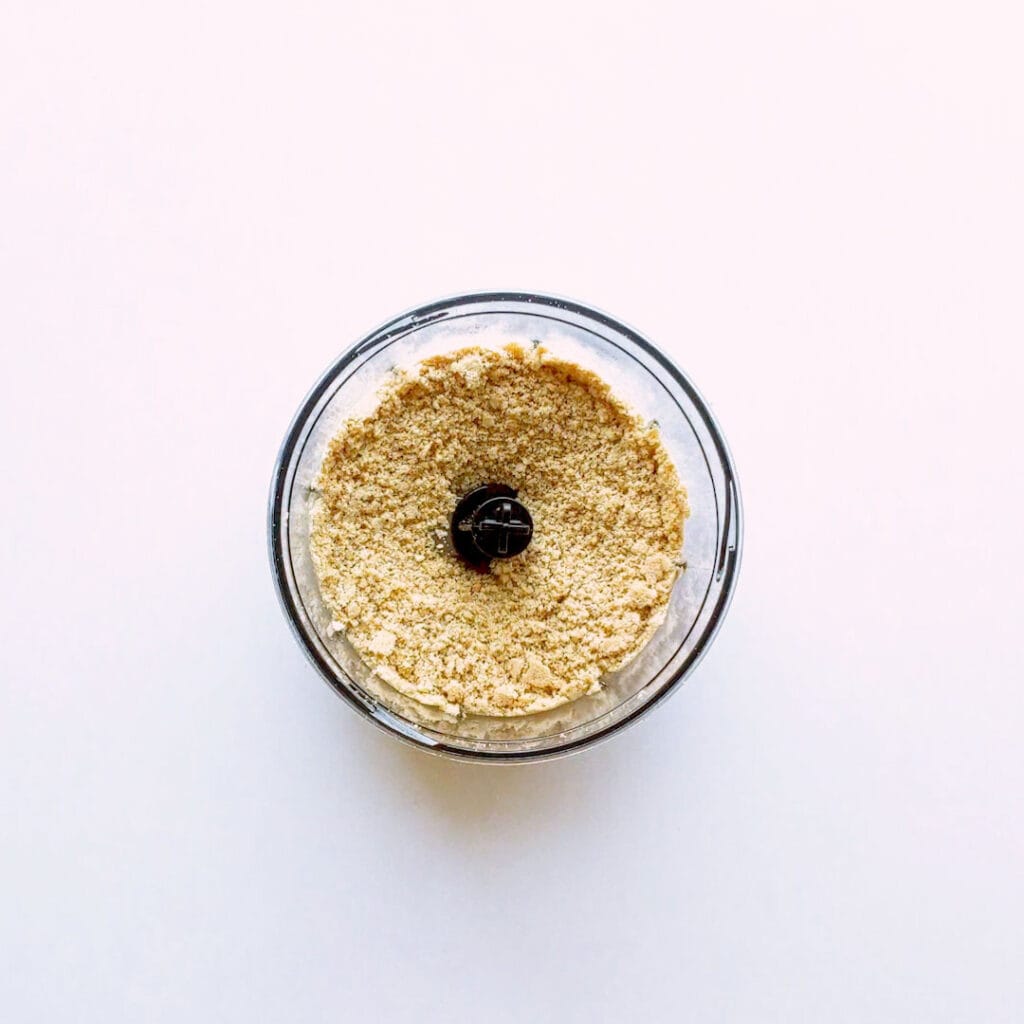
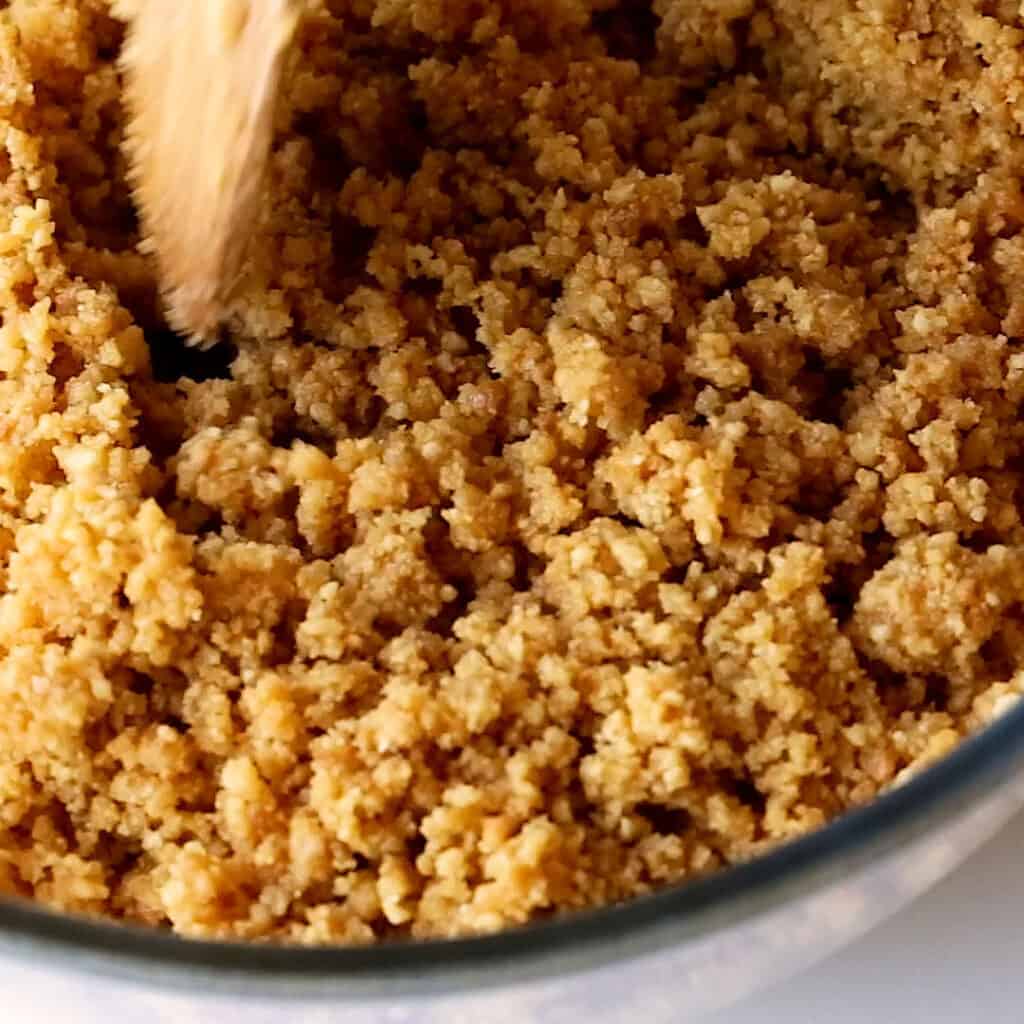
- Crush the nice biscuits using a food processor, mortar and pestle or even a potato masher in a mixing bowl. Transfer to a medium bowl.
- Melt the butter in 30 second bursts in the microwave until melted (around 1½ minutes). Pour the melted butter over the crushed biscuits and stir until combined.
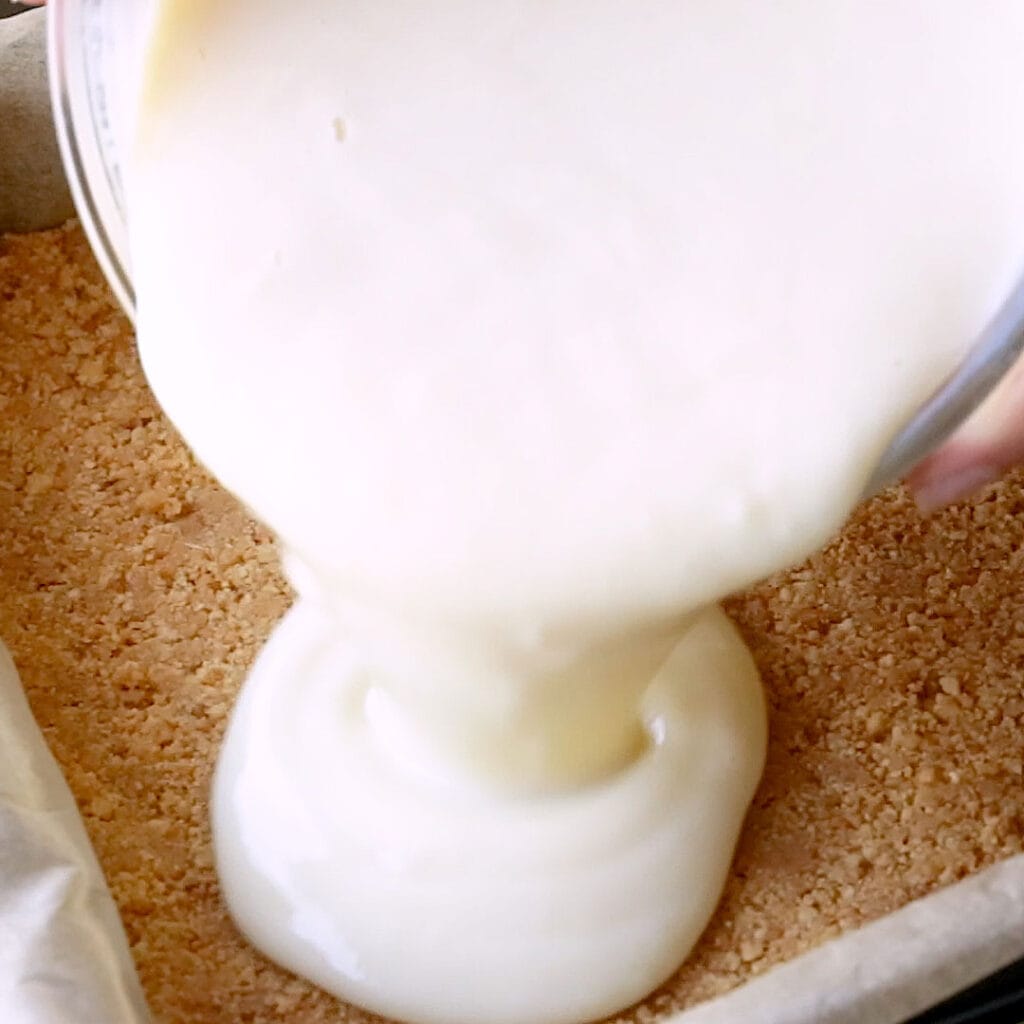
- Line a square tin (9 inch / 24cm) with baking paper or cling wrap. Pour in the crushed biscuit base and press into a flat layer using the back of a spoon.
- Refrigerate for at least 1 hour.
For the second layer:
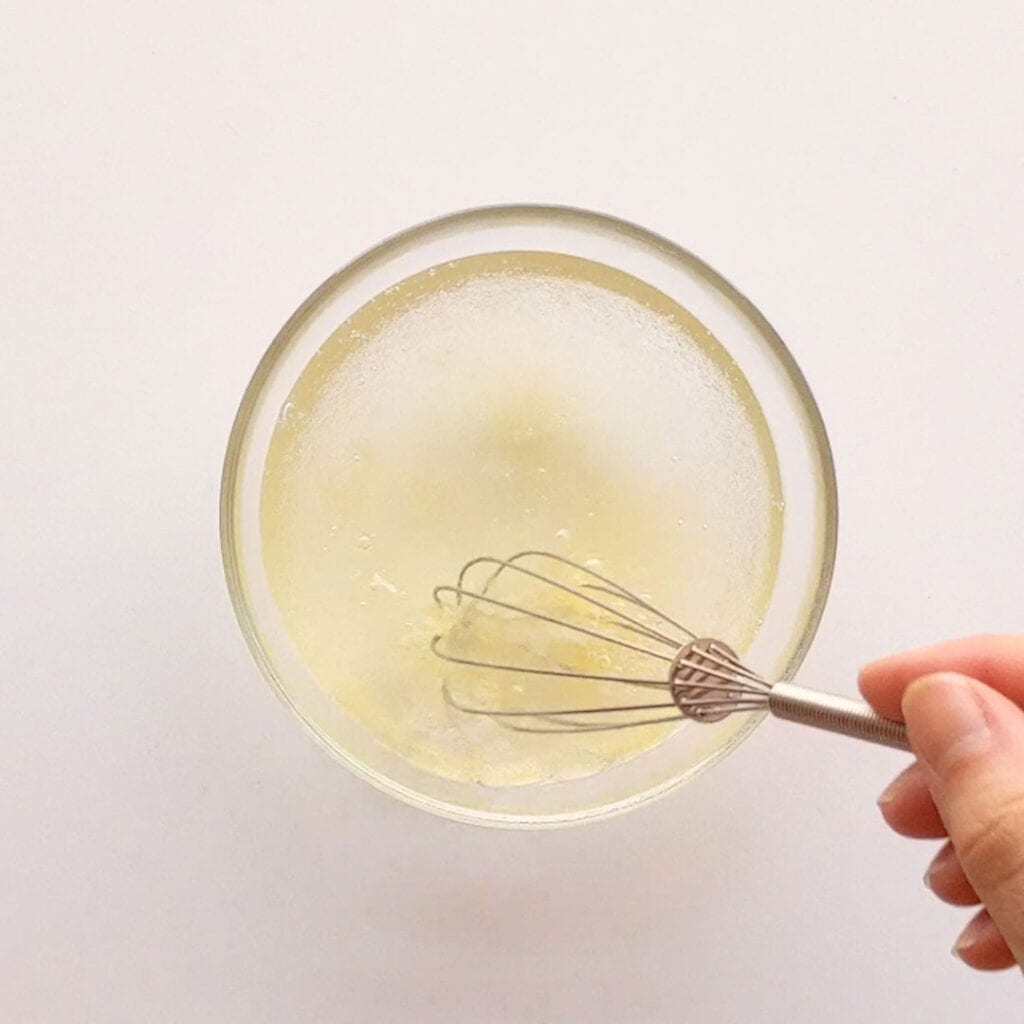
- Dissolve the gelatin powder in the boiling water, stirring until there’s no lumps.
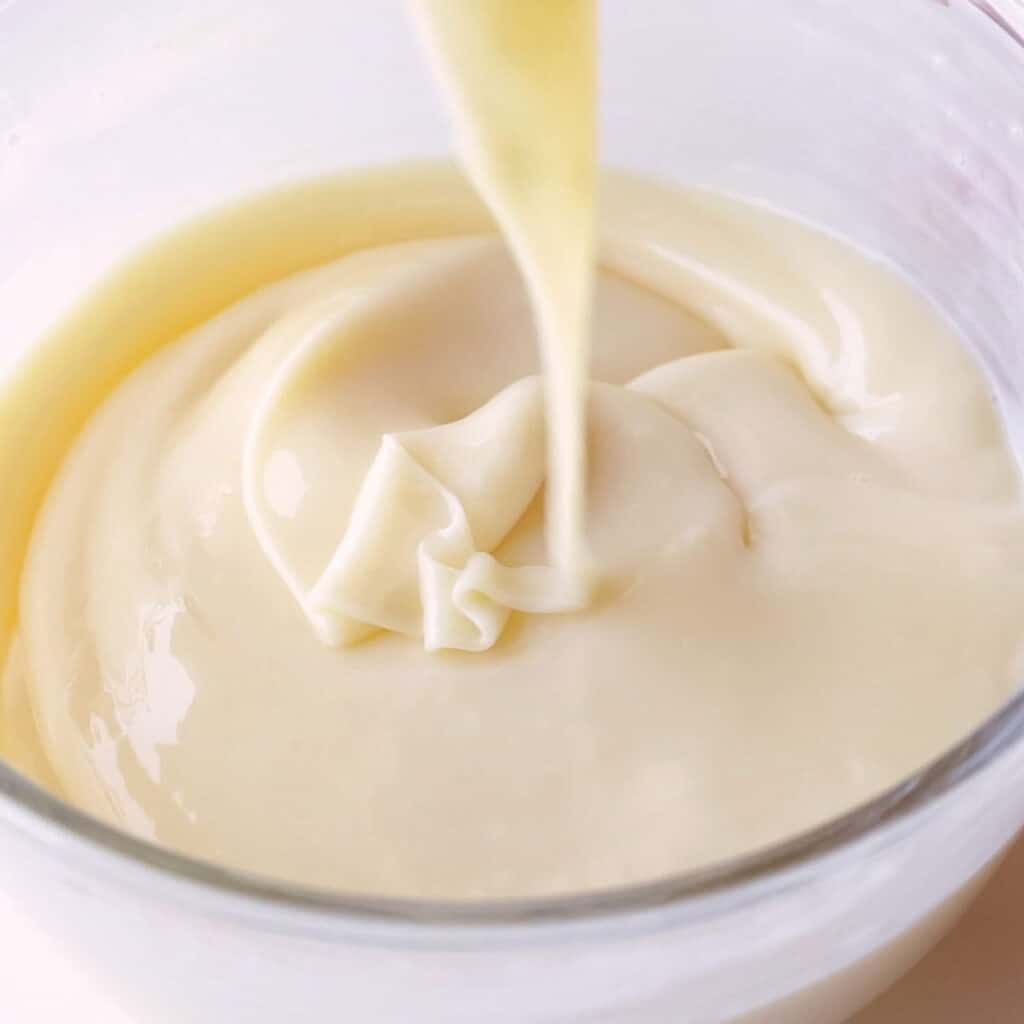
- Mix the 400 g condensed milk and 3 tbsp lemon juice in a medium mixing bowl, then pour over the gelatin mix.
- Beat together using a spoon or whisk, then pour over the biscuit base.
- Refrigerate until firm, around 30 minutes to one hour.
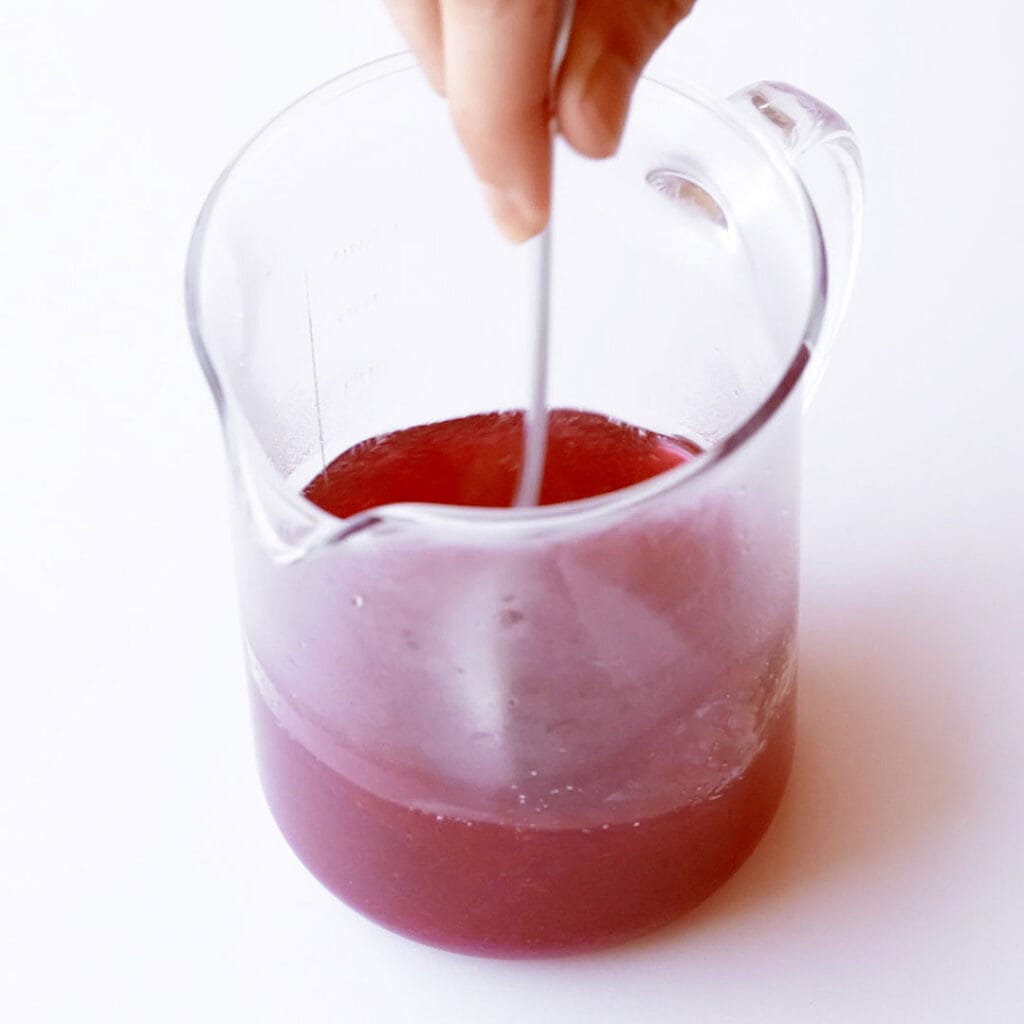
For the third layer:
- In a small bowl dissolve the 85 g raspberry jelly in 125 ml boiling water.85 g raspberry jelly,125 ml boiling water
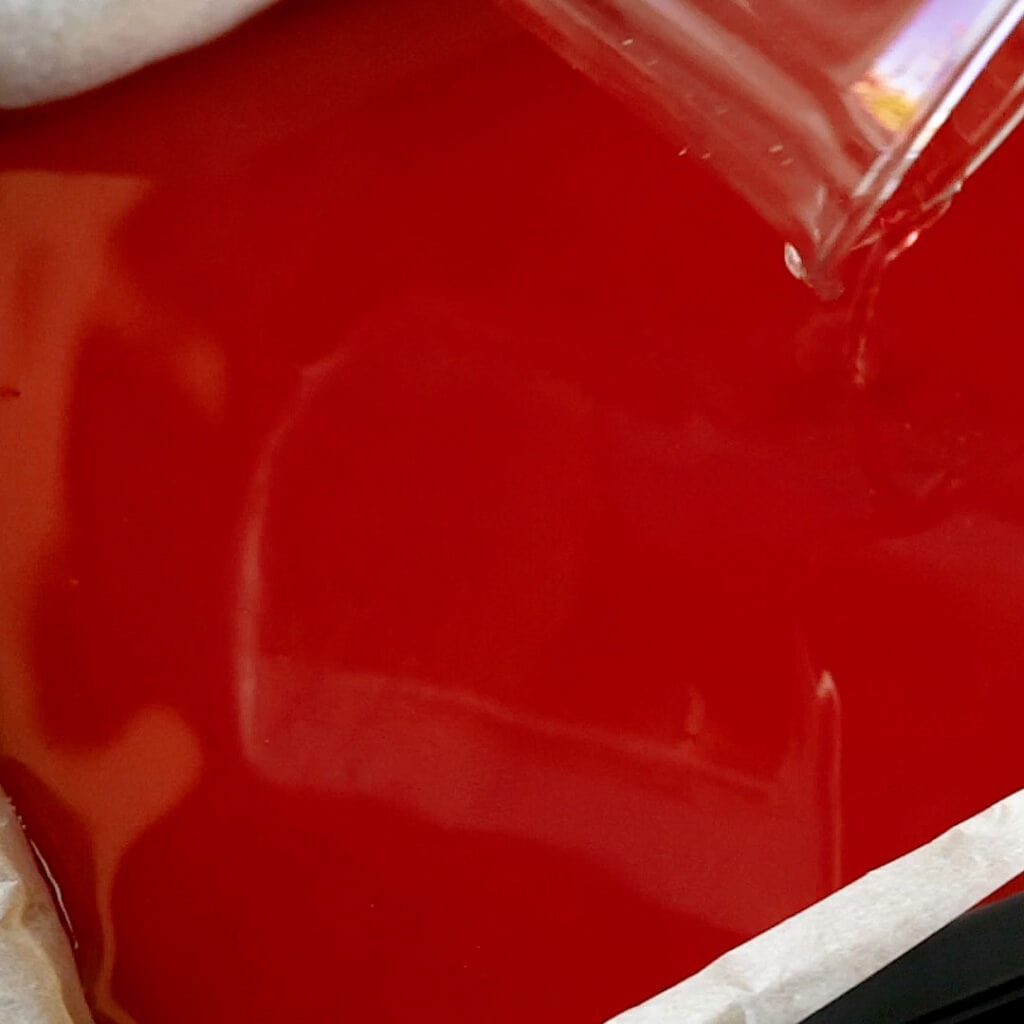
- Keep stirring until all the sugar crystals in the jelly have dissolved. Pour in the 100 ml cold water, give it a quick stir, then carefully pour over the condensed milk layer. Note: If holes start to appear in the milk layer, it’s not set yet!100 ml cold water
- Pop in the fridge to set for at least 3 hours.
To serve:
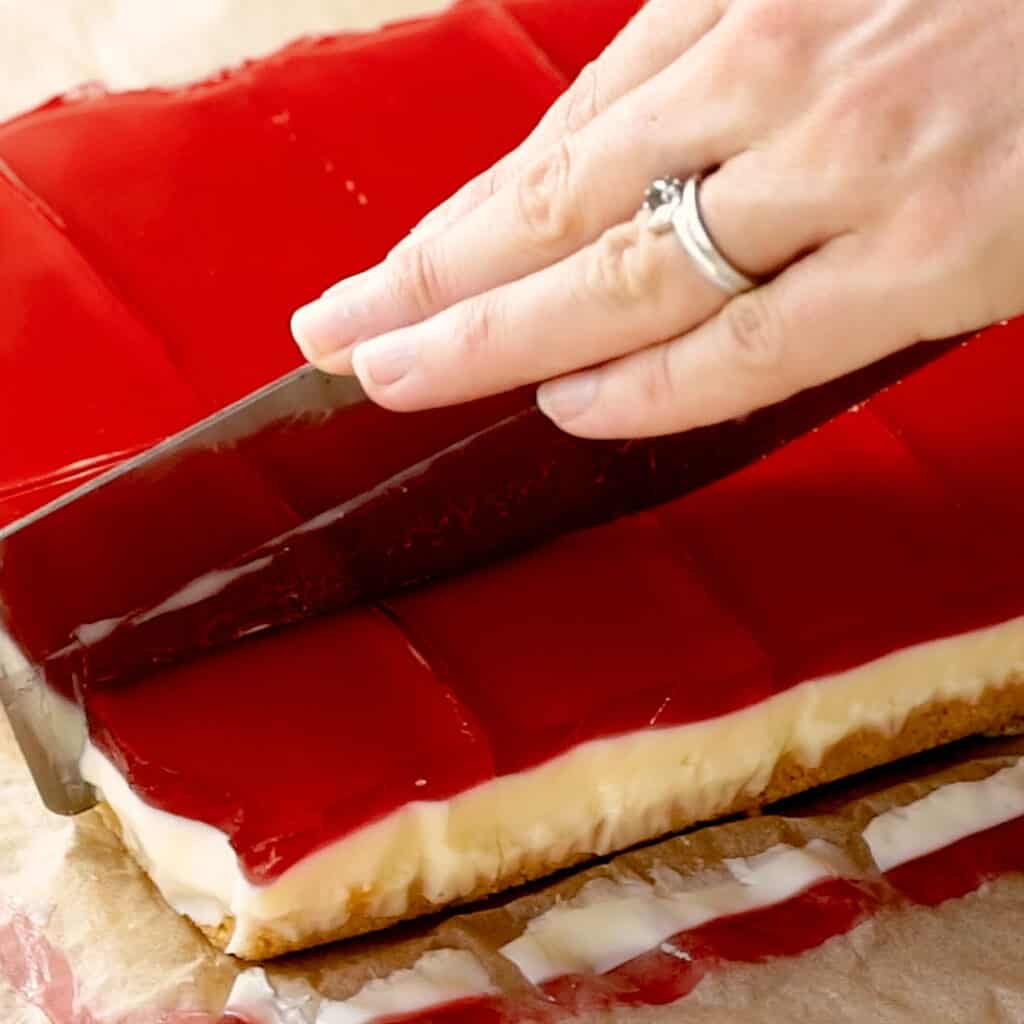
- Gently pull the slice out of the tray using the edges of the baking paper and transfer to a cutting board. Slice into squares or fingers and serve! Note: Clean knife between each slice for neat and even squares.
Wandercook’s Tips
- Water – This recipe intentionally uses less water than usual when making the jelly layers. This helps set the jelly firmer, resulting in a better final structure for cutting. For a thicker jelly layer, double it and do two packets of jelly instead (still with the less water amount).
- Be Patient – Wait for each layer to fully set before pouring in the next, otherwise they will blend into each other and you won’t end up with those lovely, clearly defined layers. You can try pouring the liquid jelly over the back of a spoon to help disperse it softly over the surface and stop holes forming in the preceding layer.
- Handle Carefully – It can be easy to spill the white or red layers, so be careful transferring the tray back and forth from the fridge.
Storage and Freezing
Slice once set and store in the fridge in an airtight container.
Jelly slice will last up to 7 days in the fridge, but best eaten sooner rather than layer. Note: The longer you leave it, the more the jelly colour will start to leach into the condensed milk layer over time.
FAQs
The biscuit base is what makes the jelly slice easy to pick up and eat. While you could make the slice without the biscuit base, it will be much harder to work with.
If you really don’t want to include the biscuit base, make sure to swap the gelatine for agar agar powder as this will result in much firmer set jelly layers that can set at room temperature, allowing it to be handled more easily.
Make sure the gelatine powder has completely dissolved in the boiling water before adding any other ingredients. If you don’t, the jelly layers won’t fully set and will blend together.
This recipe works perfectly with a 24 cm or 9 inch square baking tray. Line it with baking paper first so you can easily remove the slice from the tray once fully set.
If using a larger tray, you could do a double batch of the ingredients.
Serving Ideas & Variations
- Extra Layer(s) – You can double or triple the jelly layers with different colours and flavours – just make sure to set it fully between each and pour very gently. Why not make it a festive Christmas jelly slice with an extra layer of green jelly?
- Extra Fun – Mix sprinkles through the white layer for a fairy bread version of jelly slice!
- Experiment with Flavours – Try coffee jelly or pandan coconut jelly instead.
- Biscuits – Swap the biscuits for chocolate Tim Tams or Anzac biscuits for extra decadence.
- Flummery – Make a flummery aka jelly whip for the third (or even a fourth) layer to your jelly slice!
Try these amazing recipes next:
★ Did you make this recipe? Please leave a comment and a star rating below!
Equipment
- 9×9 in (24cm) Baking Dish
Ingredients
1st layer:
- 250 g nice biscuits 8.8 oz (1 packet), sub arrowroot, scotch finger or marie biscuits
- 150 g butter 5.3 oz, sub margarine
2nd layer:
- 3 tsp gelatin powder
- ¾ cup boiling water 188 g / 6.3 oz
- 400 g condensed milk 14 oz (1 tin), sub yoghurt
- 3 tbsp lemon juice
3rd layer:
- 85 g raspberry jelly 3 oz (1 pack), sub with strawberry or any flavour you like!
- 125 ml boiling water 4.2 oz
- 100 ml cold water 3.3 oz
Instructions
1st layer:
- Crush the 250 g nice biscuits using a food processor, mortar and pestle or even a potato masher in a mixing bowl. Transfer to a medium bowl.
- Melt the 150 g butter in 30 second bursts in the microwave until melted (around 1½ minutes). Pour the melted butter over the crushed biscuits and stir until combined.
- Line a square tin (9 inch / 24cm) with baking paper or cling wrap. Pour in the crushed biscuit base and press into a flat layer using the back of a spoon.
- Refrigerate for at least 1 hour.
2nd layer:
- Dissolve the 3 tsp gelatin powder in the ¾ cup boiling water, stirring until there’s no lumps.
- Mix the 400 g condensed milk and 3 tbsp lemon juice in a medium mixing bowl, then pour over the gelatin mix.
- Beat together using a spoon or whisk, then pour over the biscuit base.
- Refrigerate until firm, around 30 minutes to one hour.
3rd layer:
- In a small bowl dissolve the 85 g raspberry jelly in 125 ml boiling water.
- Keep stirring until all the sugar crystals in the jelly have dissolved. Pour in the 100 ml cold water, give it a quick stir, then carefully pour over the condensed milk layer. Note: If holes start to appear in the milk layer, it’s not set yet!
- Pop in the fridge to set for at least 3 hours.
To serve:
- Gently pull the slice out of the tray using the edges of the baking paper and transfer to a cutting board. Slice into squares or fingers and serve! Note: Clean knife between each slice for neat and even squares.
Video

Recipe Notes
- Water – This recipe intentionally uses less water than usual when making the jelly layers. This helps set the jelly firmer, resulting in a better final structure for cutting. For a thicker jelly layer, double it and do two packets of jelly instead (still with the less water amount).
- Be Patient – Wait for each layer to fully set before pouring in the next, otherwise they will blend into each other and you won’t end up with those lovely, clearly defined layers. You can try pouring the liquid jelly over the back of a spoon to help disperse it softly over the surface and stop holes forming in the preceding layer.
- Handle Carefully – It can be easy to spill the white or red layers, so be careful transferring the tray back and forth from the fridge.
- Extra Layer(s) – You can double or triple the jelly layers with different colours and flavours – just make sure to set it fully between each and pour very gently. Why not make it a festive Christmas jelly slice with an extra layer of green jelly?
- Extra Fun – Mix sprinkles through the white layer for a fairy bread version of jelly slice!
- Experiment with Flavours – Try coffee jelly or pandan coconut jelly instead.
- Chocolate – Swap the biscuits for chocolate Tim Tams for extra decadence.
- Flummery – Make a flummery aka jelly whip for the third (or even a fourth) layer to your jelly slice!
Nutrition


4 Comments
Anonymous
31/01/2024 at 10:03 pmWow, this jelly slice recipe looks amazing! I’ll try it out this weekend.
Wandercooks
01/02/2024 at 8:41 amOoo we hope you do! Let us know what you think. 😀
KT
15/01/2022 at 11:44 amThis looks like a fun dessert! However, I need some guidance in choosing a biscuit. I don’t think biscuit I’m thinking of is the same type of biscuit that is used in this recipe. What biscuit should I be looking for at the store? Thanks for your help 🙂
Wandercooks
15/01/2022 at 3:41 pmHey KT, you’re looking for cookies (in Australia we call them biscuits!) – so you can try something like graham crackers, digestive biscuits, shortbread etc just a dry and sweet cookie you can crush up to make a base. 🙂