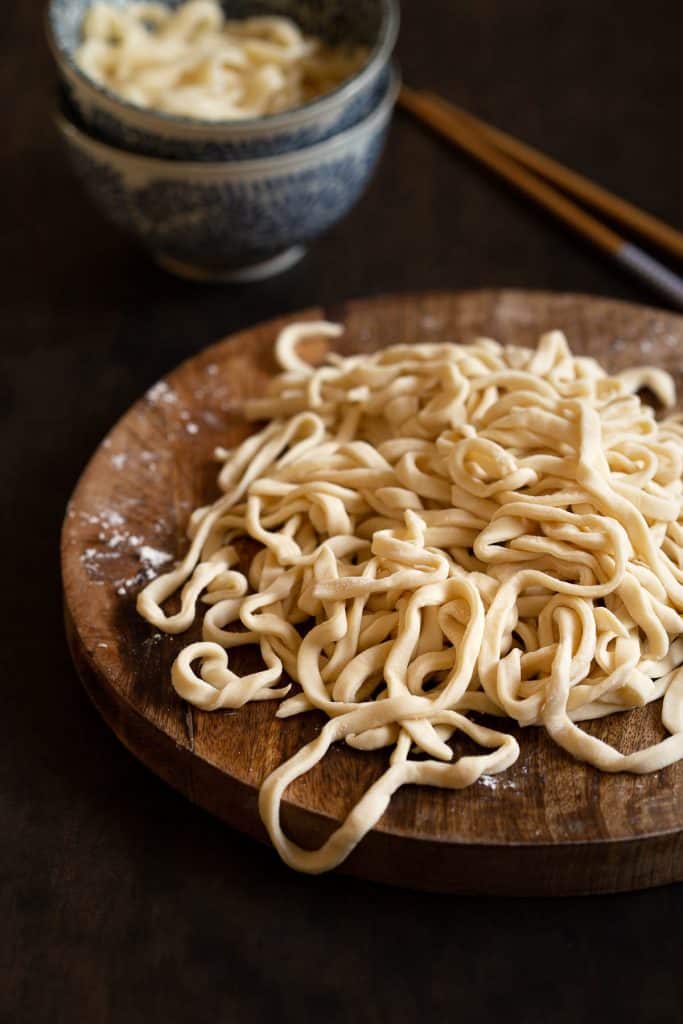
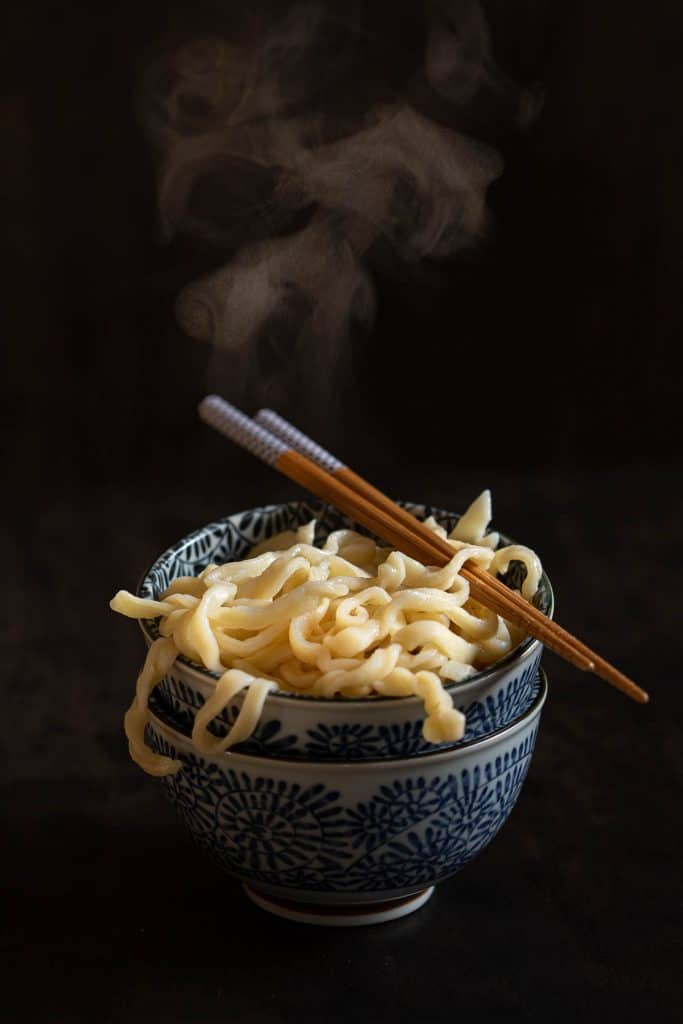
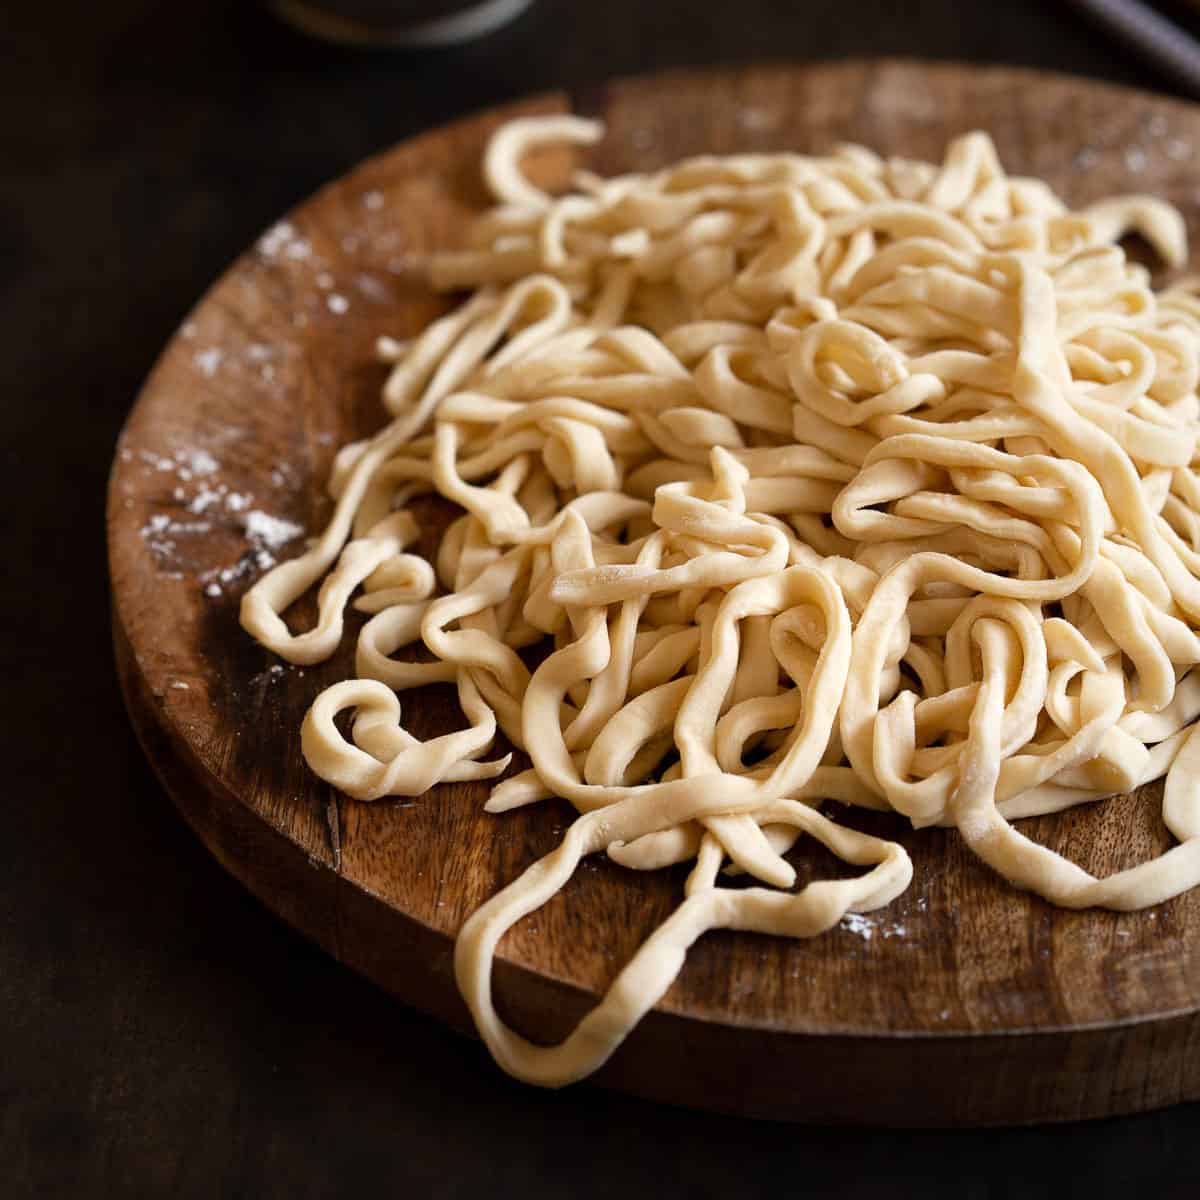
Get ready to make these super simple homemade udon noodles from scratch… with your feet! Only 4 ingredients stand between you and these fresh Japanese noodles, just waiting to be added to a big bowl of udon noodle soup or curry udon.
Why We Love This
To this day, this is one of our favourite travel memories in the mountains of Shikoku, Japan, where we learnt the fine art of making Japanese udon noodles with our feet. Yep. You read that right.
This is the easiest method for making homemade noodles from scratch. We love being able to make a batch at any time and either eat them fresh, or pop them straight in the freezer for future deliciousness.
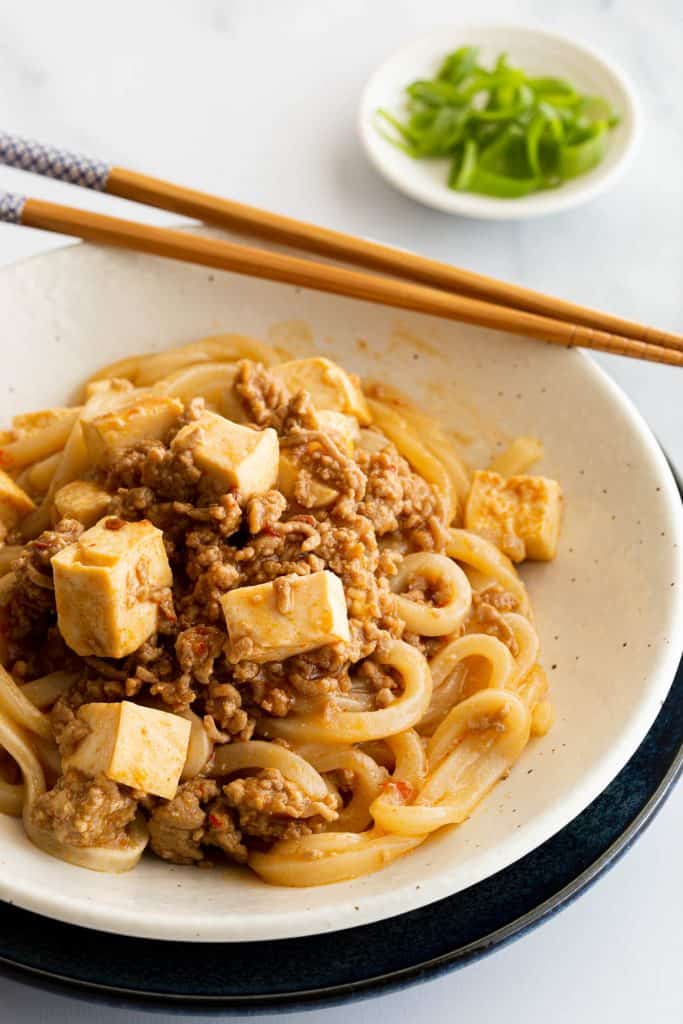
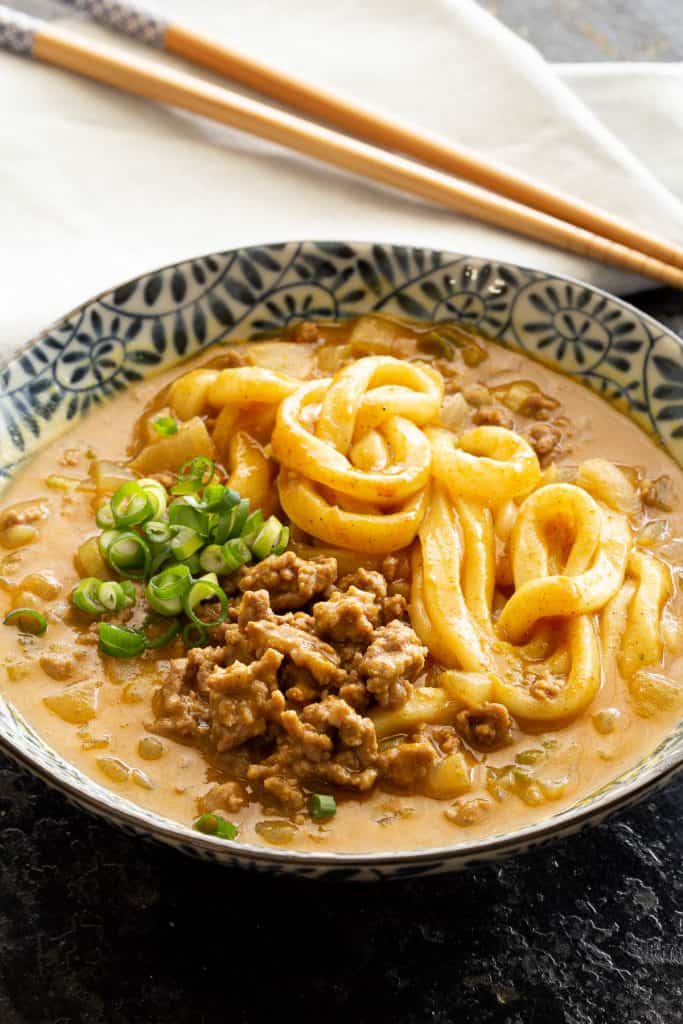
Related: Yaki Udon (Stir Fried Udon Noodles) / Nikomi Udon Soup with Miso
What are udon noodles?
These delectable chewy noodles are very popular in Japanese cuisine. They’re usually served in a simple broth, a light soy based sauce or with Japanese curry roux as curry udon. It’s the perfect light meal to fill you up.
Where we learnt to cook udon:
Our first attempt at making udon noodles from scratch was in Miyoshi, Shikoku Island, Japan with the village’s very own udon master.
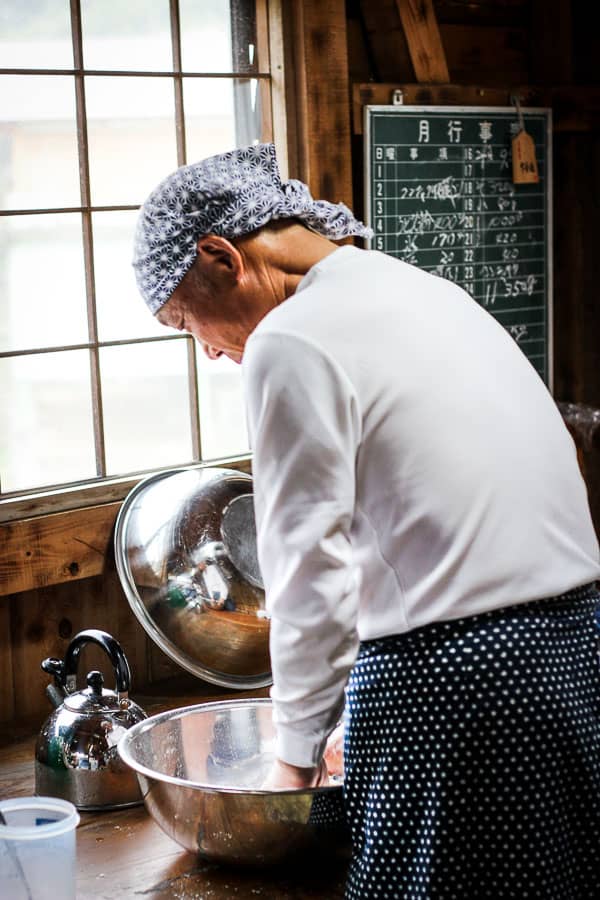
Stepping inside the cosy udon cooking shed, the master launched straight into his lesson with a quick introduction to the recipe – both of which were completely in Japanese. We quickly realised that he didn’t speak English and we would have to rely on our conversational Japanese (and a few useful hand gestures) to turn the simple ingredients of flour, water and salt into noodle-y goodness.
Quickly donning aprons and super stylish bandanas, we followed along doing our best to copy the master’s technique.
When he told us to pop our dough between sheets of thick plastic, the master motioned to us to jump up and knead the balls with our feet!
We looked at each other, quickly confirming we’d both understood the instruction correctly, then jumped up and got stomping. We couldn’t argue though – this unusual and completely unexpected technique was super effective. Squishing the dough under our feet helped it become smooth and perfectly kneaded.

After that, it wasn’t just the dough balls that needed a little rest. While the dough took a break in a warm place for 30 minutes (the most convenient warm place being under a Japanese kotatsu table), we chatted with the master and his wife (as best as we could) over a cup of hot Japanese matcha green tea.
One at a time our sheets of dough were carefully laid out onto a long chopping board before being chopped into thin strips using a handy spring-loaded cleaver. At home, the easiest way to achieve this would be with a pasta machine.
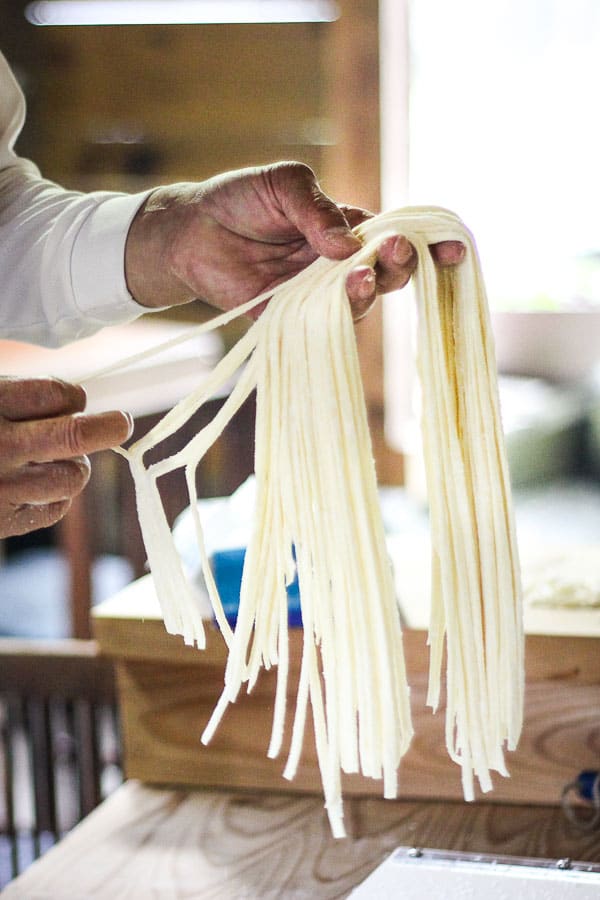
Afterwards we gathered the noodles into our hands and gently pulled them apart to help separate them properly, then dropped them straight into steaming hot water to cook.
Before long the noodles were ready to be eaten, ladled out into huge bowls along with a raw egg each, followed by a ladle full of dashi, a splash of udon shoyu (soy sauce), sliced spring onion, a sprinkle of ground sesame seeds. Yum!
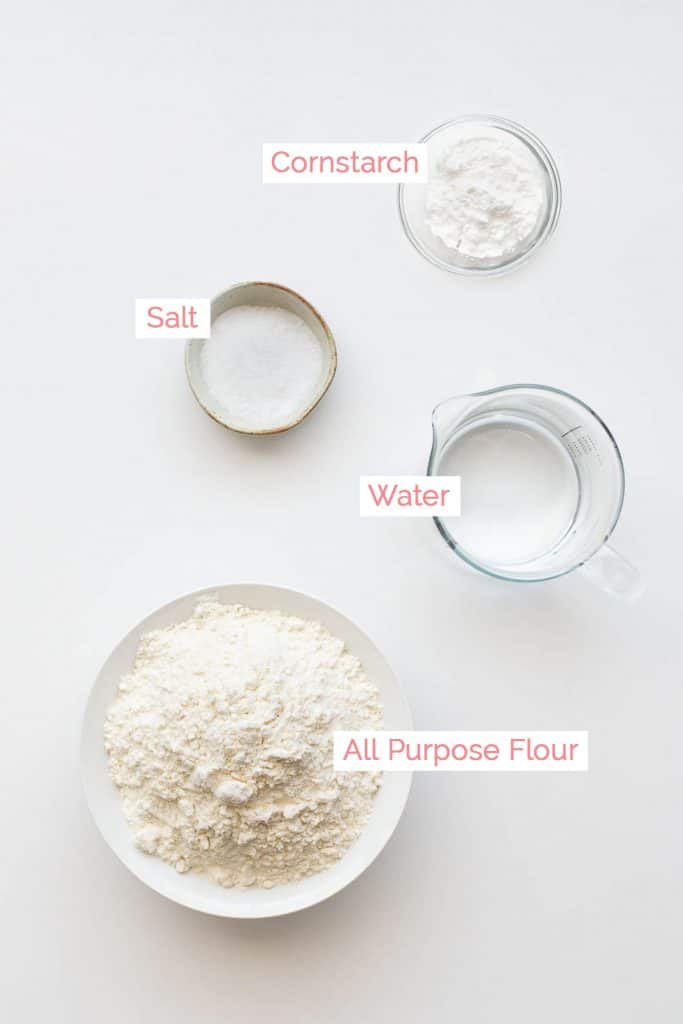
What You’ll Need
This recipe can’t get much simpler! You need flour, water and salt – that’s IT! The cornstarch (or tapioca flour) is only used to stop the dough and noodles from sticking. We used bread flour (or all purpose flour), and recommend a whole wheat flour if you can get your hands on it.
How to make udon with your feet:
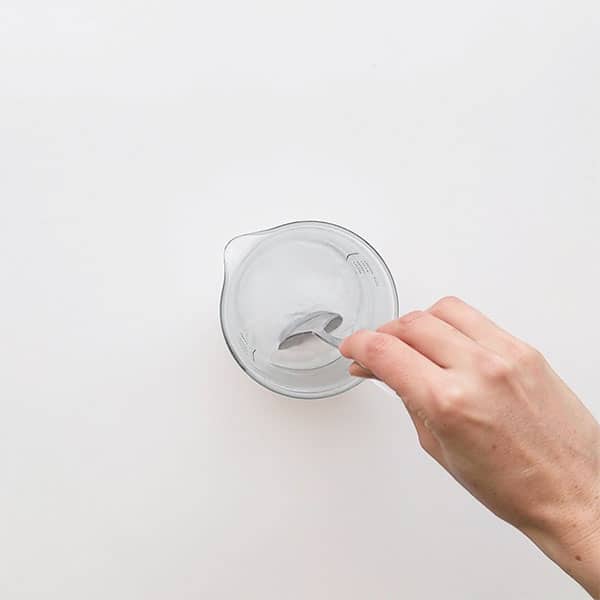
- Mix salt into the iced/cold water and stir until dissolved.
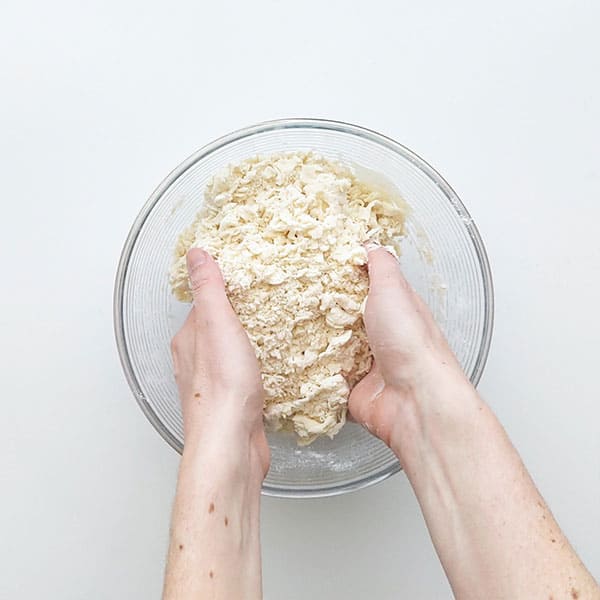
- Place the flour in a large mixing bowl. Pour the salt water over flour, reserving 2 tbsp to add later. Using your finger tips in the shape of claws, mix the flour and salt water together until they bind into fluffy strips. Add remaining liquid knead with the thumbs and palms of your hands, gradually forming a rough ball shape.
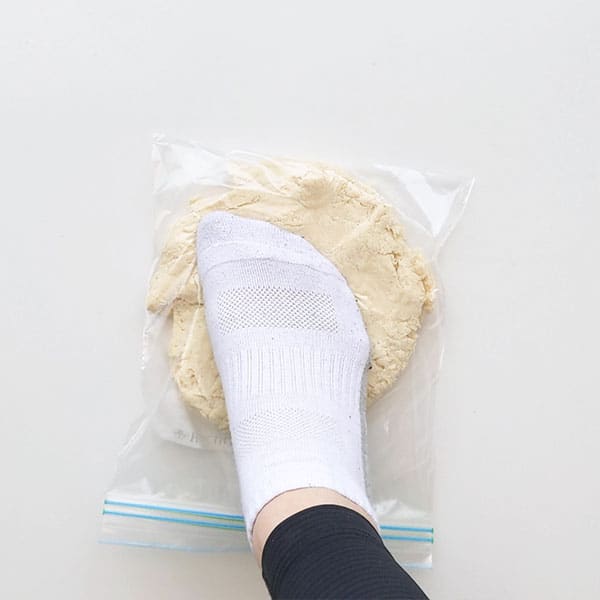
- Place the dough ball in a thick plastic bag and spread out using your feet. When it becomes approximately 20 cm / 8 inches wide, hop off and fold the dough over itself four times (like closing the lid of a cardboard box). Pop it back in the plastic, and spread again with your feet. Do this around 20 – 30 times.
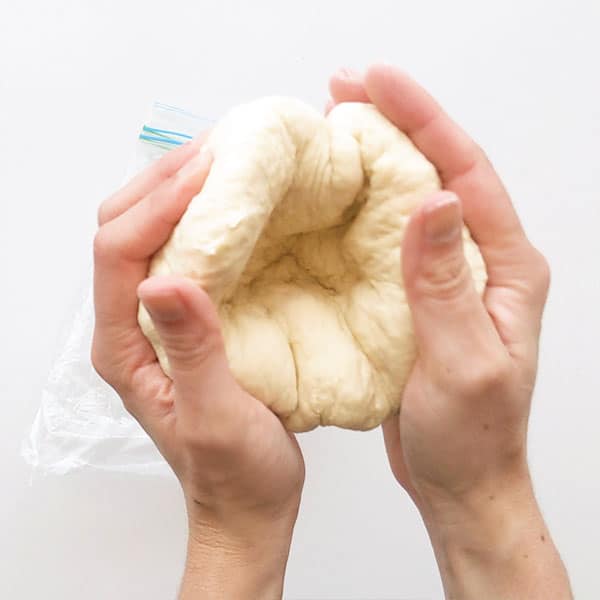
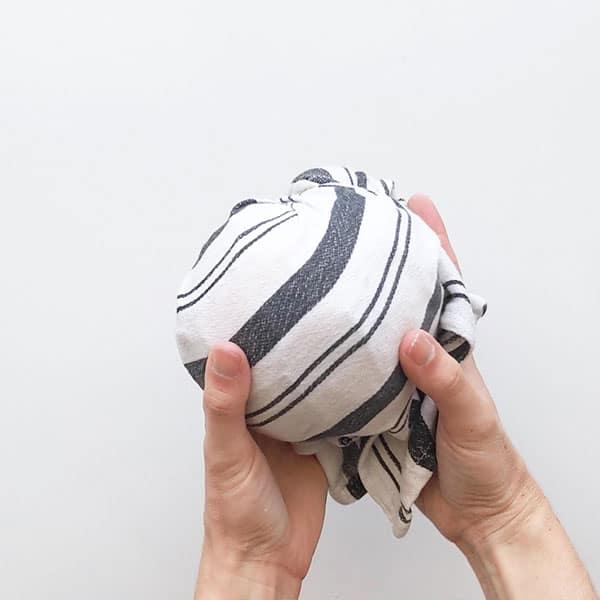
- Remove from plastic and fold up into clam shape.
- Place into a plastic airtight bag and cover with a tea towel. Rest in a warm place for 30 minutes. Remove from plastic bag onto floured surface and press dough into a flat circle with the palms of your hands. Dust liberally with cornflour and roll out using a rolling pin until 1 cm / ½ inch thick.
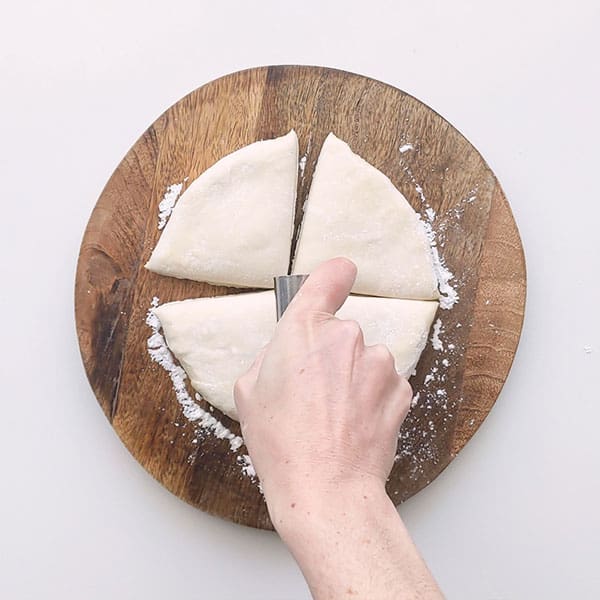
- If cutting with pasta maker: Cut the dough into 4 equal sections, and shape the dough into a rough rectangular shape.
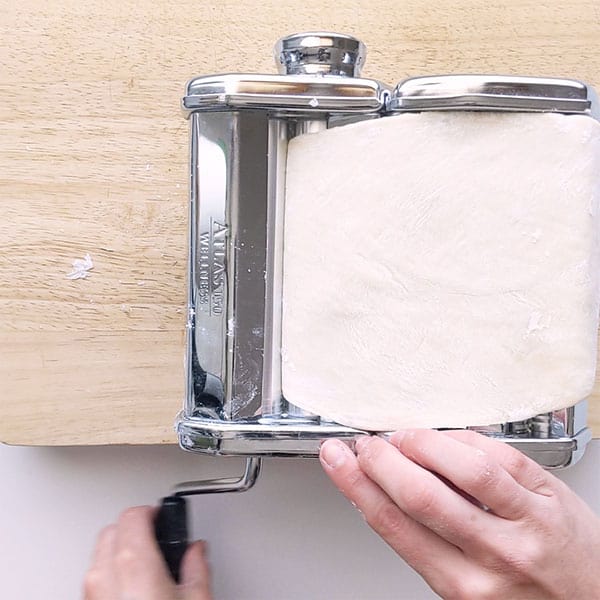

- Pop it through the pasta roller starting from size 0 to 2. Roll it through twice for each size.
- Now feed the dough through the fettuccine cutter on the machine. Dust with a little extra cornstarch if necessary to keep the noodles from sticking together.
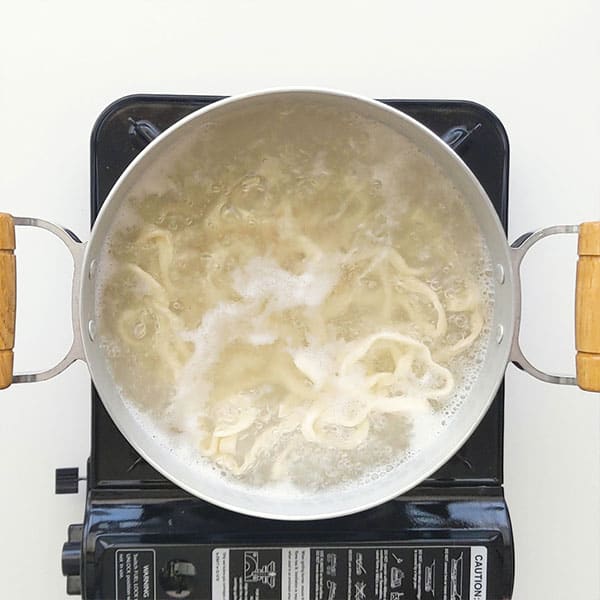
- To cook the udon noodles: Bring a large pot of water to boil. Pop in the udon and cook for around 5 minutes until cooked through.
Wandercook’s Tips
- If using a pasta maker, don’t go any thinner than size 2 when rolling out. You want nice, thick and chewy noodles!
- Once the udon is floating while boiling, you know they’re almost ready.
- Keep an eye on the noodles while boiling them, as they do have the tendency to boil over. Simply reduce the heat slightly if this happens.
- If you want to be super traditional, you can use a Japanese udon knife, known as udon kiri. We’ve found them online, and they look so cool!
FAQs
Yes! Although, it will be a lot harder by hand. You could also try using your KitchenAid – but only for the kneading step. We recommend keeping it on a low setting of around 2-3, as the dough is quite tough. Still use your hands to mix it initially and get the right texture.
We use and recommend bread flour. The higher gluten percentage works well for getting the right udon texture. You can also use all purpose flour or whole wheat flour.
Yes and yes.
If freezing the udon noodles, you can do this after cutting them. Section them out into portions and pop them into sealed ziplock bags. It’s best to use them up within a month. When ready to cook, no need to thaw, pop them directly into the boiling water and cook for around 10 minutes, or once they’re floating. Give one a taste if you’re unsure, to see if it’s at the texture you prefer.
You can also keep the noodles in the fridge, although we recommend freezing over refrigerating for the best texture result.
If freezing the udon dough, you’ll need to put it in a ziplock or sealed container as well. When you’re ready to make it into noodles, leave it out on the bench to thaw to room temperature over an hour or two. Then roll out, fold and cut as normal.
Variations & Substitutes
- Salt: You can use table salt, sea salt or Himalayan salt for your udon.
- Cornstarch: Sub out with tapioca flour or rice flour in a pinch.
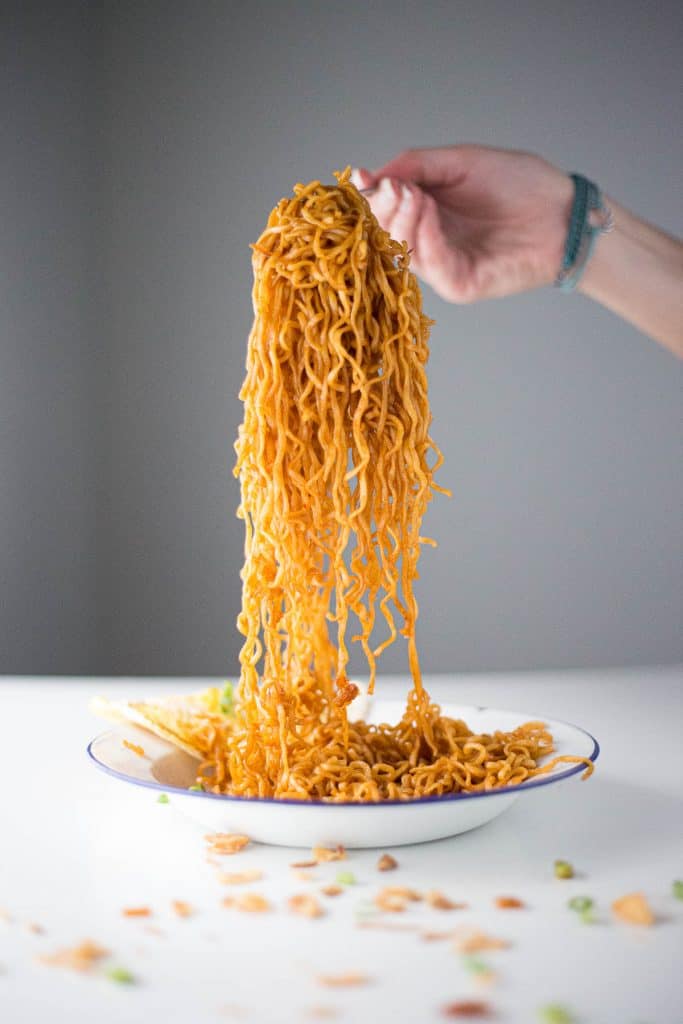
For more noodle goodness, try these next!

★ Did you make this recipe? Please leave a comment and a star rating below!
Equipment
Ingredients
- 400 g plain flour / all purpose flour bread flour works even better!
- 200 ml water iced or cold (2 tbsp reserved for later)
- 1 tbsp salt
- cornstarch / cornflour
Instructions
- Mix salt into the iced/cold water and stir until dissolved. Reserve 2 tbsp for later.1 tbsp salt, 200 ml water
- Place the flour in a large mixing bowl. Pour the salt water over the flour (except for the reserved amount). Using your finger tips in the shape of claws, mix the flour and salt water together until they bind into fluffy strips.400 g plain flour / all purpose flour
- Add remaining 2 tbsp of salt water and knead with the thumbs and palms of your hands, gradually forming a rough ball shape.
- Place the dough ball in a thick plastic bag and spread out using your feet. When it becomes approximately 20 cm / 8 inches wide, hop off and fold the dough over itself four times (like closing the lid of a cardboard box). Pop it back in the plastic, and spread again with your feet. Repeat this around 20 – 30 times (not a typo – this is how you get that perfect udon texture!).
- Remove from plastic and fold up into clam shape. Press edges into centre of the ball removing as much air as possible. Place into a plastic airtight bag and cover with a tea towel. Rest in a warm place for 30 minutes.
- Remove from plastic bag onto floured surface and press dough into a flat circle with the palms of your hands. Dust liberally with cornstarch and roll out using a rolling pin until 1 cm / ½ inch thick.cornstarch / cornflour
If cutting with pasta maker:
- Cut the dough into 4 equal sections, and molding the dough into a rough rectangular shape, feed it through the pasta roller on Size 0. Do this twice, before moving up to Size 1 and folding through twice, and finally on Size 2.
- Now feed the dough through the fettuccine cutter on the machine. Dust with a little extra cornstarch if necessary to keep the noodles from sticking together.
If cutting by hand:
- Roll the dough sheet around the rolling pin and continue to roll over itself, pressing forward four times to thin out the dough. Repeat this process rolling twice from top to bottom and then left to right. You want the dough to be around ½ cm / ¼ inch thick
- Lay out the sheet of dough onto a cutting surface. Add plenty of cornflour and fold the dough in twice to a rough rectangular shape, like folding a letter.
- Slice the dough into ½ cm / ¼ inch wide strips.
- Unfold the noodles and gather in small sections into your hands and tap a few times against the cutting surface to remove excess cornflour. Gently pull apart each strip into separate noodles.
To cook the udon noodles:
- Bring a large pot of water to boil. Pop in the udon noodles and cook for around 5 minutes until cooked through.
Video

Recipe Notes
- If using a pasta maker, don’t go any thinner than size 2 when rolling out. You want nice, thick and chewy noodles!
- Keep an eye on the noodles while boiling them, as they do have the tendency to boil over. Simply reduce the heat slightly if this happens. Once the udon is floating while boiling, you know they’re almost ready.
- Flour: We use and recommend bread flour. The higher gluten percentage works well for getting the right udon texture. You can also use all purpose flour or whole wheat flour.
- Kneading: With feet is best. You can use hands but it will be a lot harder. A stand mixer or KitchenAid is also okay, but only for the kneading step. Keep it on a low setting of around 2-3, as the dough is quite tough. Still use your hands to mix it initially and get the right texture.
Nutrition


28 Comments
S Subramanian
07/02/2022 at 10:53 amHello
I have whole wheat flour. Is the water measurement the same for whole wheat flour? Thank you
Wandercooks
07/02/2022 at 11:48 amHi, we have not tested this recipe with whole wheat flour so I’m not sure if the ratio would need to be changed for the water. If you do try it with the current water, let us know how you go!
phil love
02/02/2022 at 11:50 pm& the devil finds work for idle hands … as I recover from long covid
what exactly possessed me to attempt this & why today, I really dont know but … here I am , trying to make , from scratch ;
UDON NOODLE
for the unknowing, its a simple dough of salt water & flour kneaded (by foot – yes by foot you heard correct) 50 times …. in a bin bag … on the floor … creating an 8 inch circle before folding it 4 times over back into a ball and starting again.
50 times … its all about the layers & the exact elasticity
50 times …. I kid you not …. trying to convince myself (despite the long covid lack of taste / smell thing) it’ll be worth it.
50 times … I laugh as I ‘dance’ away thinking I am trying to make udon not a Samurai sword
50 times …. even the dog is rolling her eyes at me
and yes …. I know you can buy udon noodle at less than a £1 a pack ready made
not finished there …. I then went on to attempt nabe yaki udon & washed it down with a cold asahi
I am still wondering how it might have turned out leaving all the work to the Kitchenaid mixer ??????
Wandercooks
07/02/2022 at 11:58 amHaha it’s definitely a workout AND a recipe in one!
Glad you had some fun with it, and it definitely sounds like you turned it into a very delicious feast alongside your beer. 🙂
Also, good luck with your recovery!
Mark
06/08/2019 at 8:31 amThis looks amazing. I would love to do this. Where did you take your class? I’ve taken a soba class in Iya Valley and would love to learn how to make udon on my next trip to Japan this Fall.
Wandercooks
06/08/2019 at 5:02 pmHi Mark, thanks for stopping by! We discovered this recipe when we were staying at Momonga Village Guesthouse – the owners introduced us to a nearby Udon Master who took us into his home to teach us. If you head to that area, we definitely recommend reaching out to them to see if they can put you in touch. The master’s English was very limited, so if you know some basic Japanese it will help. It’s such a beautiful green part of Japan, hope you have an amazing visit. 🙂
Mark
10/08/2019 at 2:09 pmThank you so much! What a fun looking place to stay. Thank you for sharing this.
Wandercooks
16/08/2019 at 3:57 pmYou’re welcome Mark, enjoy your adventures through Japan, we can’t wait to get back there again soon!
Shihoko
05/05/2016 at 10:09 amI think this is the best and easiest way to make delicious home made Udon noodles <3 I am going to share this on my social media accounts 😀 If it is in Shikoku, it may be Sanuki Udon? You proved that food is the best way to communicate 😀
Wandercooks
05/05/2016 at 3:19 pmOh yes I think you’re right! It definitely had the square shape and flat edges of Sanuki Udon, which we much prefer to the rounded shape. Not sure why, but I think it’s slightly chewier, or at least a much more satisfying texture, especially when served hot! How do you like to eat udon noodles?
Regina
28/04/2016 at 11:46 pmOMG… noodles made by foot? How awesome is is that! This is my first visit to your site, but I’ll have to keep coming back. Anything combining travel and food instantly piques my interest 😀
Wandercooks
29/04/2016 at 8:03 amYay thanks for stopping by Regina, hope you enjoy! Of course now we must ask: What’s your favourite cuisine?
Regina
01/05/2016 at 3:12 amOh boy, that a tough one. It depends on my mood a little. Having just spent 8 months in Thailand, I am a sucker for al things Thai food. But when I need comfort, it’s the Slavic/Eastern European food my mom cooked.
Wandercooks
02/05/2016 at 9:09 amIt’s definitely a touch choice! Especially with so much delicious food everywhere you look! 😀 Thai food is totally delicious but we miss Eastern European food so much and had a ball eating our way through so many countries there. Albania and Bulgaria were probably our top favourites (but again, so hard to choose!). 😀
Valentina
28/04/2016 at 11:01 pmOh what I would do to be in the mountains of Japan making these noodles! What an amazing experience (& how delicious)!
Wandercooks
29/04/2016 at 8:02 amIt’s definitely an amazing experience – thoroughly recommend! Such a beautiful region of Japan and filled with wonderful people. (And amazing food – of course!)
Annie @ Annie's Noms
28/04/2016 at 10:25 pmOh my gosh, I’ve always wanted to make my own noodles; it looks like the most amazing experience! These noodles look amazing!
Wandercooks
29/04/2016 at 7:57 amIt’s super fun and definitely cause for a few laughs haha. But the foot technique definitely works, and at the end you get to eat the freshest, tastiest noodles ever. What’s not to love? 😛
Christie
28/04/2016 at 9:39 pmWhat an amazing time. This is what I love about traveling. This would definitely be on my some day list.
Wandercooks
29/04/2016 at 7:54 amOh definitely, us too! Plus it’s amazing how food and cooking can bring people together the way nothing else can. (But for even more fun, definitely try cooking with your feet hahaha.)
Dannii @ Hungry Healthy Happy
28/04/2016 at 7:21 pmYou just can’t beat a big bowl of noodles like this. It is so comforting and always makes me feel better.
Wandercooks
28/04/2016 at 7:52 pm100% AGREE! We need more of this in our lives!!
Sarah
28/04/2016 at 6:26 pmLOVE your photos! So Happy I came across your site, I’m going to Vietnam in 2 weeks for the first time!
Wandercooks
28/04/2016 at 7:51 pmThanks Sarah! So jealous, we’re in love with Vietnam and would go back in a heartbeat. Be sure to eat as much street food as you can, including Com Tam (Pork Rice), Beef Pho and as many Ca Phe Su’a Da (Vietnamese Iced Coffee) as you can possibly fit in!
Genie
08/05/2015 at 6:11 amWhat an amazing culinary travel experience. Love your photos. Such a beautiful landscape, noodle making looks very therapeutic in such a place. I don’t think I would ever want to leave there.
Wandercooks
09/05/2015 at 9:01 amThanks Genie, it is a lovely place. If you ever go the area is called Miyoshi, Shikoku, Japan.
Bec
30/04/2015 at 7:33 pmWhat a wonderful experience. I am now craving some steamy udon noodles and a delicious tea! Bec x
Wandercooks
30/04/2015 at 7:36 pmThanks Bec, glad you enjoyed. Highly recommend you enjoy a bowl with friends! 🙂