This EASY onigiri recipe is flavoured with delicious Japanese seasonings and wrapped in nori, perfect for a quick snack or a tasty lunchbox treat. Read on for tips, tricks and our handy step by step guide.
Why We Love This
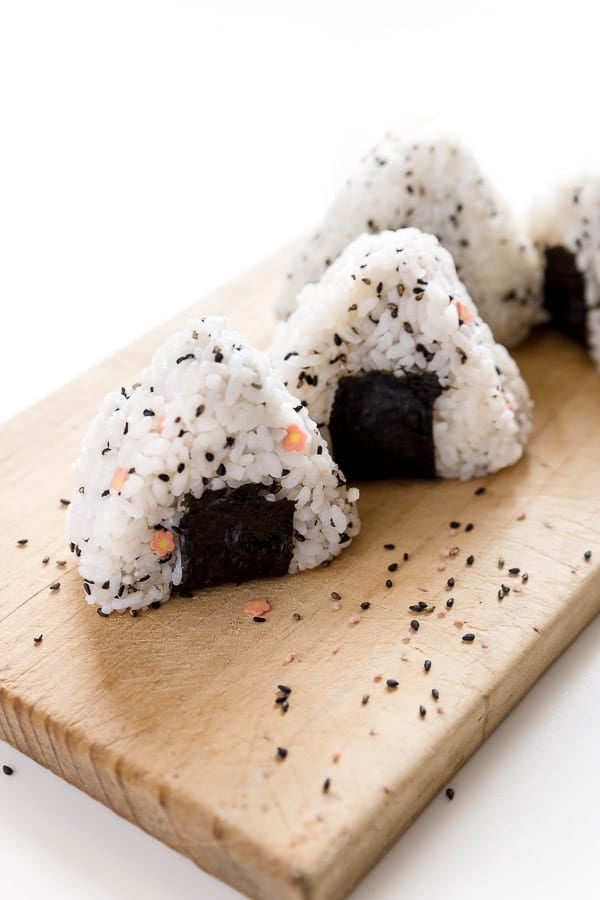
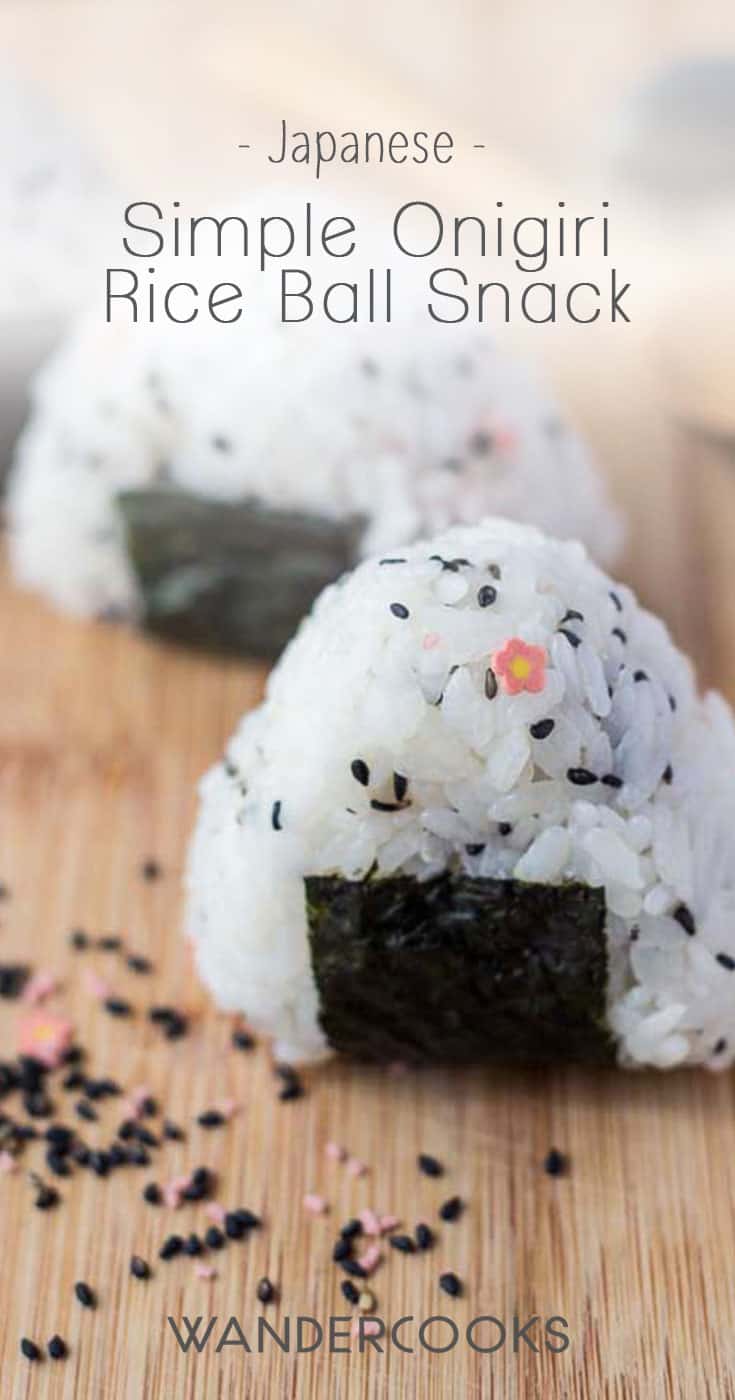
These are the cutest little rice ball snacks! We love onigiri because they are so easy to adapt to your own flavour combinations, and a great way to use up leftover ingredients.
You can enjoy onigiri warm, cold or at room temperature, so they’re perfect in your lunchbox or as a portable snack on the go. You can even plate them up as a tasty appetiser!
What is Onigiri?
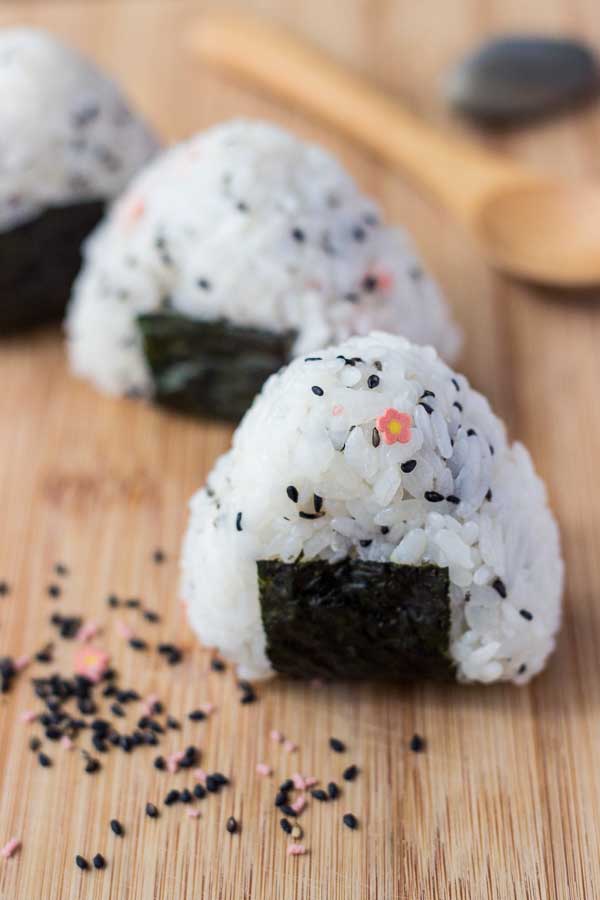
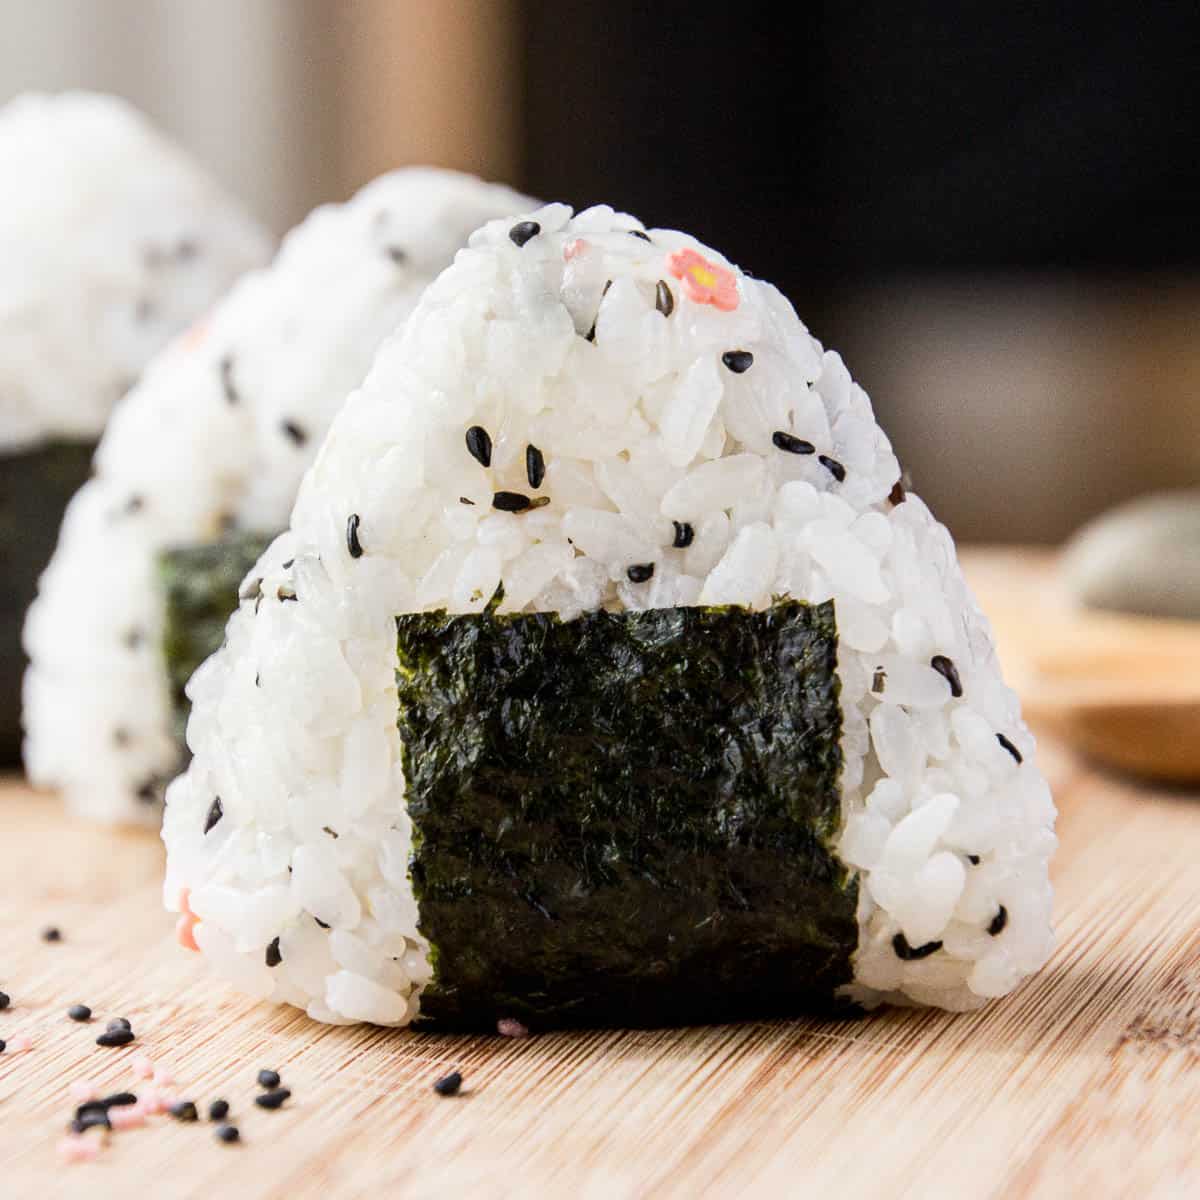
Also known as o-musubi or nigirimeshi, onigiri are Japanese rice ball snacks made from cooked or steamed sushi rice, furikake seasonings (and sometimes tasty hidden fillings), wrapped a nori seaweed wrapper.
In Japan, they’re either made at home in the morning or purchased from a nearby kombini (convenience store), then taken to work or school as a tasty snack or quick lunch.
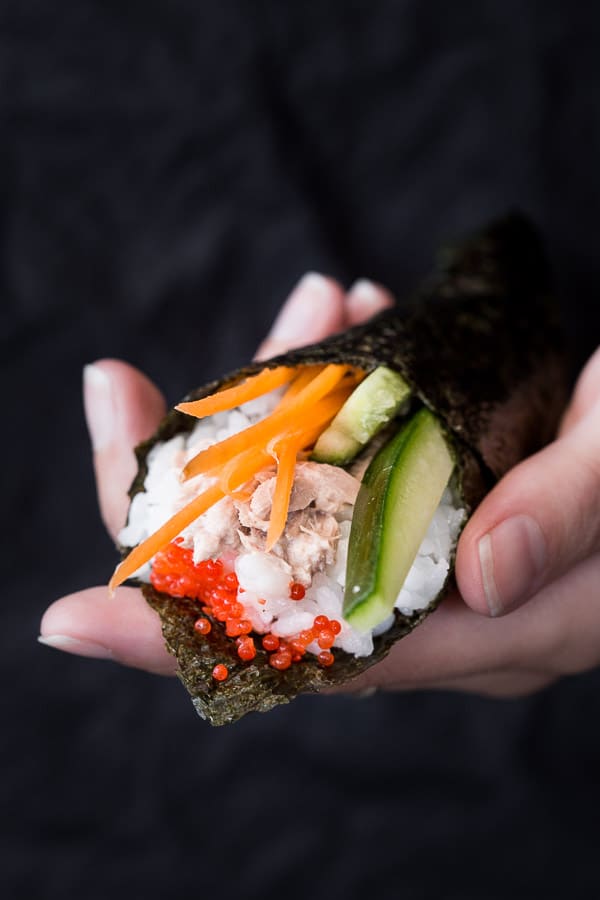
Onigiri are similar yet different to sushi rolls or handrolled temaki sushi. The biggest difference is that regular sushi is seasoned with sushi vinegar while ongiri starts from a base of plain rice. We also think they are so much easier to make than regular sushi!
Where We Learned This Recipe
We learnt this recipe at a sakura celebration in Miyoshi, Japan. After spending the morning making udon noodles with our feet (yep), it sounded like the perfect way to escape the cold, blustery weather, and maybe even try some local Japanese food. Funny how nobody mentioned the karaoke.
Plate after plate reached the tiny table in front of us as we sat on the floor, Japanese style – filled with homemade oden stew, t onigiri rice balls, and free flowing cups of sake and beer.
Afterwards, the ladies from the community took us into the kitchen and showed us step-by-step how to make onigiri by hand. They taught us that ideally want to end up with one face of the onigiri having a small indentation from your fingers, so you can see that it’s handmade.
What You’ll Need
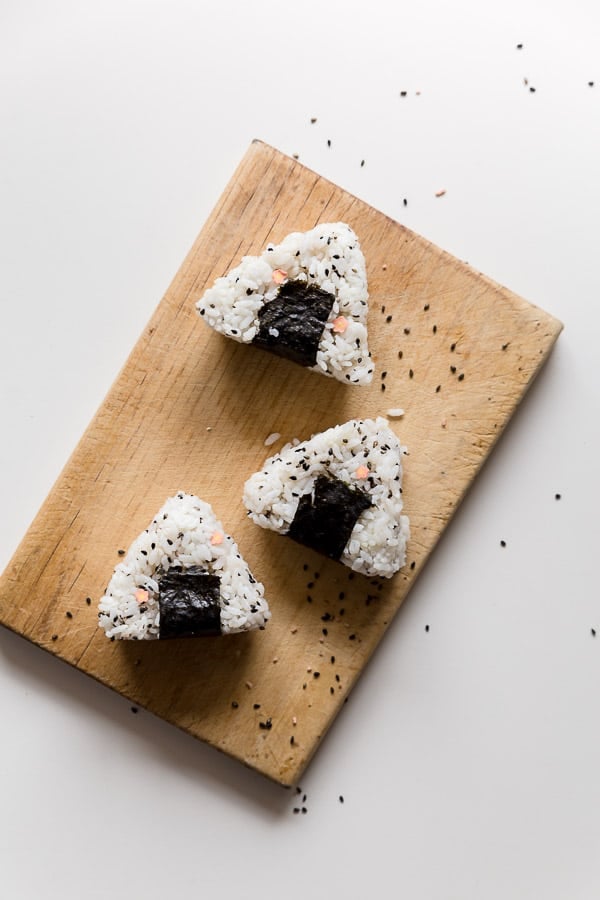
Just three ingredients are all you need for these easy onigiri rice balls! All you need is cooked rice, a good sprinkling of rice seasoning (also known as furikake or gomashio), and a simple technique to mould it into a cute triangular shape. Wrap in a small decorative sheet of nori seaweed and your onigiri will be ready to eat!
- Rice – We recommend koshihikari rice for the best texture. Cook it in a rice cooker, a multi-cooker, or on the stove using the absorption method. Here’s a great guide on how to cook Japanese sushi rice.
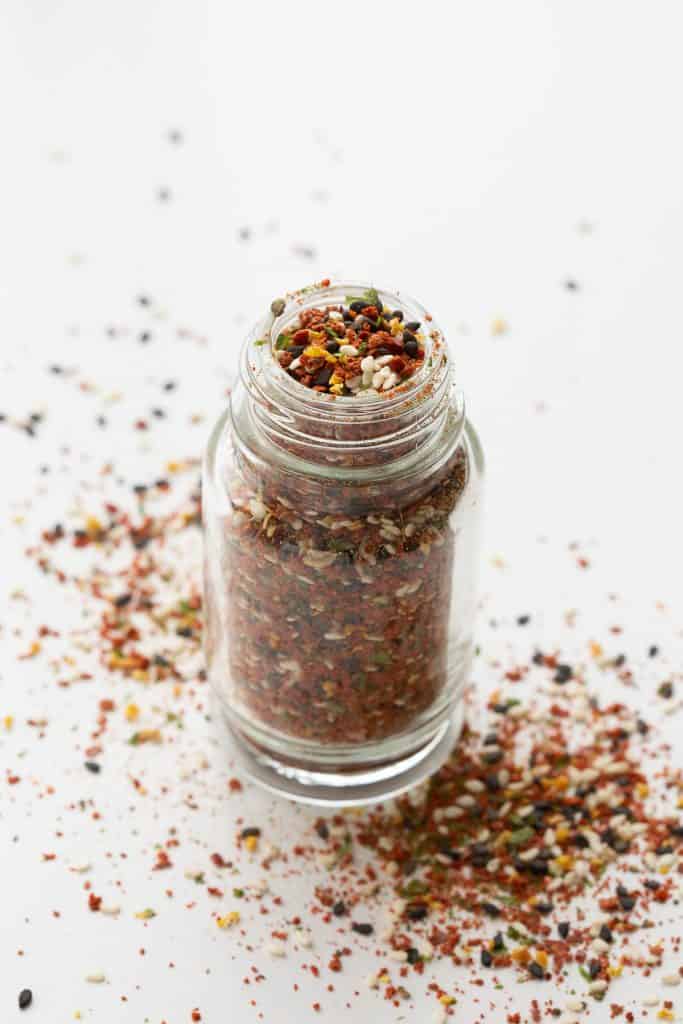
- Furikake – This is a type of Japanese seasoning usually sprinkled over cooked rice. It’s made from a blend of ingredients like dried bonito flakes, sesame seeds, seaweed, egg, salt, sugar and various spices. There are so many furikake flavours out there, so look for packets of assorted furikake flavours and experiment to find your favourite! You can get them from your nearby Asian grocer or online, or even make your own. We’ve also included some optional ideas below to customise your onigiri with different seasonings and fillings. You can buy the furikake pictured below online here.
- Nori – This is the flat seaweed wrapper also used to wrap sushi. You can find it online, at Asian grocers or even from well stocked supermarkets either in full size squares or in mini pre-cut strips. It’s not essential, but does make for a great little hand hold for your homemade onigiri.
How to make Onigiri:
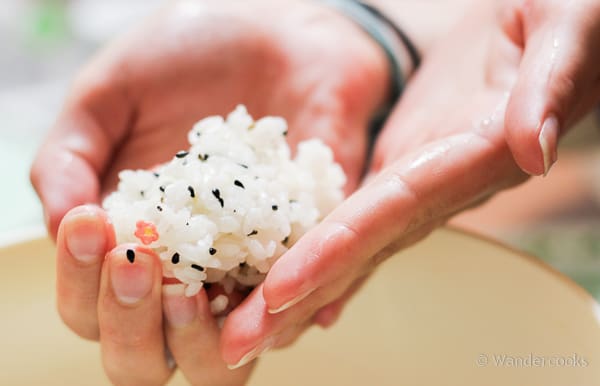

- Pop your cooked rice into a nice mixing bowl. Add the furikake or rice flavouring and mix through evenly. Separate the rice into equal portions, big enough to be a large handful each.
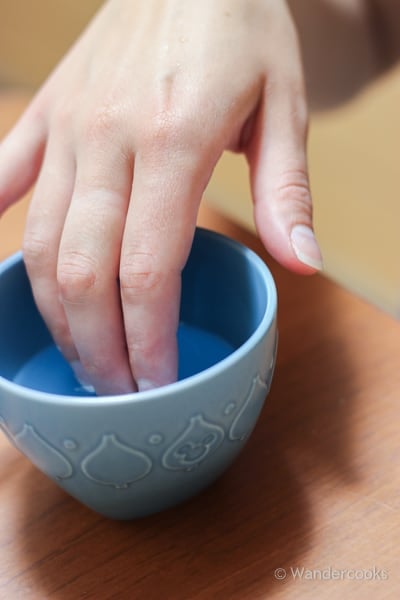
- Wet your hands with water and rub together with a pinch or two of salt. This stops the rice sticking to your hands and helps keep it fresher for longer.
- Take up one portion of rice in your hands.
- If you are hiding some fillings inside, here is where you make an indent, place the ingredients inside and fold the rice over, then lightly press into a ball.
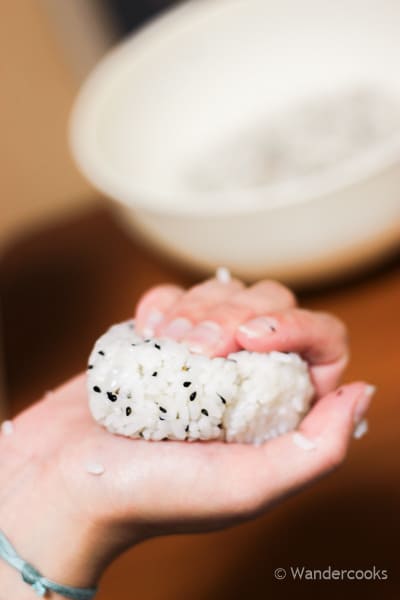
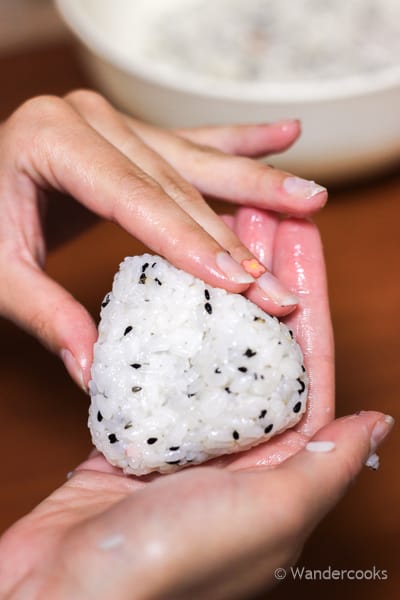
- Using mainly your fingertips while resting the rice on your palm, start to press and squeeze the rice into a triangular shape, rotating as you go so it’s even.
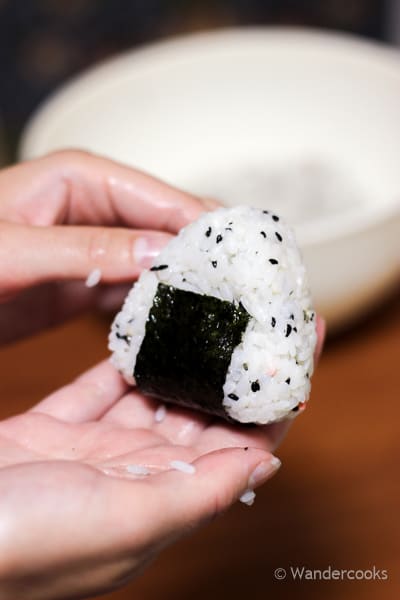
- Place a slice of nori on the bottom of the onigiri (the rough side should face the rice) and fold it up towards to the middle of the onigiri.
Onigiri Filling & Seasoning Ideas
Our favourite method to make onigiri is to use furikake – aka rice seasoning – which is mixed through the rice itself. Here are some of our favourite seasonings, which you might be able to find on online or from well-stocked Asian grocers.
- Gomashio – black sesame salt
- Ume Goma Shio – plum sesame salt (our favourite! The Marumiya brand is delicious and also includes the cute little decorative flowers you can see in our photos)
- Katsuo Fumi – bonito flakes with seaweed and spices
And here are some delicious ideas for fillings that you can hide inside the rice ball itself:
- Shredded chicken and mayonnaise
- Canned tuna and mayonnaise with a spicy chilli seasoning
- Pickled plum – also known as umeboshi
- Simmered kombu seaweed
- Salted salmon or salted cod roe
You’re only limited by your imagination and your tastebuds. What will you add to make your own homemade onigiri?

Wandercooks Tips
- For best results, make your onigiri while the rice is still warm. This will help the rice stick together better and make it easier to form the traditional triangle shape.
- To make your fresh onigiri look more authentic, add a slice of nori around the base. It looks great and tastes great too!
- If you’re making onigiri ahead of time, it’s a good idea to store the nori separately from the rice until you’re ready to eat, otherwise it will go soggy.
FAQs
We recommend using koshihikari![]() sushi rice which is stickier and will hold its shape better. Medium grain rice or short grain rice works best for onigiri as the grains tend to stick to each other better than long grain rice (such as jasmine rice).
sushi rice which is stickier and will hold its shape better. Medium grain rice or short grain rice works best for onigiri as the grains tend to stick to each other better than long grain rice (such as jasmine rice).
Onigiri are best enjoyed fresh. If you need to store them overnight, we recommend wrapping in plastic wrap or popping in a small airtight container before storing them in the refrigerator. Doing this will help retain moisture in the rice and stop the surface from drying out. You can also wrap them in an extra layer (such as paper towel or a regular towel) to stop the rice getting too cold and hard.
If you plan to eat them with a nori seaweed sheet, we recommend keeping it separate until you’re ready to eat.
If your onigiri have dried out a bit but are still good on the inside inside, you can bring them back to life as yaki-onigiri – also known as grilled onigiri. Baste them in a little soy sauce, then fry them in a pan with sesame oil. The heat will crisp up the outside leaving the inside tender and moist. Yum!
Variations & Substitutes
- Use Leftovers as Fillings – How about fried chicken, canned tuna or pickled vegetables?
- Get Creative with Shapes – Instead of triangles, try making them into squares or animals! If you’re feeling creative, use thin slices of nori to create faces or patterns on top of the rice. Careful note: In some areas of Hawaii and Japan, it is considered bad luck to serve circular or round onigiri, as this shape can be reserved for funerals.
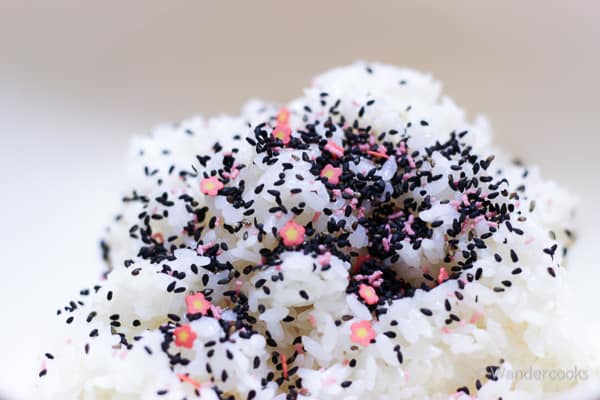
P.S. Heaps of our lovely readers have been asking about the cute little flowers in the furikake we used to decorate our onigiri!
It’s part of a gorgeous Japanese rice seasoning we LOVED in Japan, called Ume Goma Shio (ie plum sesame salt), and it’s made by the brand Marumiya.
The good news is you can easily find Marumiya Brand Ume Goma Shio online from Amazon, or occasionally in the seasoning section of Asian import stores. Just look for the cute little white seal cartoon.
It’s super fun to use and has a lovely salty sesame flavour with a hint of ume (Japanese plum). If you give it a try, let us know what you think or make your own gomashio at home!
Want more tasty Japanese snacks? Try these:
★ Did you make this recipe? Please leave a star rating below!
Ingredients
- 3 cups sushi rice cooked
- 50 grams rice seasoning aka furikake
- water
- salt
- nori sheets / seaweed sheets cut into small rectangles
Instructions
- Pop your cooked sushi rice into a large mixing bowl. Add the furikake rice seasoning and mix through evenly. Note: if you feel like hiding something tasty inside instead, you can skip this step.3 cups sushi rice, 50 grams rice seasoning
- Separate the rice into equal portions, approximately one large handful for each onigiri.
- Wet your hands with water and rub together with a pinch or two of salt. This stops the rice sticking to your hands and helps keep it fresher for longer.water, salt
- Pick up one handful/portion of rice. If you are hiding some fillings inside, here is where you make an indent, place the ingredients inside and fold the rice over, then lightly press into a ball.
- Using mainly your fingertips while resting the rice on your palm, start to press and squeeze the rice into a triangular shape, rotating as you go so it’s even. According to our Japanese friends, you want to end up with one face of the onigiri having a small indentation from your fingers.
- Place a slice of nori on the bottom of the onigiri, rough side in towards the rice. Then fold it up towards to the middle of the onigiri.nori sheets / seaweed sheets
- Repeat for the remaining rice portions.
Video

Recipe Notes
- Rice – We recommend koshihikari rice for the best texture. Cook it in a rice cooker, a multi-cooker, or on the stove using the absorption method. Here’s our full guide on how to cook Japanese sushi rice. Make sure the rice is warm while making your onigiri. This will help the rice stick together better and make it easier to form the traditional triangle shape.
- Furikake – This is a type of Japanese seasoning usually sprinkled over cooked rice. It’s made from a blend of ingredients like dried fish, sesame seeds, seaweed, egg, salt, sugar and various spices. There are so many furikake flavours out there, so look for packets of assorted furikake flavours and experiment to find your favourite! You can get them from your nearby Asian grocer or online, or even make your own. We’ve also included some optional ideas below to customise your onigiri with different seasonings and fillings.
- Nori – This is the flat seaweed wrapper also used to wrap sushi. You can find it online, at Asian grocers or even from well stocked supermarkets either in full size squares or in mini pre-cut strips. It’s not essential, but does make for a great little hand hold for your homemade onigiri.
- To Store – Wrap them in plastic wrap or popping in a small airtight container before storing in the refrigerator. Doing this will help retain moisture in the rice and stop the surface from drying out. You can also wrap them in an extra layer (such as paper towel or a regular towel) to stop the rice getting too cold and hard. Keep the nori separately from the rice until you’re ready to eat, otherwise it will go soggy.
Nutrition


54 Comments
jane @ littlesugarsnaps
16/03/2017 at 8:06 pmOh my. My idea of hell would be singing in public. I think I would have found a way to hide under than tiny table. However, these onigiri sound and look much more pleasing to my senses.
Wandercooks
20/03/2017 at 2:16 pmIf there was a way to hide under that tiny table I certainly would have – but Sarah wasn’t gonna let me out of it that easy! At least it was a good opportunity to brush up on my Beatles lyrics hahaha. And yep, couldn’t agree more about the onigiri… I might have gone back for seconds just to ease those post-karaoke nerves. 😛
Just Jo
16/03/2017 at 6:54 pmOhhh, so this is what the little emoji on my phone is supposed to be! So cute! I hadn’t realised it didn’t necessarily contain raw fish (I’m sorry, I’m not a sushi lover) so I’ve never tried onigiri. You make them sound so tempting though, I would gobble up a batch no problem!
Wandercooks
20/03/2017 at 2:19 pmHahaha yep that’s the one! We didn’t realise they could be so versatile either, but quickly discovered you can fill them with a whole range of flavours. Umeboshi (Japanese pickled plum) was definitely an experience, but you could easily make them with your own favourite fillings or rice seasonings!
Luci's Morsels
16/03/2017 at 1:50 pmI have been wanting to try onigiri and now I am more motivated than ever. This looks simple enough and delicious! Thanks for sharing this!
Wandercooks
20/03/2017 at 2:20 pmYay, hope you enjoy Luci, so keen to hear how you go with them!
Valentina
16/03/2017 at 1:22 pmI’m going to try these with my kids. They will love helping and eating! ;-). Thanks for the step-by-step photos! So helpful.
Wandercooks
20/03/2017 at 2:21 pmOh no doubt they’ll love it Valentina, a chance to play with their food and make their own creations! Glad you enjoyed the step by step.
Allison
22/02/2017 at 4:00 amI can not wait to make my own Onigiri! My husband and I were watching the animé, Food Wars on Hulu, (great for foodies, but not for kiddos!) and I couldn’t wait to find a recipe. Luckily, Pinterest is omniscient, and led me to Wandercooks! Your recipe looks delicious, your story was adorable, but it’s your positive replies in the comment section that I really love. Thank you for showing such encouragement to other cooks! ❤ It’s the little things for me. Now I’m off to start my rice cooker…
Wandercooks
23/02/2017 at 8:28 amAww thanks Allison we hope you guys enjoy them! It’s silly, but onigiri always remind me of playing a stealth/ninja game called Tenchu on the Playstation – they were a health item you could pick up haha. I’m glad they are just as munchable in real life as they look in anime and video games haha. Would love to hear what you guys think of them!
DeeDee Rigell
16/02/2017 at 4:14 amThank for the push! I have World Thinking Day with 20 girl scouts next week and they chose Japan! One group of girls has to do foods of Japan!
Wandercooks
17/02/2017 at 2:44 pmOh how exciting, we’re totally jealous! Hope you all have fun with the onigiri, and if you need any help or suggestions for other Japanese recipes please just let us know – we’d be happy to help! 🙂
OA
10/09/2016 at 9:42 amThese look great, but I’ve never cooked short grain rice before, so I’m kind of lost on what to do. Would anyone mine giving me a few tips on what would be the best way to cook it for this recipe?
Wandercooks
10/09/2016 at 11:10 amHey there thanks for stopping by! The easiest way is in a rice cooker, but the good news is it’s also easy to cook on the stove – just be sure not to remove the lid while cooking as the steam is essential. Here’s our full instructions for three ways to make sushi rice – hope you enjoy!
Theresa
18/06/2016 at 2:09 amWhat are the little flowers on the rice in the photos? What are they made from? They are a cute add to the Onigiri…
Wandercooks
20/06/2016 at 4:19 pmHey Theresa, not sure what they are *exactly*, but they’re flavoured with ‘ume’ aka Japanese plum. They’re part of the ‘goma shio’ (sesame salt) furikake Japanese seasoning. Just found a link to the actual packed on Amazon. So excited! 🙂 Ume Goma Shio
Georgina Ingham | Culinary Travels
13/06/2016 at 1:25 amI love sushi but I confess I have never made it, or any other Japanese food, with the exception of Katsu Curry at home. These look lovely and are inspiring me to try cook more Japanese cuisine.
Wandercooks
14/06/2016 at 11:07 amOoh boy, at least you started with an awesome Japanese recipe! Katsu curry is amazing, I think we’ll have to create our own asap. Hope you enjoy a delicious simple onigiri of your own, would love to know how you go! 🙂
Florentina
12/06/2016 at 7:24 amI have never made these before. They look so cool and sound delicious !
Wandercooks
14/06/2016 at 11:04 amThey’re so much fun to make! And so easy to customise too, so you can always mix and match your favourite seasonings or fillings. I can never go past the black sesame & salt seasoning mix, but when it comes to fillings, chicken and mayo can never go wrong!
Joy @ Joy Love Food
12/06/2016 at 5:54 amWe love Japanese food at our house, these little balls look so good and are so cute, I will have to give it a try soon!
Wandercooks
14/06/2016 at 11:02 amThey’re the cutest food ever haha, and so much fun to eat. I think we’ll have to go make a batch right now! 😛
Kate @ VeggieDesserts
10/06/2016 at 8:55 pmYou’ve made this look so easy. Thanks for the step by step photos!
Wandercooks
14/06/2016 at 11:01 amYou’re welcome Kate, hope you enjoy shaping up your onigiri!
Gloria @ Homemade & Yummy
09/06/2016 at 9:48 pmWe love sushi here, so these look perfect. What a great little party dish. Love it!!
Wandercooks
10/06/2016 at 5:28 pmGreat to hear! These are just like sushi only way easier to make. Hope you enjoy! 🙂
LG
05/03/2016 at 4:58 pmThis is a great base recipe! Very cute. I’d recommend also trying to put some filling inside! Canned tuna or chicken is popular for these..or cooked chicken.. (:
Wandercooks
09/03/2016 at 8:33 amThanks LG! Yes, chicken or tuna inside is amazing. And so easy to do as well. Just indent the rice with your finger, pop in your filling, and cover over with a bit more rice til it’s nice and hidden. Easy!
Tina Jui
04/01/2016 at 5:32 pmYum! I love these, but never thought to make them at home for some reason. Thanks for the little push and inspiration to give it a try at home 🙂
Wandercooks
04/01/2016 at 8:29 pmAnytime Tina. 😀 It’s crazy, because it’s so simple – especially when you have a rice-cooker you can have them ready to take to work in minutes. Let us know how you go with yours!