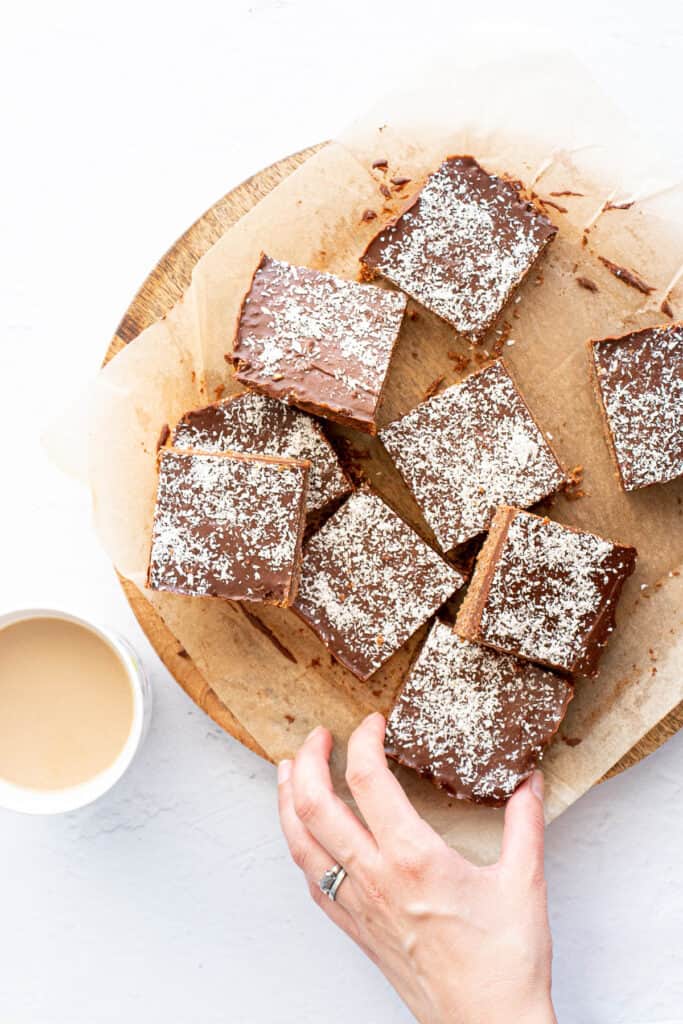
Use up those last few crumbs in the box and make our super easy chocolate Weetbix Slice. This classic Aussie slice recipe is the perfect sweet treat – just mix and bake!

Why We Love This
Weetbix slice is super delicious, inexpensive, and a great way to use up leftover Weetbix – or the crumbs that always end up at the bottom of the box!
It’s perfect with a hot cuppa coffee or tea, or packed up in a lunchbox for school or work. You can even freeze it for later, making it perfect for batch cooking and gifting.
We use less sugar in this recipe compared to other versions, and brown sugar for a more caramelised flavour. Paired with chocolate icing, it’s still plenty sweet!
Related: Hedgehog Slice / Weetbix Cake / Easy Scone Recipe
What is Weetbix Slice?
Weetbix slice is a super easy, old fashioned slice recipe we grew up with in Australia. It’s quite similar to other classic treats like chocolate concrete or Aussie crunch.
The most popular version is today’s chocolate coconut Weetbix slice, made with crushed Weetbix biscuits, flour, desiccated coconut butter, sugar and cocoa. Once baked, it’s iced with a simple chocolate icing. An alternative version is lemon Weetbix slice, made with lemon zest in the base and lemon icing on top.
This iconic slice is hugely popular for school fetes and kids parties. Back in the 80’s Aussie mums would also whip up a batch to put in kids school lunch boxes.
Just like our family favourite vanilla slice and jelly slice recipes, our Weetbix slice is a go-to quick and easy recipe that’s great to take to birthdays and celebrations.
What You’ll Need
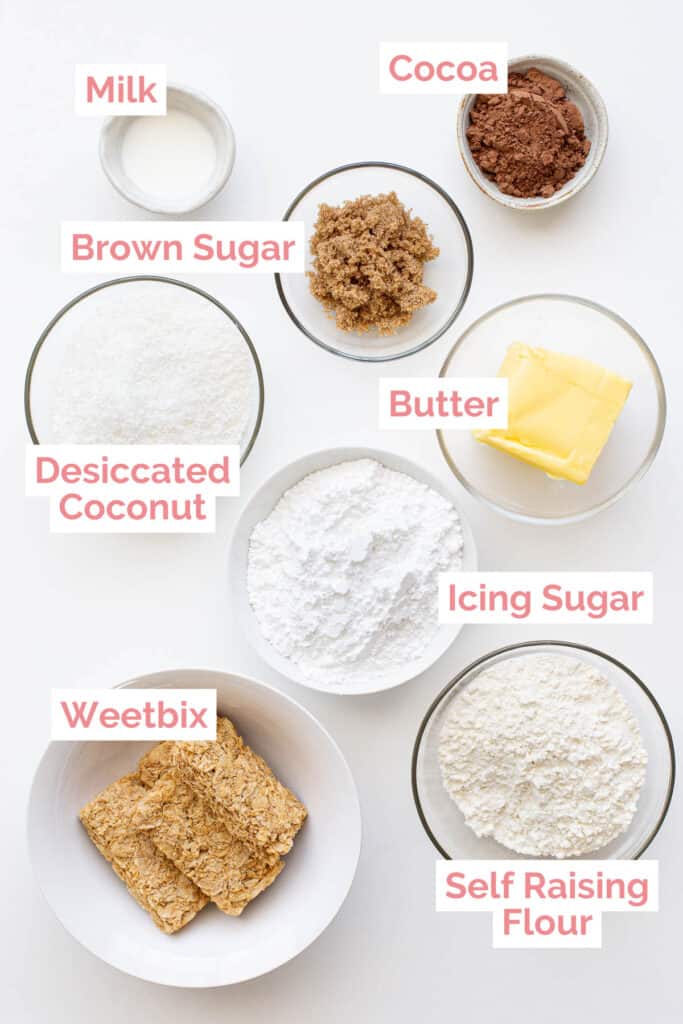
- Weetbix – The star of this amazing slice! If you don’t have any on hand, don’t worry! You can sub with any of your favourite cereals such as Cornflakes, Nutrigrain, Sultana Bran, or even quick oats etc. You can also use gluten free Weetbix varieties if you need.
- Desiccated Coconut – This adds to the flavour and texture of the slice. Sub with shredded coconut, or if you don’t have quite enough, make up the rest of the quantity with quick oats.
- Brown Sugar – We use brown sugar for a slightly caramelised flavour, but you can use any kind of sugar you have on hand.
- Self Raising Flour – Sub with 1 cup of plain flour and 1 tsp of baking powder if you need. You can also swap for a high quality gluten-free flour if you prefer.
- Butter – You can use salted or unsalted butter or swap for margarine or coconut oil if you prefer.
- Icing Sugar – Also known as powdered sugar or confectioner’s sugar.
- Cocoa – Use quality baking cocoa for a rich chocolate flavour. Regular drinking chocolate is made with sugar so won’t give you the same intensity of chocolate flavour (and may make the slice too sweet).
How to Make Weetbix Slice
Weetbix Slice Base
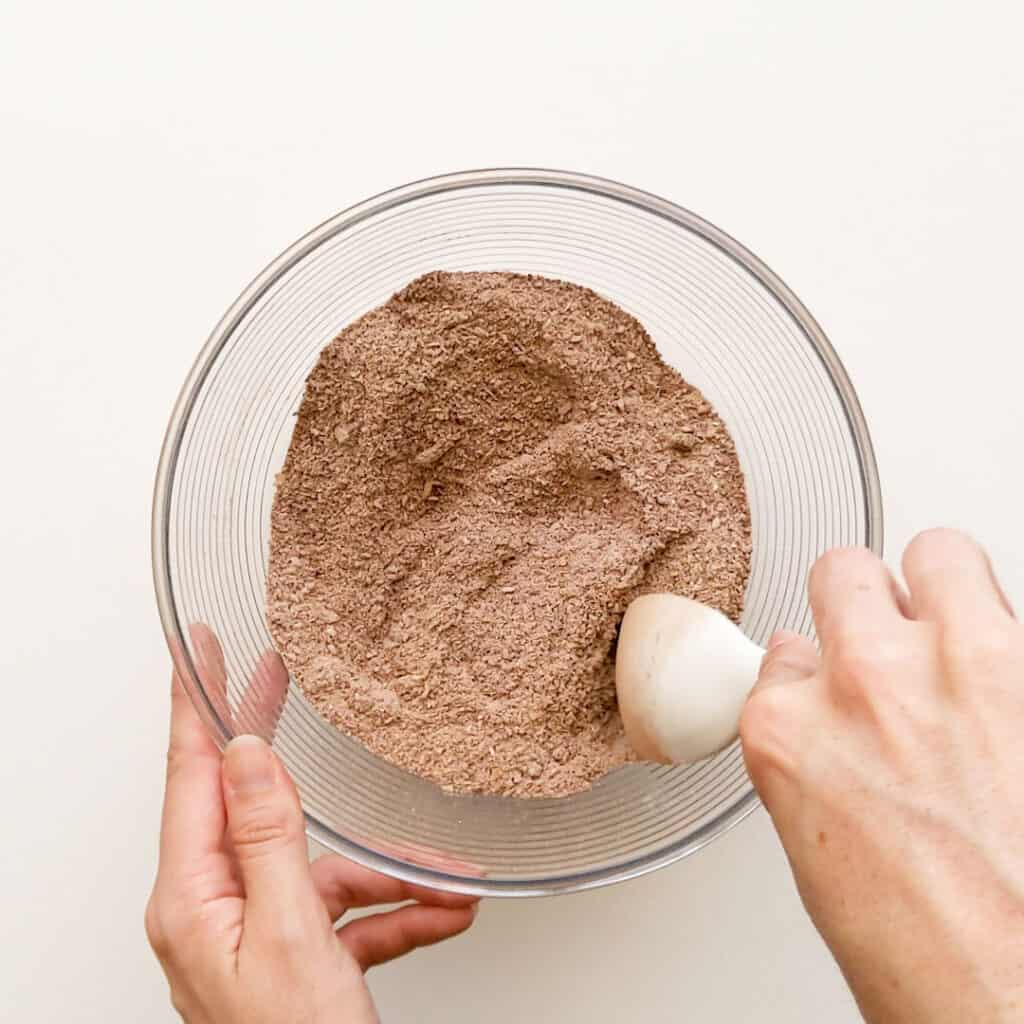
- Pre-heat the oven to 180C / 360F. Blend Weetbix biscuits in a blender until broken up into a fine powder. Transfer to a large bowl and mix in the remaining dry ingredients (self raising flour, sugar, desiccated coconut and cocoa powder).
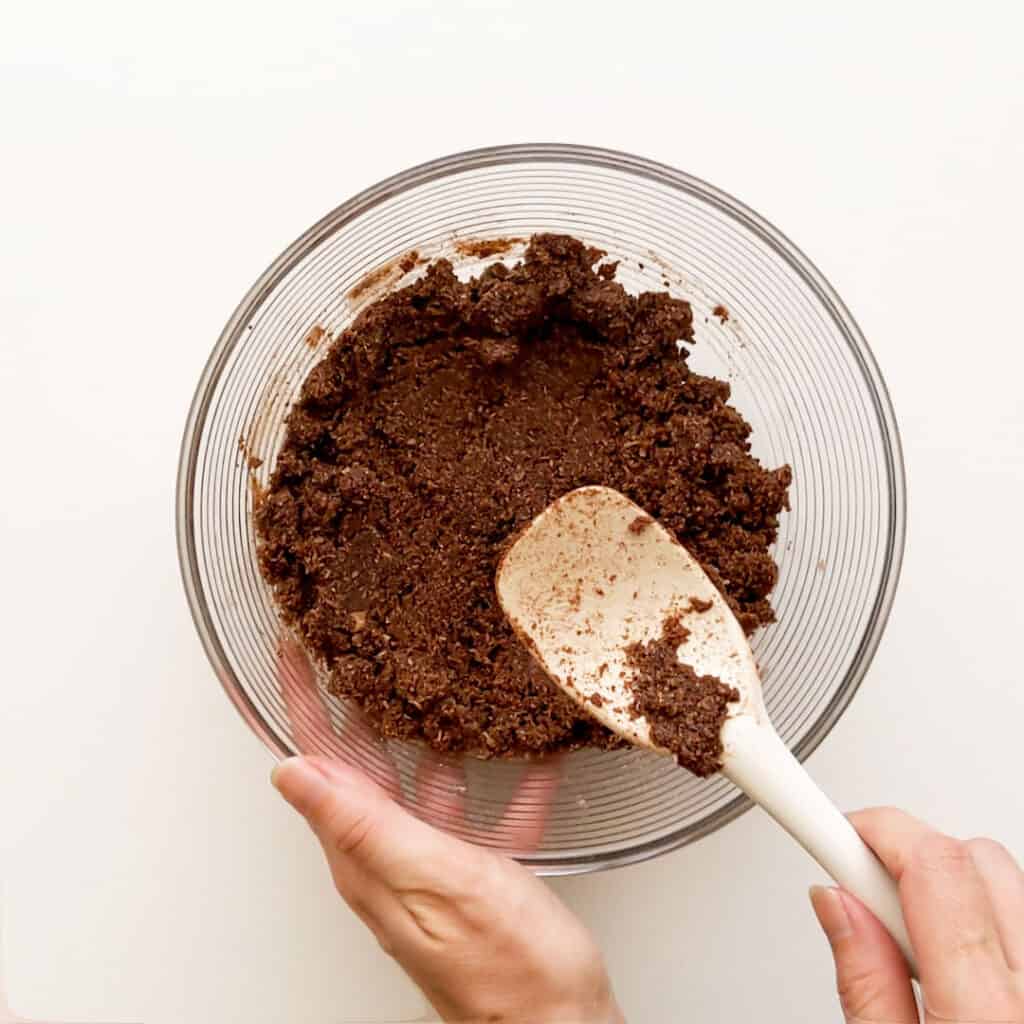
- Pour in the melted butter and mix until well combined.
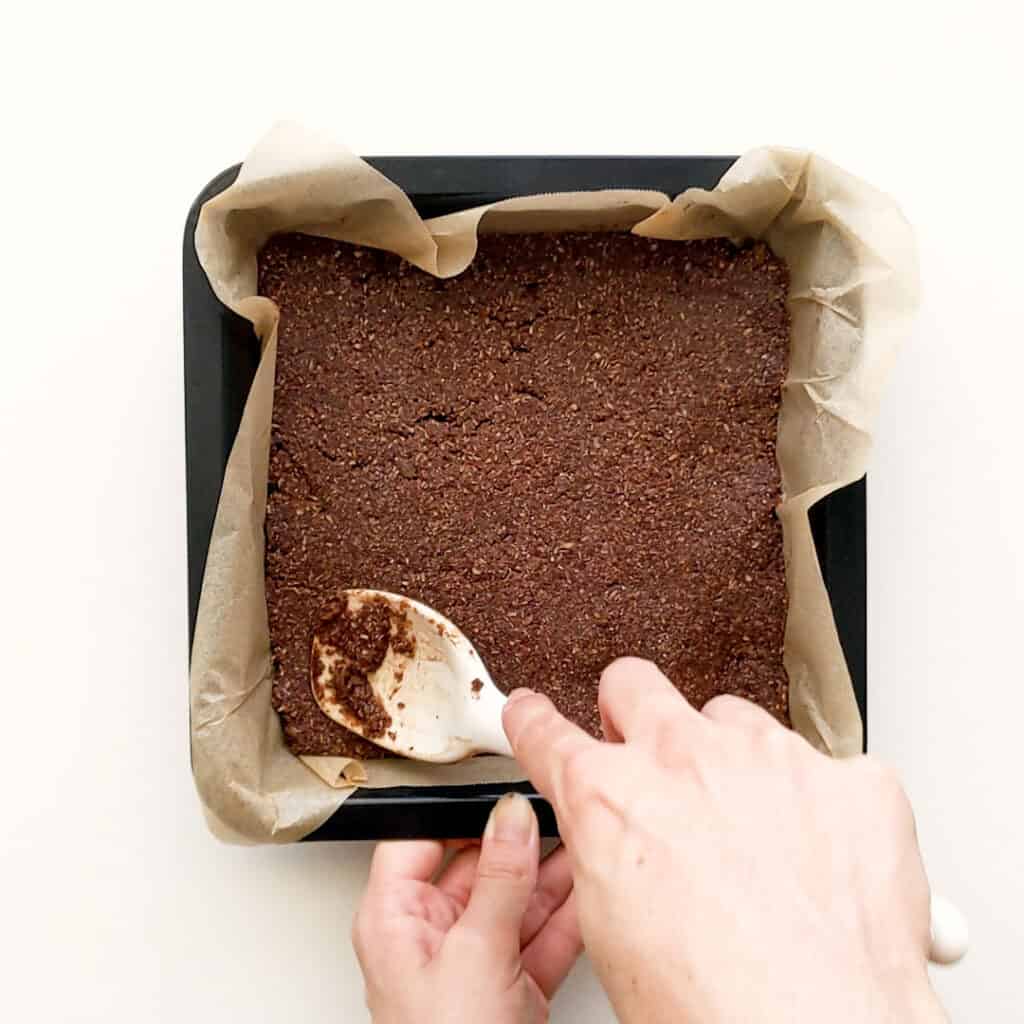
- Press the mixture out into a 24 x 24 cm (9 x 9 in) square pan lined with baking paper.
- Bake for 15 minutes, then remove from the oven and allow to cool down slightly while you make the icing. Tip: Leave the slice in the tin to avoid it crumbling as it cools. If you make the mistake of taking it out while too hot and it crumbles, use a spoon to press it back down while it’s still warm and you’ll be able to salvage it – no stress!
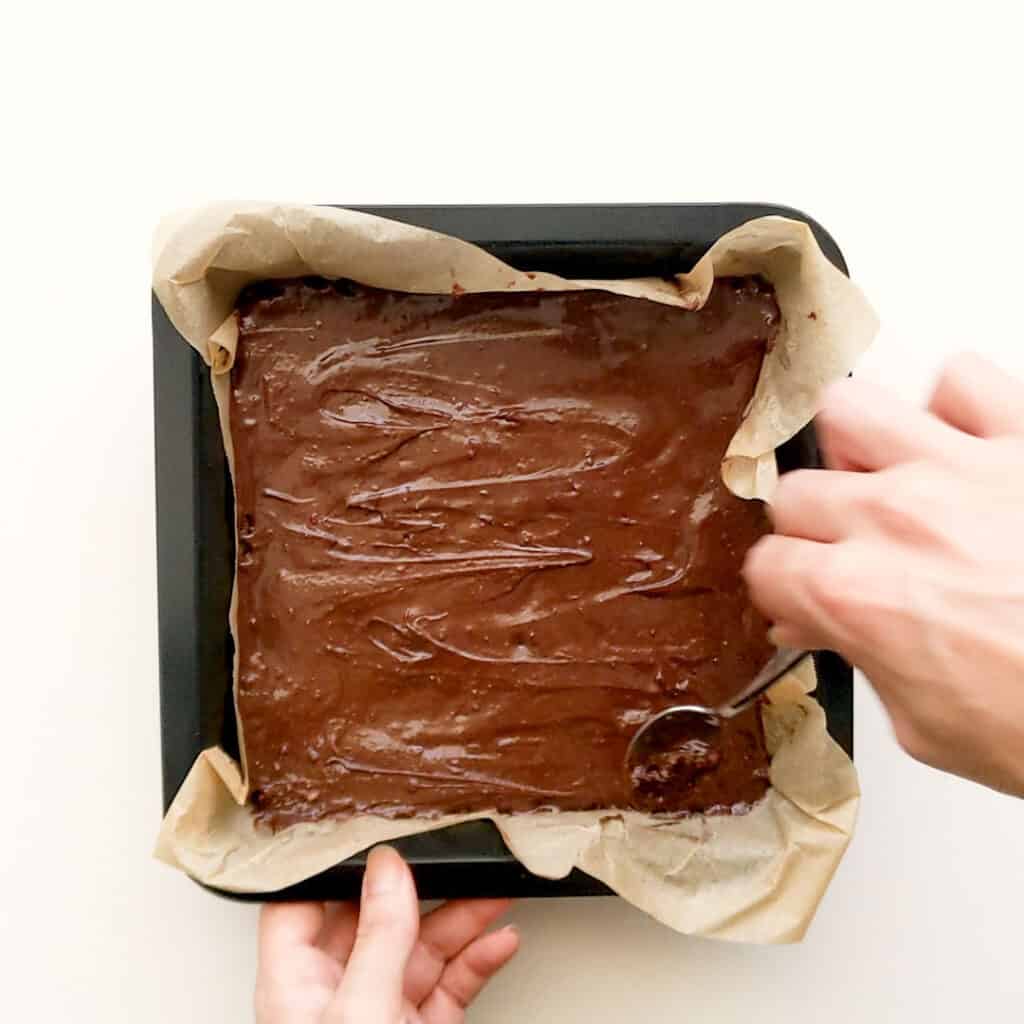
- In a small bowl mix together the icing sugar, cocoa powder, butter and milk with a spoon. Tip: Add 1-2 tsp of extra milk or warm water as required to loosen the icing if you find it’s sticking to the spoon instead of the slice and it’s too hard to spread. Pour onto the still warm slice and spread out over the surface using the back of the spoon.
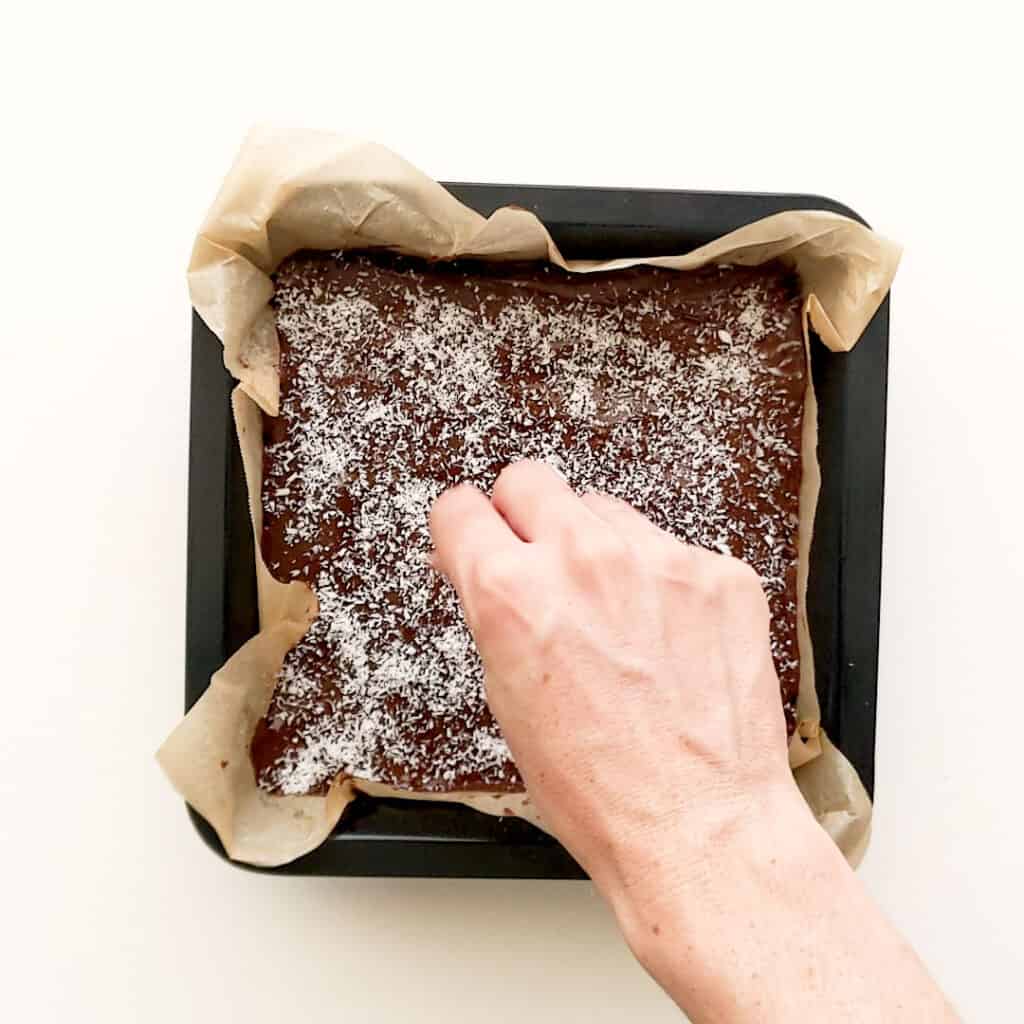
- Garnish the slice with extra desiccated coconut.
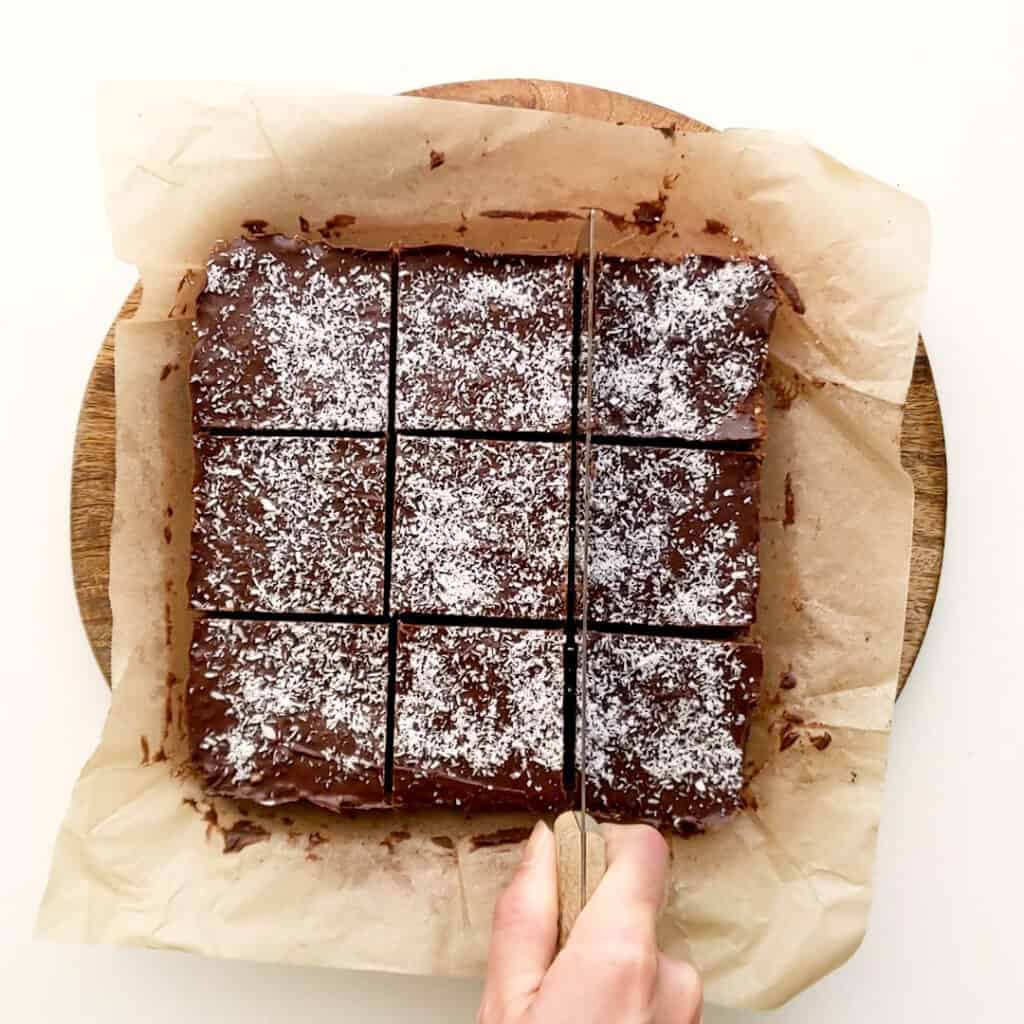
- Pop into the fridge to cool for at least an hour (or overnight) before slicing. The firmer the slice, the easier it will be to cut without it crumbling!
Wandercook’s Tips
- Just Use Crumbs – No need to use whole Weetbix biscuits, just save up the crumbly bits from the bottom of your box and store in a jar until you have enough to make this recipe!
- Texture – For a fine crumb texture in the slice, pulse the Weetbix crumbs in a blender or food processor for a few seconds, or crush using a mortar and pestle for extra fun.
- Tray Size – We use our trusty 24 x 24 cm (approx 9 x 9 inch) square lamington tray which is about 5 cm (2 inch) deep. You can also use a wide rectangular slice tin.
- Bite Size Pieces – This recipe is so moreish, so we recommend slicing into smaller pieces to make it go even further (and you can feel better about eating ‘just one more piece’. 😉
- Storage – Keep in an airtight container in the fridge for up to one week.
FAQs
Yep you can! Once sliced up, store in an airtight container in the freezer for around 2-3 months. Pop a slice (still frozen) into your lunchbox and it will be defrosted by the time you’re ready to eat.
There are a couple of reasons: It may be that you didn’t use quite enough butter for the amount of dry ingredients, you may not have cooked it long enough or you tried to move or cut the slice while it was still warm. The reason for this is the butter is the only liquid holding everything together – there’s no eggs or condensed milk to bind it all. So, while the butter is hot, it’s still in a liquid form. Once it cools, it will set, holding the slice together firmly to keep it’s shape.
Variations
- Alternate Presentation – Spoon out the mixture into muffin trays before baking for neat individual portions.
- Alternate ‘Icing’ – Skip the original icing from the recipe, and scatter chocolate chips or melts across the top of the slice before baking. They’ll melt across the surface as it bakes! Otherwise, you could melt a big batch of chocolate in the microwave and slather over the top after baking, like we do in our hedgehog slice.
- Extra Texture – Add crumbled Malteasers or chopped marshmallows on top before setting in the fridge. Or add a handful of crushed nuts into the mixture before baking.
- Extra Flavour – Stir in vanilla essence or melted peanut butter before baking.
- Dried Fruit – Add a handful of dried fruit such sultanas, currants, dates, raisins or mixed fruit.
- Big Batch – Double or even TRIPLE the recipe to make a big batch for a special occasion!
- Optional Garnish – Top with rainbow sprinkles or chocolate sprinkles (hagelslag), choc freckles or crumbled peppermint crisp.

Try these amazing recipes next:
- Easy Aussie Trifle – The perfect super quick trifle recipe for busy cooks.
- Vanilla Slice – This speedy slice is perfect for parties.
- Aussie Crunch – A beloved crunchy choc cornflake slice, so easy to make.
- Coconut Ice – The classic two layer treat for sweet tooths!
- Caramilk White Christmas – Sweet, delicious and oh so festive slice.
★ Did you make this recipe? Please leave a comment and a star rating below!

Equipment
- 1 9×9 in (24cm) Baking Dish or slice tray
Ingredients
For the slice
- 60 g Weetbix biscuits 4 pieces
- 180 g butter melted, sub with coconut oil
- ¼ cup brown sugar 30 g
- 1 cup desiccated coconut 85 g
- 1 cup self raising flour 120 g, sub plain flour + 1 tsp baking powder
- 2 tbsp cocoa powder not drinking chocolate
For the icing
- 1 cup icing sugar / powdered sugar 120 g
- 1 1/2 tbsp cocoa powder not drinking chocolate
- 1 tbsp milk
- 50 g butter softened slightly
- 2 tbsp desiccated coconut to garnish
Instructions
Weetbix Slice Base
- Pre-heat the oven to 180C / 360F.
- Blend Weetbix biscuits in a blender until broken up into a fine powder. Transfer to a large bowl and mix in the remaining dry ingredients (self raising flour, sugar, desiccated coconut and cocoa powder).60 g Weetbix biscuits, ¼ cup brown sugar, 1 cup desiccated coconut, 1 cup self raising flour, 2 tbsp cocoa powder
- Pour in the melted butter and mix until well combined. Press the mixture out into a 24 x 24 cm (9 x 9 in) square pan lined with baking paper.180 g butter
- Bake for 15 minutes, then remove from the oven and allow to cool down slightly while you make the icing. Tip: Leave the slice in the tin to avoid it crumbling as it cools. If you make the mistake of taking it out while too hot and it crumbles, use a spoon to press it back down while it’s still warm and you’ll be able to salvage it – no stress!
Chocolate Icing
- In a small bowl mix together the icing sugar, cocoa powder, butter and milk with a spoon. Tip: Add 1-2 tsp of extra milk or warm water as required to loosen the icing if you find it’s sticking to the spoon instead of the slice and it’s too hard to spread.1 cup icing sugar / powdered sugar, 1 1/2 tbsp cocoa powder, 50 g butter, 1 tbsp milk
- Pour icing onto the still warm slice and spread out over the surface using the back of the spoon. Garnish with extra desiccated coconut. Pop into the fridge to cool for at least an hour (or overnight) before slicing. The firmer the slice, the easier it will be to cut without it crumbling!2 tbsp desiccated coconut
Video

Recipe Notes
- Just Use Crumbs – No need to use whole Weetbix biscuits, just save up the crumbly bits from the bottom of your box and store in a jar until you have enough to make this recipe!
- Texture – For a fine crumb texture in the slice, pulse the Weetbix crumbs in a blender or food processor for a few seconds, or crush using a mortar and pestle for extra fun.
- Tray Size – We used our trusty 24 x 24 cm (approx 9 x 9 inch) square lamington tray which is about 5 cm (2 inch) deep.
- Bite Size Pieces – This recipe is so moreish, so we recommend slicing into smaller pieces to make it go even further (and you can feel better about eating ‘just one more piece’. 😉
- Storage – Keep in an airtight container in the fridge for up to one week.
Nutrition


14 Comments
SusieQ
14/01/2024 at 3:38 pmIs it 180FF?
Wandercooks
15/01/2024 at 9:40 amYes, it’s fan forced. 🙂
Maz
20/11/2023 at 4:17 pmBasic recipe … often the best. This doesn’t disappoint! I like it because it’s not overly sweet, and my grandchildren always ask for more. 😉
Wandercooks
21/11/2023 at 8:59 amAmazing Maz. It is good to have an easy go-to recipe – especially for the grandkids! 😁
Renee
10/09/2023 at 7:36 pmSo good have made twice in one week! Family love it and so do I 😋 perfect combination of all ingredients 👌🏻
Wandercooks
11/09/2023 at 6:46 amOh wow, amazing work! Thanks for letting us know and so happy to hear everyone enjoyed it. 😁
Sue
20/08/2023 at 10:16 amIt tastes good, just is a bit too crumbly for toddlers to eat without crumbs on nans floor, despite me following the recipe to the letter.
Wandercooks
22/08/2023 at 10:02 amHey Sue, this slice does err on the side of crumbly for toddler hands. If you want it a little more solid for the little ones, you can add more butter – I’d up it to 200g instead. 🙂
Leanne
13/07/2023 at 10:38 amSo easy to make and very yummy. I love that the sweetness is just enough.
Wandercooks
17/07/2023 at 4:02 pmSo glad you enjoyed it Leanne!
Melissa
06/07/2023 at 2:49 pmVery easy to make & my family loves it.
So yummy
Wandercooks
06/07/2023 at 4:16 pmFantastic Melissa, so happy to hear. I’m sure it didn’t last long!
Linda
02/03/2023 at 9:19 pmThis slice is super yummy with marshmallow on top instead of icing. I used to make it for my kids many years ago.
Wandercooks
03/03/2023 at 9:59 amNow that’s a very cool idea!