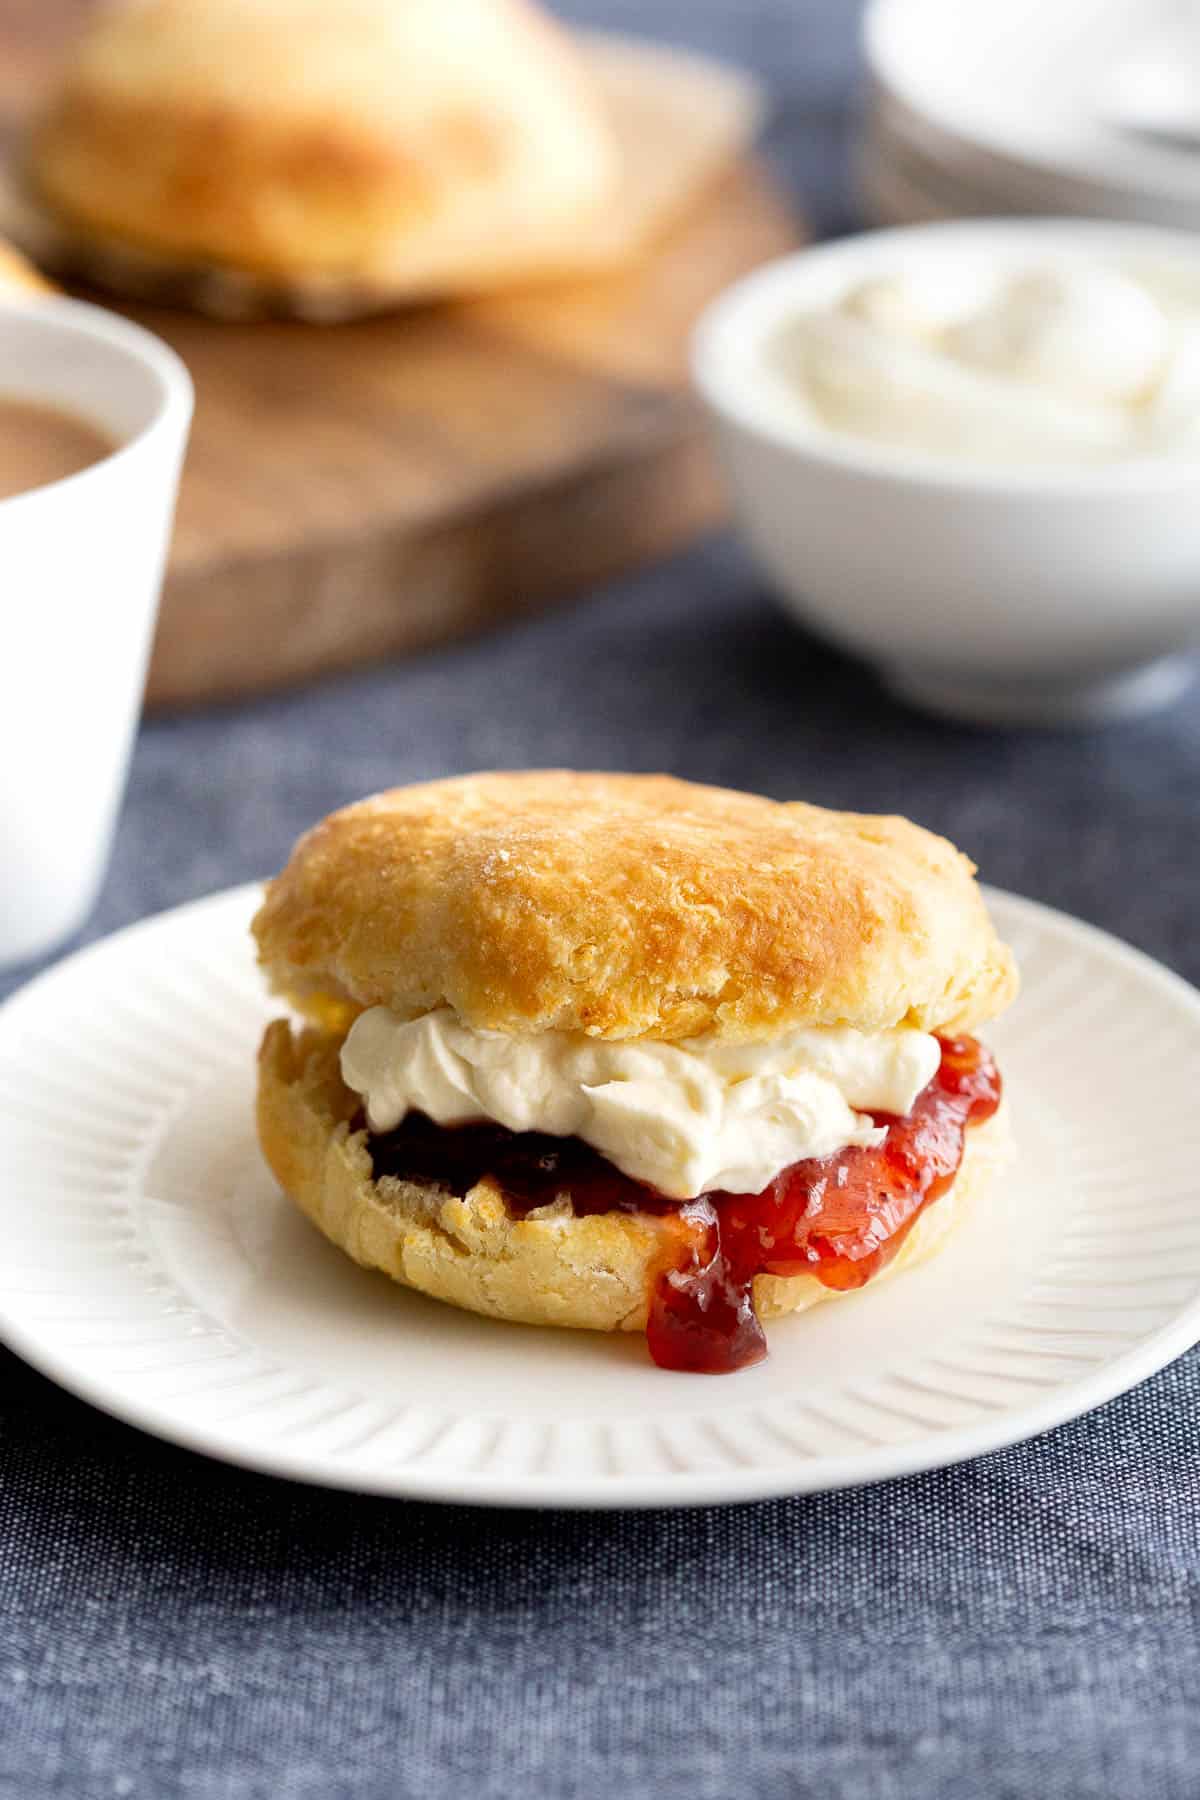
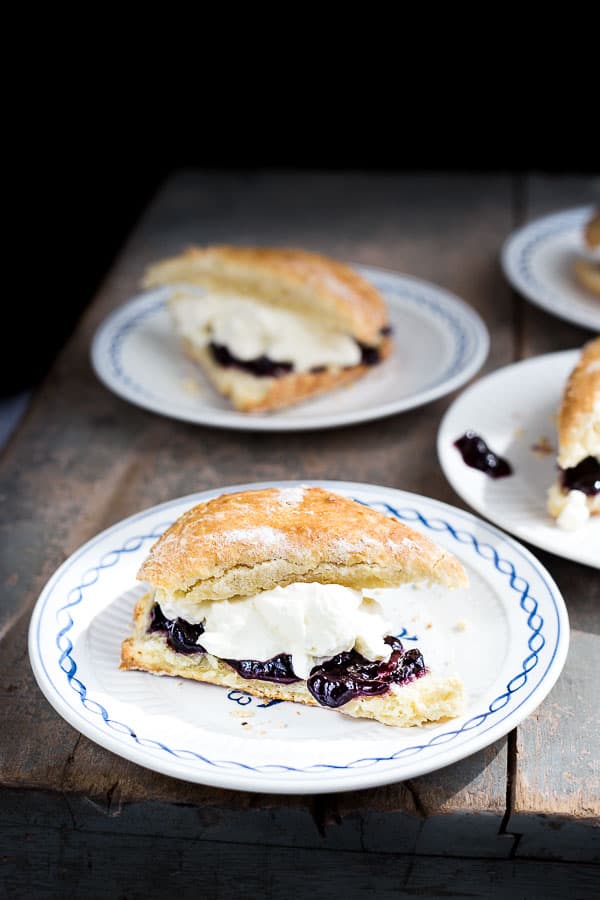
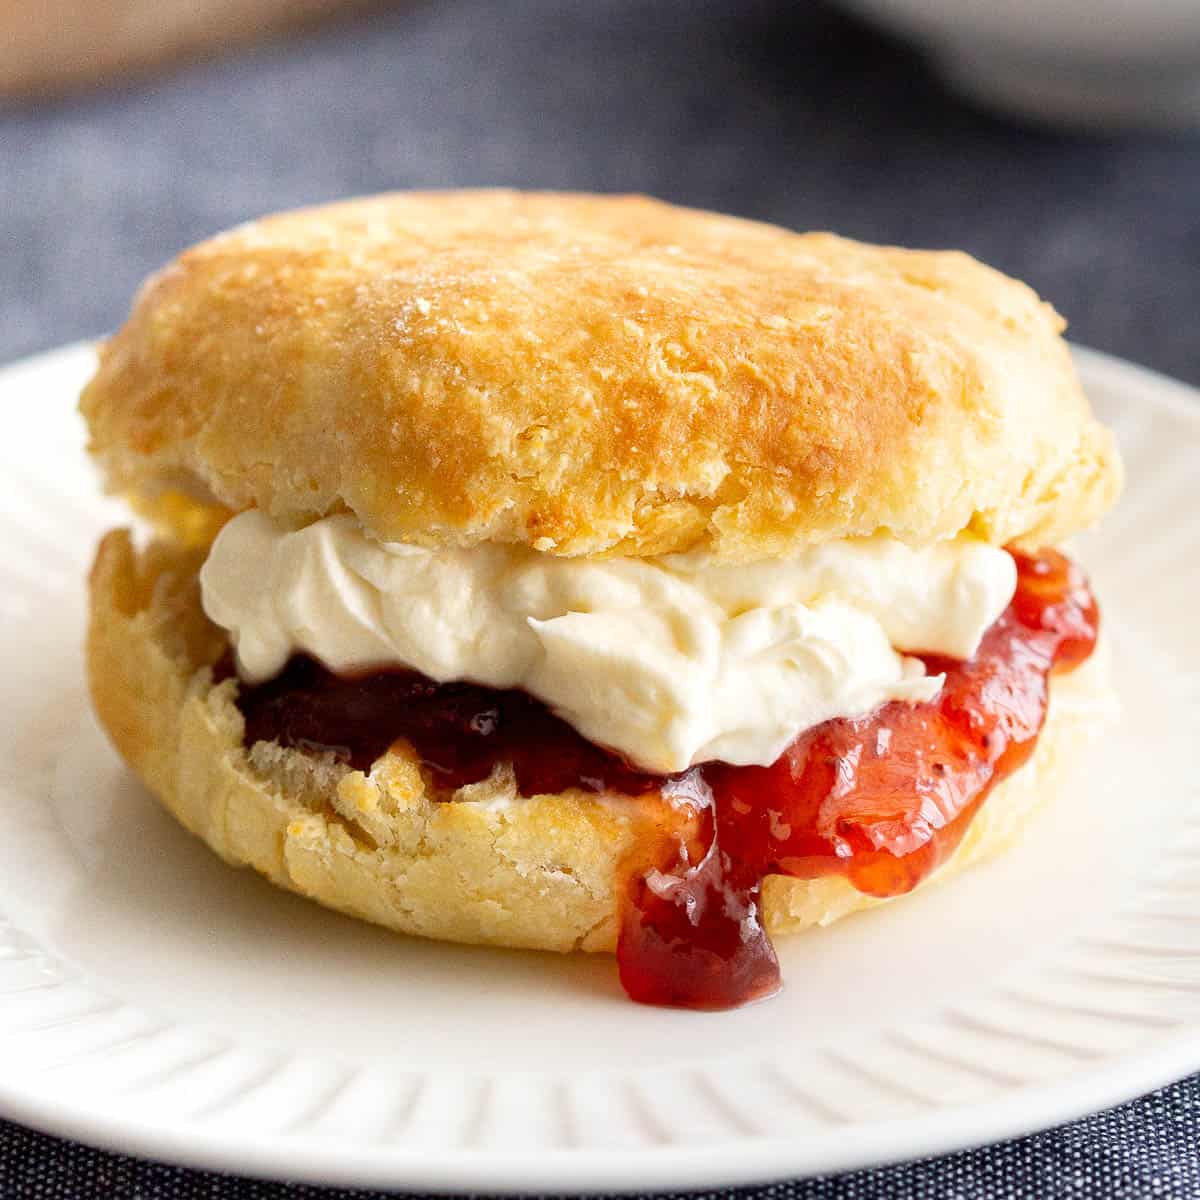
The best scones are always made from scratch! Make Grandma’s easy scone recipe – crumbly on the outside, soft and flaky on the inside, perfect for slathering with jam and cream.
Why We Love This
Transform basic pantry staples to the best scones ever in no time! This easy scone recipe is made the traditional way by hand, but you can use a food processor to make it even easier.
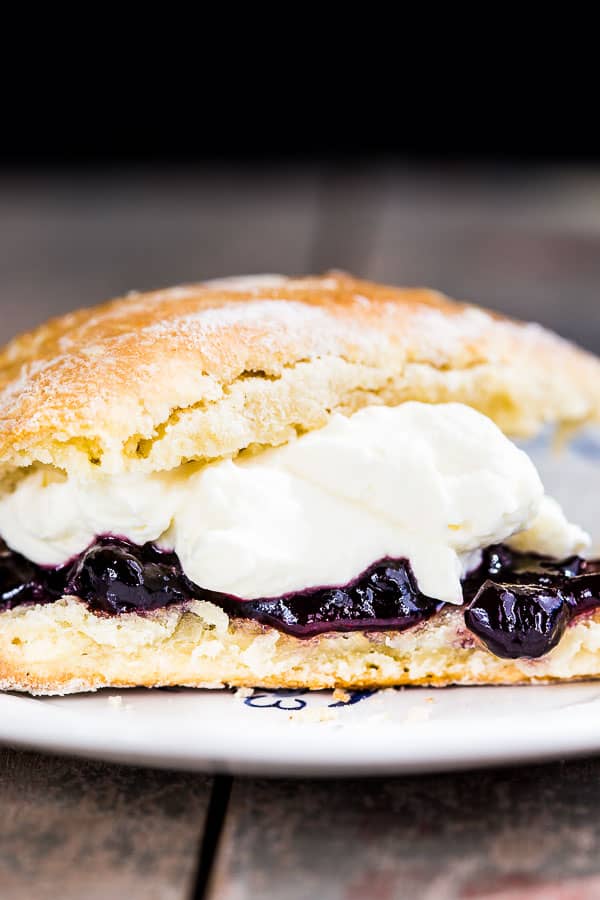
Slather your freshly baked scones in butter, jam or cream for the best afternoon snack or store them in the freezer for later.
This recipe is super adaptable to add new flavours or textures – see our variations section below for more ideas.
Related: Ginger Fluff Sponge / Apple Crumble with Muesli / Weetbix Cake with Dates
What are Scones?
Scones are a type of quick bread made with baking powder instead of yeast. They’re similar in appearance to Australian damper bread, and both can be prepared with either savoury or sweet additions to the dough.
Today we’re sharing Laura’s Grandma’s scone recipe, perfected over years of baking for family. It brings back memories of when the whole family would gather at Gran’s for a feast of epic proportions – scones, party pies, sausage rolls, and Grandma’s famous pea and ham soup!
Scones vs Biscuits
Scones are often confused with American biscuits, but there are a couple of key differences. American biscuits tend to be sweeter, lighter and fluffier, with visibly flaky layers, and sometimes include fruit or other additions. Scones, on the other hand, are a little more dense with a crisp and crumbly texture. They’re traditionally served with fresh butter, jam, and thickened cream (heavy cream) or clotted cream.
What You’ll Need
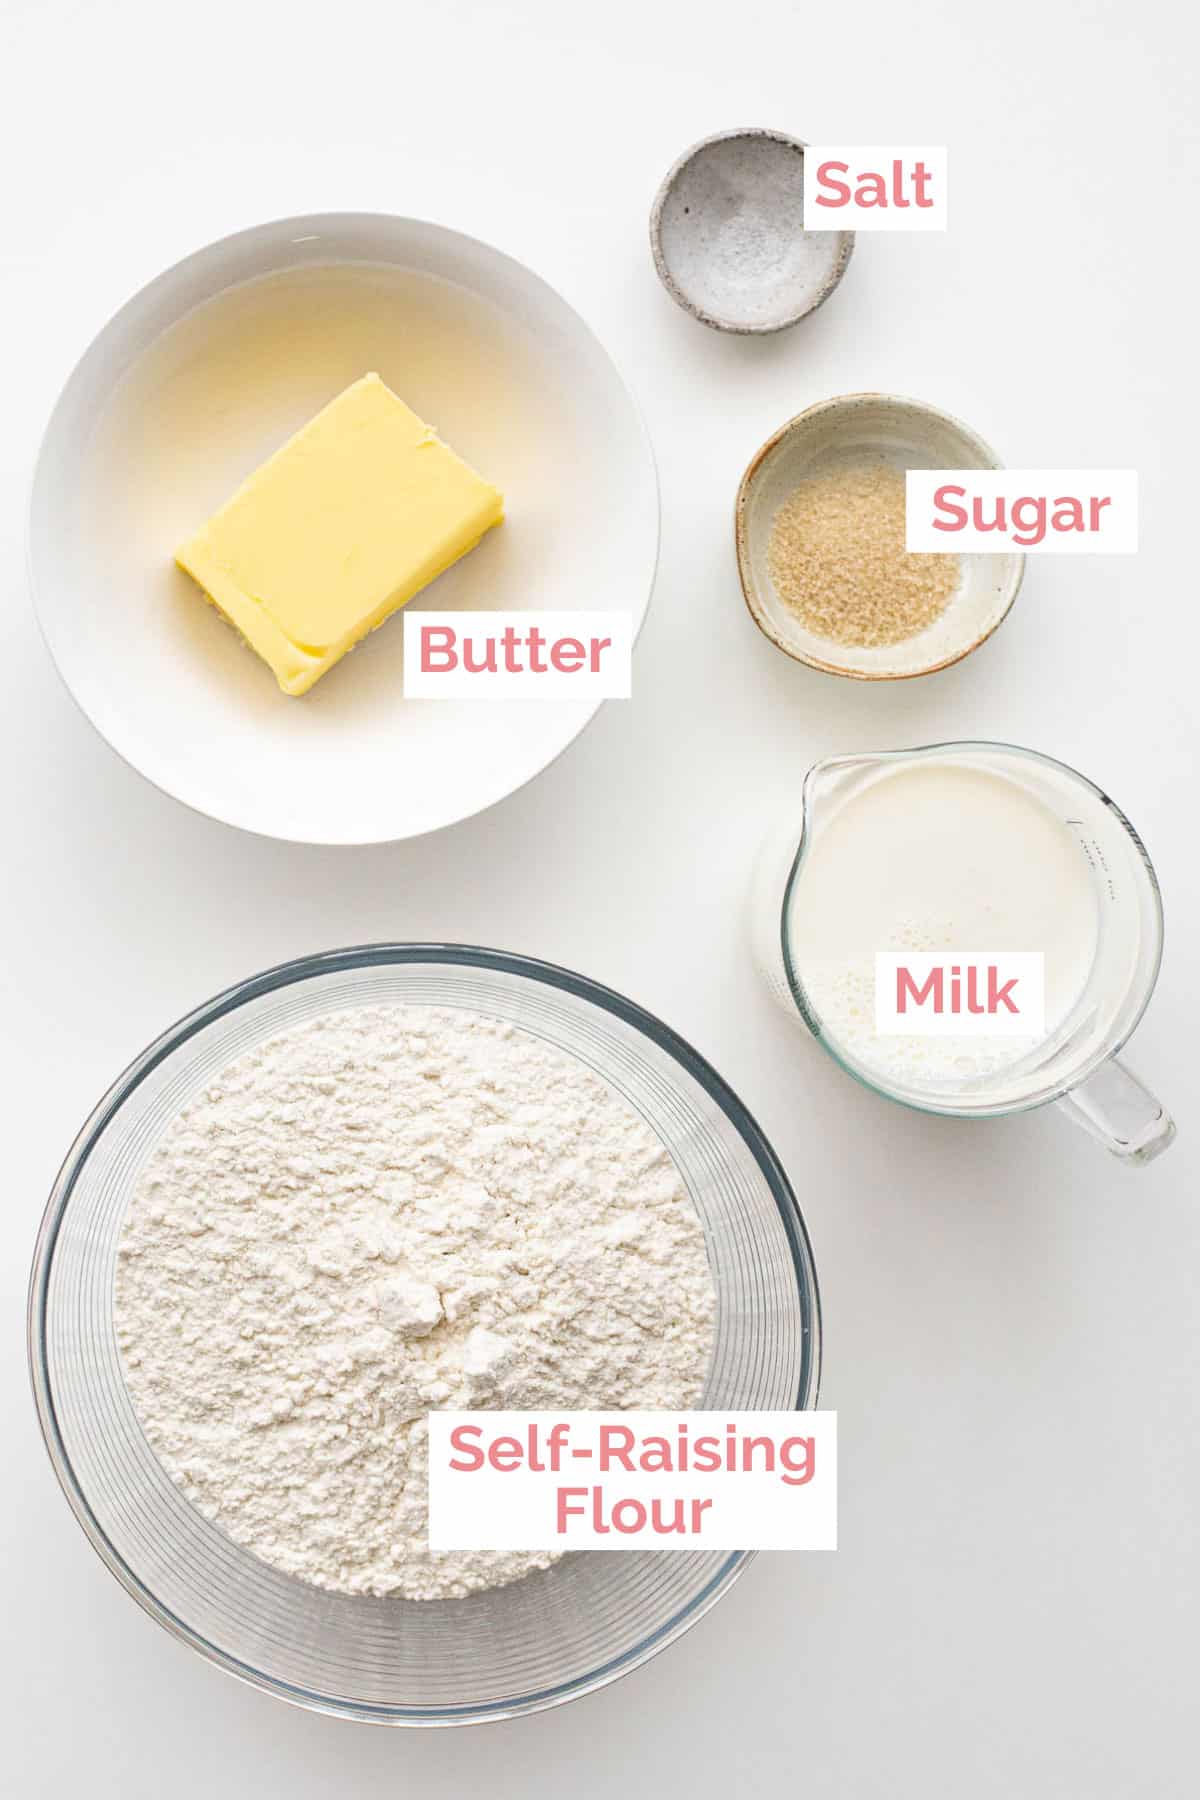
- Self Raising Flour – We use self-raising flour so there’s no need to add baking powder in separately. It results in more even textured scones as the raising agent is more evenly mixed through the flour. Sub with plain flour and sift in 4 tsp baking powder if you need.
- Butter & Milk – You can use salted or unsalted butter, it’s up to you. Full cream milk or buttermilk will give you light and fluffy scones. Both ingredients should be cold when you start working with them, so only take them out of the fridge right before you use them.
How to Make Scones

- Preheat the oven to 230˚C / 450˚F and line a tray with baking paper. Place the flour, sugar and salt into a large mixing bowl. Add the chopped butter and dig in with your hands. Mix the butter and flour together with your fingers until you get a crumbly texture with no lumps.
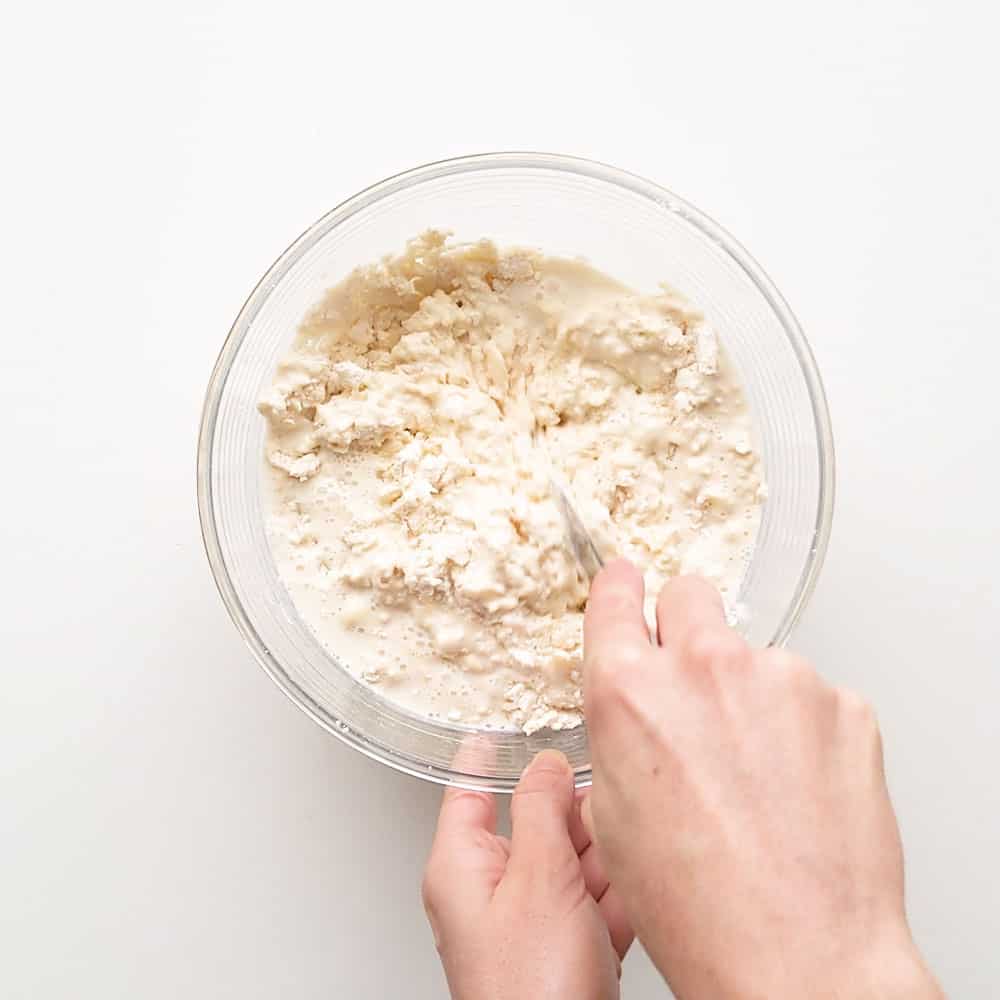
- Make a well in the centre and pour in the milk. Use a butter knife or dough scraper to ‘cut’ the flour in all directions until the dough just starts to come together into a sticky dough ball.
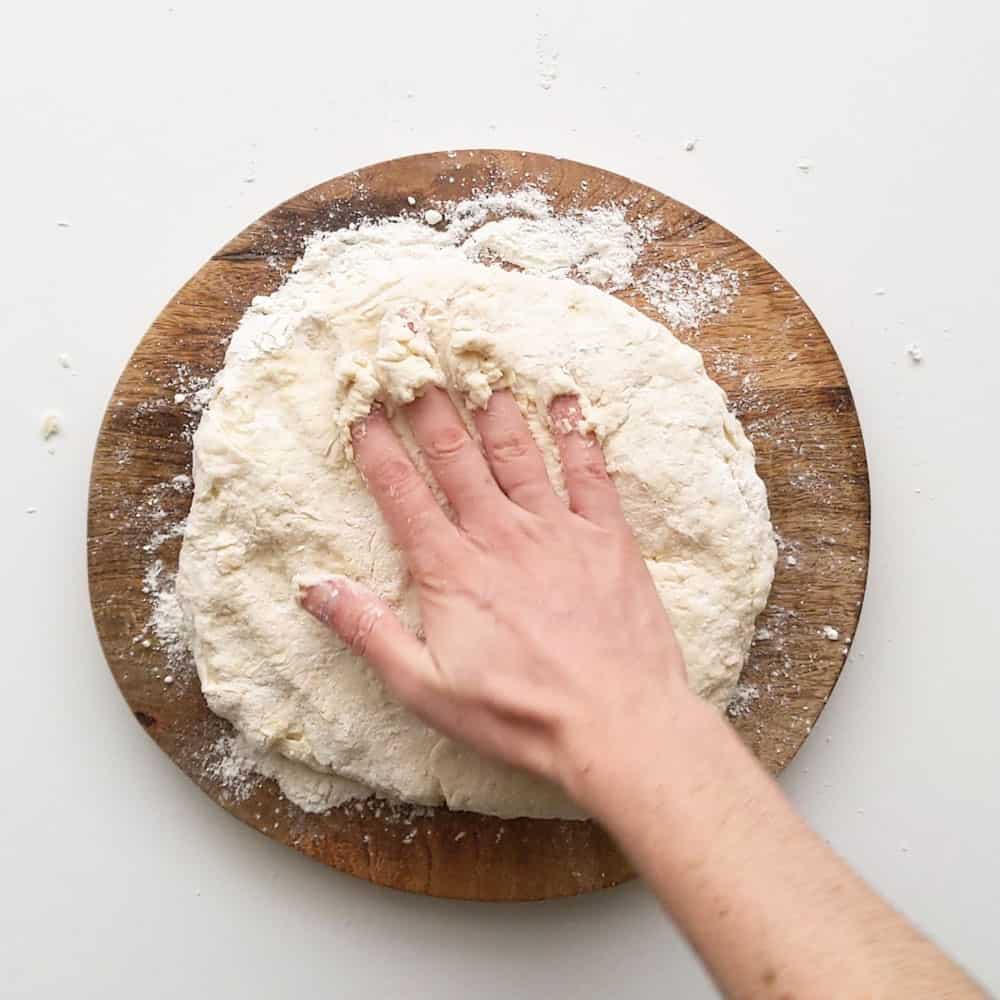
- Turn out the dough onto a lightly floured surface. Gently press out into a flat 2 cm / 1 in thick circle.
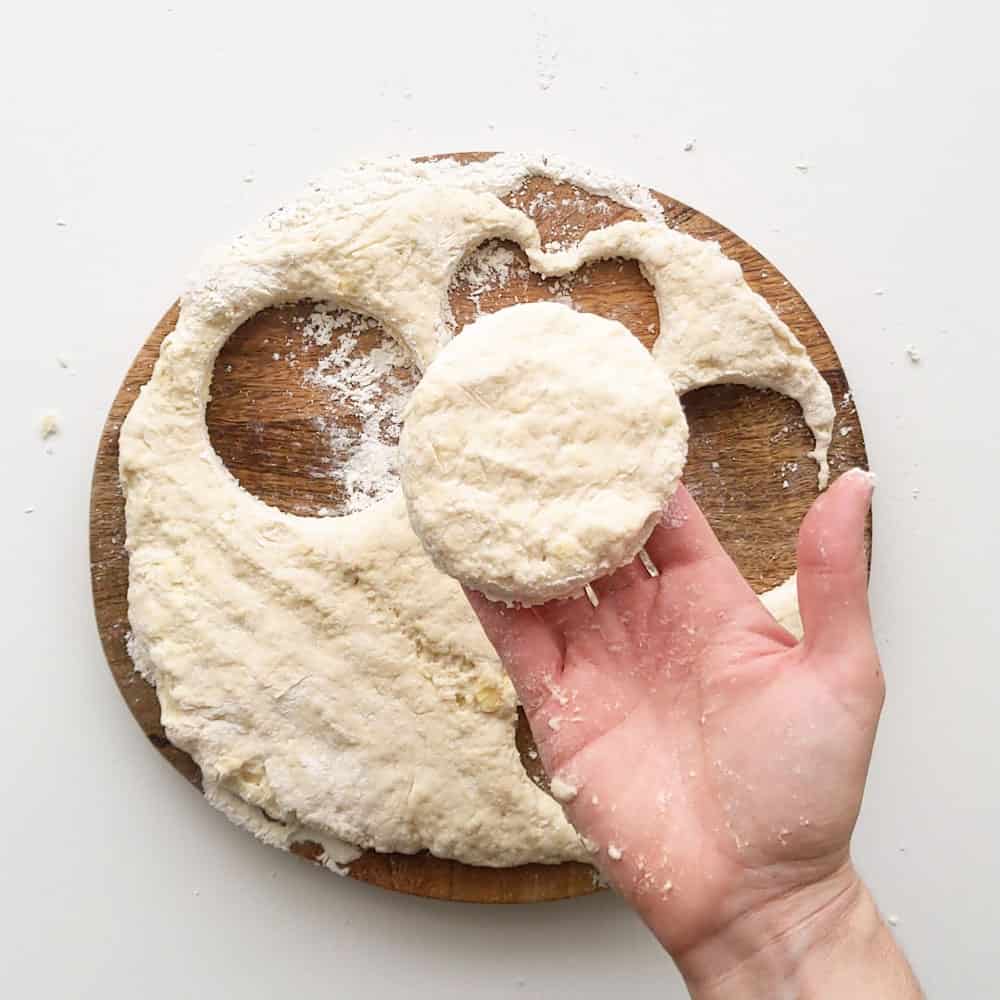
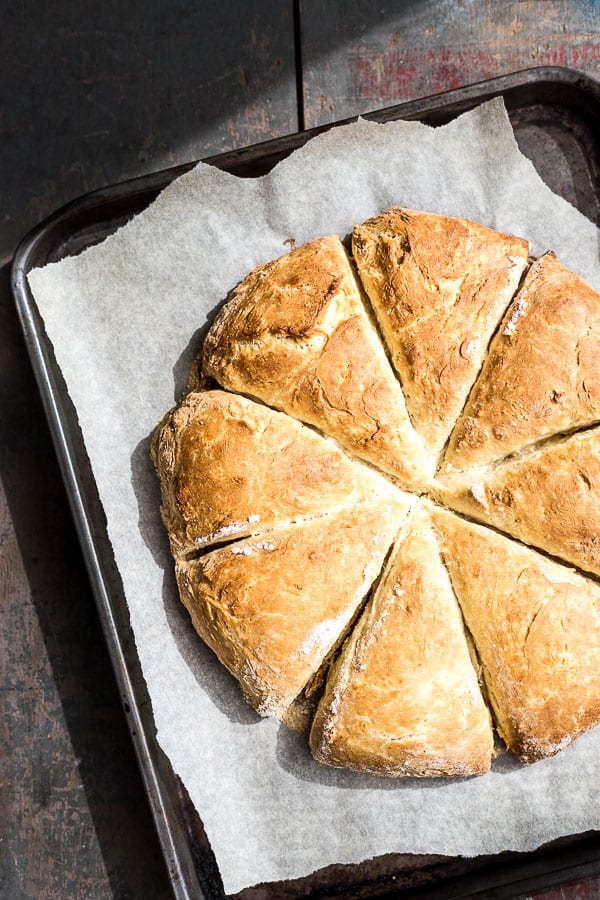
- Transfer dough onto a lined baking sheet and cut into 8 equal pieces just like a pizza. OR use a scone or cookie cutter to cut into shapes. Dust the cutter each time before pressing, and don’t twist when pulling it out. Transfer to the baking tray.
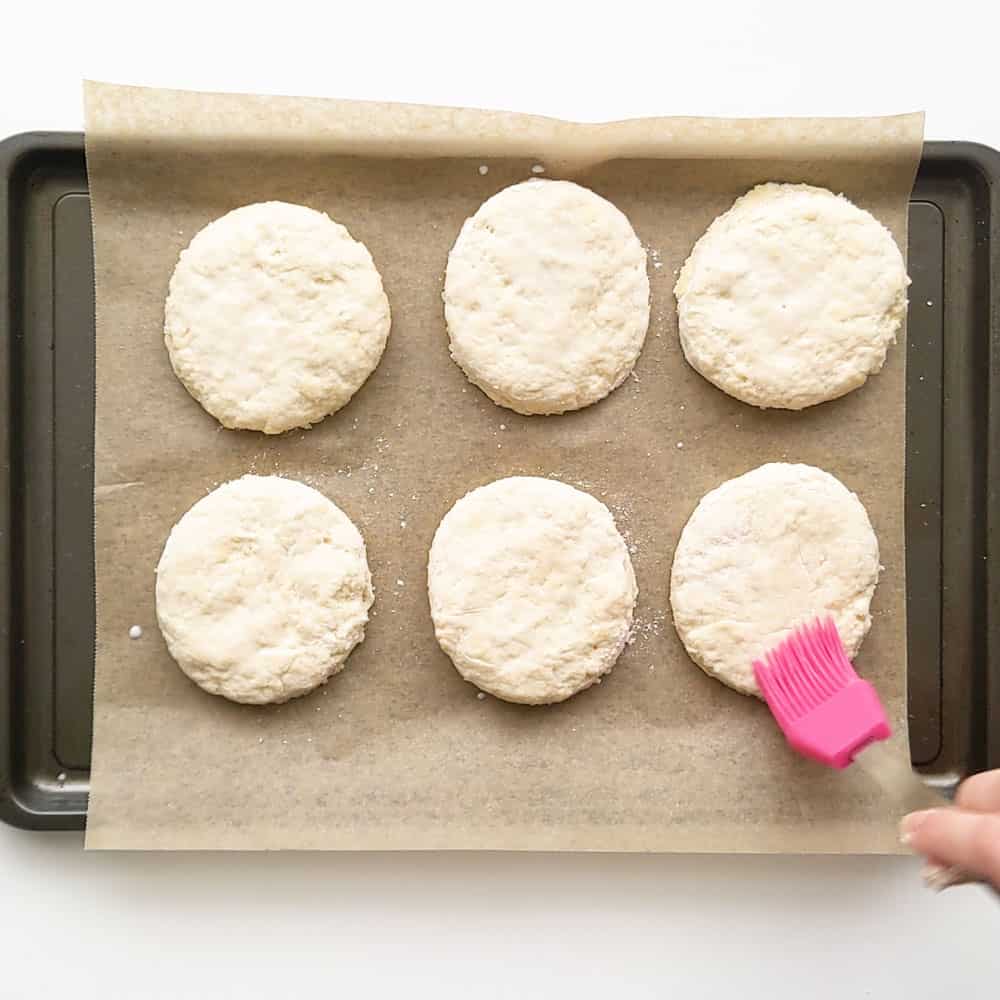
- Lightly brush the top of each scone with milk to glaze. Bake for 20 minutes or until golden brown.
Wandercook’s Tips
- Start Cold – Always use cold butter and milk when making scones. This stops the butter while you bring the ingredients together, creating steam when baking and resulting in lighter scones. You can even use frozen butter to help achieve this.
- Don’t Over-Knead – There’s almost no kneading required for scones. Simple ‘cutting’ the flour with a butter knife or dough scraper is the key technique in this recipe. It helps ‘pull’ everything together, resulting in that fluffy scone texture you know and love.
- Shaping the Scones – You can use a scone cutter / cookie cutter to get the right shape. Lightly dust it in flour before each press to stop the dough sticking. Avoid twisting when pulling the cutter out as this can make them go lopsided while baking.
- Extra Tall Scones – Arrange them close together on the baking tray. This way they all support each other as they rise, and the steam released will keep the insides extra moist and fluffy as they’re baking.
- Keep Fresh – Wrap scones in a towel after baking to trap in a little moisture but still allow them to breathe.
FAQs
Hot scones are amazing with a simple slather of butter alongside a hot cup of coffee or tea! For cooler scones, serve them with jam or marmalade and your favourite cream such as clotted, thickened cream or heavy cream. If you’re feeling experimental, try them with a fresh batch of coconut jam or cinnamon infused speculoos spread!
Yes you can add the flour, sugar and salt to a food processor, then add the butter on top. Give it a quick blitz until the ingredients look like breadcrumbs, then continue with the recipe below.
Scones are at their best on the day of baking, but will last for 2-3 days in an airtight container. Reheat in the microwave on high for 10-20 seconds to warm them before eating so they’re nice and fluffy.
Yes, you can freeze scones. For best results, store in an airtight container in the freezer for up to three months. Allow them to defrost on the bench before reheating them in the microwave on high for 10-20 seconds. Or warm them in the oven (preheated to 150˚C/300˚F) for 5 to 10 minutes.
There are a few things that may have stopped your scones from rising.
– Oven Temperature – make sure your oven is fully pre-heated before baking, as a cold oven can affect the rising agent.
– Out of Date Ingredients – Try again with fresh self-raising flour (or plain flour and baking powder if using).
– Too Much Kneading – Once you add the milk, it’s important you don’t over-mix the dough. Over-kneading causes the flour to develop too much gluten, leading to scones that are flat, dense or chewy.
– Too Much Flour – When turning out the dough onto your work surface, just dust it very slightly so the dough doesn’t stick.
It’s probably from working the dough too much. Use a knife or dough scraper to ‘cut’ through the mixture until it’s just combined before pressing it lightly into a ball – there’s almost no kneading at all. You can also try cooking them a little bit longer to see if that dries them out a bit more.
Variations
- Play With Shapes – While you might typically think of scones having a roughly rounded shape, there are no hard and fast rules. Make them squares, rectangles, triangles or any shape you desire.
- Add Fruit – Once you’ve incorporated the butter but before you add the milk, you can add a handful of currants, raisins, dried cranberries, chopped dates or even frozen berries and mix them into the dough.
- Flavour Ideas – Try them with a tbsp of fresh lemon zest, orange zest, vanilla extract or almond extract.
- Spice it Up – Add a sprinkling of cinnamon or pumpkin spice (cinnamon, ginger, nutmeg & cloves) in with the dry ingredients.
- Make it Savoury – Omit the sugar and add fresh herbs such as rosemary, oregano or dill.
- For Chocolate Lovers – Add a handful of dark, milk or white chocolate chips.
- Add Texture – Stir though toasted coconut, chopped almonds, walnuts or pecans.
For more baking fun, try these next:
★ Did you make this recipe? Please leave a comment and a star rating below!
Ingredients
- 450 g self raising flour
- 100 g butter salted or unsalted, cold, roughly chopped
- 375 ml milk full cream, cold
- 2 tsp raw sugar
- 1/2 tsp salt
Optional Toppings:
- Jam
- thickened cream / heavy cream Whipped, thickened, heavy or clotted
- Butter
Instructions
- Preheat the oven to 230˚C / 450˚F and line a tray with baking paper.
- Place the flour, sugar and salt into a large mixing bowl. Add the chopped butter and dig in with your hands. Mix the butter and flour together with your fingers until you get a crumbly texture with no lumps.450 g self raising flour, 2 tsp raw sugar, 1/2 tsp salt, 100 g butter
- Make a well in the centre and pour in the milk. Use a butter knife or dough scraper to 'cut' the flour in all directions until the dough just starts to come together into a sticky dough ball.375 ml milk
- Turn out the dough onto a lightly floured surface. Gently press out into a flat 2 cm / 1 in thick circle.
- Transfer dough onto a lined baking sheet and cut into 8 equal pieces just like a pizza. OR use a scone or cookie cutter to cut into shapes. Dust the cutter each time before pressing, and don’t twist when pulling it out. Transfer to the baking tray.
- Lightly brush the top of each scone with milk to glaze. Bake for 20 minutes or until golden brown. Optional: Serve with jam, cream and butter.Jam, thickened cream / heavy cream, Butter
Video

Recipe Notes
- Self Raising Flour – We use self-raising flour so there’s no need to add baking powder in separately. It results in more even textured scones as the raising agent is more evenly mixed through the flour. Sub with plain flour and sift in 4 tsp baking powder if you need.
- Butter & Milk – You can use salted or unsalted butter, it’s up to you. Full cream milk or buttermilk will give you light and fluffy scones. Both ingredients should be cold when you start working with them, so only take them out of the fridge right before you use them.
- Don’t Over-Knead – There’s almost no kneading required for scones. Simple ‘cutting’ the flour with a butter knife or dough scraper is the key technique in this recipe. It helps ‘pull’ everything together, resulting in that fluffy scone texture you know and love.
- Shaping the Scones – You can use a scone cutter / cookie cutter to get the right shape. Lightly dust it in flour before each press to stop the dough sticking. Avoid twisting when pulling the cutter out as this can make them go lopsided while baking.
- Extra Tall Scones – Arrange them close together on the baking tray. This way they all support each other as they rise, and the steam released will keep the insides extra moist and fluffy as they’re baking.
- Keep Fresh – Wrap scones in a towel after baking to trap in a little moisture but still allow them to breathe.
- Variations:
- Play With Shapes – While you might typically think of scones having a roughly rounded shape, there are no hard and fast rules. Make them squares, rectangles, triangles or any shape you desire.
- Add Fruit – Once you’ve incorporated the butter but before you add the milk, you can add a handful of currants, raisins, dried cranberries, chopped dates or even frozen berries and mix them into the dough.
- Flavour Ideas – Try them with a tbsp of fresh lemon zest, orange zest, vanilla extract or almond extract.
- Spice it Up – Add a sprinkling of cinnamon or pumpkin spice (cinnamon, ginger, nutmeg & cloves) in with the dry ingredients.
- Make it Savoury – Omit the sugar and add fresh herbs such as rosemary, oregano or dill.
- For Chocolate Lovers – Add a handful of dark, milk or white chocolate chips.
- Add Texture – Stir though toasted coconut, chopped almonds, walnuts or pecans.
Nutrition


16 Comments
Deb Thomas
14/05/2023 at 1:36 pmThese are terrific. I just made them and served with my home made mulberry jam and cream and a fresh pot of tea. I love the buttery taste. Thanks so much.
Wandercooks
16/05/2023 at 11:17 amOh wow, sounds like a magical combo with homemade mulberry jam! We make that too from my parents’ trees. One of the best jam flavours!
Ellen
29/04/2021 at 1:16 amI am going to try to make these scones just now, only to learn the recipe has no quantities that I can use. It would very nice of you to give us Americans the ingredients in volumes. That’s how most of us still bake. I haven’t the slightest clue how much of anything to use. It doesn’t seem like just guessing is a very smart way to bake. 🙁
Wandercooks
29/04/2021 at 8:44 amHey Ellen! There’s a button under the ingredients list that switches the recipe from metric to US ounces and pints. 🙂 I’ve just added the US amounts into the notes section though for each ingredient, so it’s easier for you to see. Let me know if that’s better. 🙂
plasterer bristol
11/07/2016 at 3:19 pmWow these look irrestistible, will be giving these a go for sure. Simon
Wandercooks
14/07/2016 at 4:11 pmAwesome to hear Simon – would love to know how you go! Enjoy, and don’t eat them too quick haha 🙂
Victoria
18/05/2016 at 2:04 amI love this recipe! I just finished making them, and they turned out awesome, if a little chewy (i probably kneaded them too much)
Wandercooks
18/05/2016 at 9:53 pmYay! That’s great Victoria, so glad you enjoyed them. In regard to the chewyness, it may indeed be from kneading it. We just used the knife to ‘cut’ through the mixture until it was combined before pressing it lightly into a ball, so it was almost not kneaded at all. Also, depending on your oven, try cooking them a liiiittle bit longer to see if that dries them out a bit more. Hope that helps for your next batch!
Kristy @ Southern In Law
29/04/2016 at 6:18 pmI feel like everyone needs a great homemade scone recipe – and these look PERFECT!
Wandercooks
29/04/2016 at 6:38 pmThanks Kristy! 100% agree too haha 🙂
Christina @ Banner Printing
29/04/2016 at 5:06 pmThe dish is just filled with your grandma’s affection & blessings rather than the basic ingredients of which it has been made… Thank you so much for sharing this wonderful recipe!!!
Wandercooks
29/04/2016 at 5:10 pmThanks Christina! You’ve made our day with such a lovely comment – it’s definitely the love that makes it taste that much better. 🙂
Martin @ The Why Chef
28/04/2016 at 10:54 pmEmma and I love scones! We made hundreds of them for our guests at our wedding as a canapé when everyone arrived (although I hated them a little after making 200 of them…)! We also made homemade jam to slather on top!
But we have a HUGE bone of contention between the two of us – does it go jam then clotted cream, or clotted cream then jam?!? Emma doesn’t even butter the scone, which is quite clearly wrong.
Wandercooks
29/04/2016 at 8:01 amWow that’s a lot of scones, what a delicious idea for a wedding. 😀 Also homemade jam is so much better too – what flavour did you make?
P.S. Sorry Emma, I think we’ll have to side with Martin on this one, at least when it come to the butter. In terms of order of deliciousness though? Can you believe we’ve only ever tried it jam first, then cream? Had never even imagined it going the other way!
Martin @ The Why Chef
29/04/2016 at 7:11 pmWe went fruit picking and made a whole bunch – strawberry, blackberry, raspberry, blackcurrant, and a bodge of all of them as mixed berry!
Haha I’m the cream first but I think that’s because you can get twice as much on the scone if it goes on first…. High five on the buttering! 😛
Wandercooks
02/05/2016 at 9:03 amWow that sounds like so much fun! Can’t get much fresher flavour than that can you!
Well now we really must try the cream first shenanigans. Always keen if that means we can pack on extra hahah.