Try this beloved Australian bakery sweet – Hedgehog slice. Full of crushed biscuits, nuts, coconut and cocoa, this is one super simple no bake treat with only 10 minutes prep!

In This Post You’ll Learn
Why We Love This
This is one super simple slice! We can usually whip this up in 10-15 minutes, then let the fridge do the rest while it sets.
The beauty of this recipe is you can batch it, freeze it AND gift it. It keeps really well in the fridge or freezer too, so you can easily make it ahead when you have time and serve it when you’re ready.
Related: Weetbix Slice / Aussie Crunch / Caramilk White Christmas
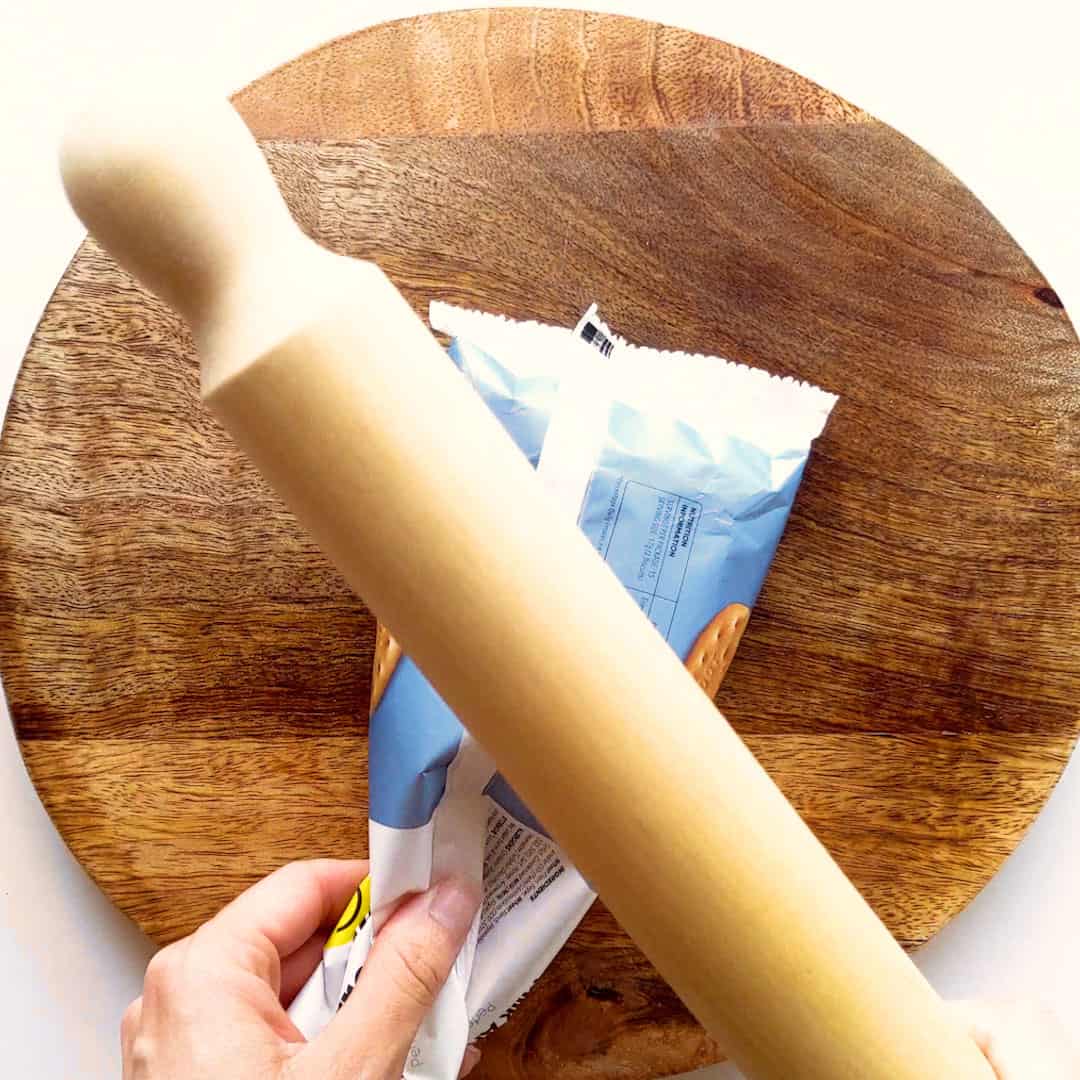
Best Way To Crush Biscuits – Gamechanger!
There’s nothing worse than making one of these simple recipes but ending up with biscuit crumbs flying everywhere. We like avoiding extra plastic use like Ziplock bags where necessary, and came up with the idea to use what we’ve got – the biscuit packet!
The key is to portion out your biscuits into quarter stacks, doing a bit a time. Just add a portion to the biscuit packet, lightly twist the end (enough to hold the crumbs, but loose enough to let air out so you don’t pop the bag!) and smash away with your rolling pin.
Of course, you can also use a food processer with a couple of quick pulses, but we find manually crushing the biscuits gives you a better distribution of big and small chunks.

What is Hedgehog Slice?
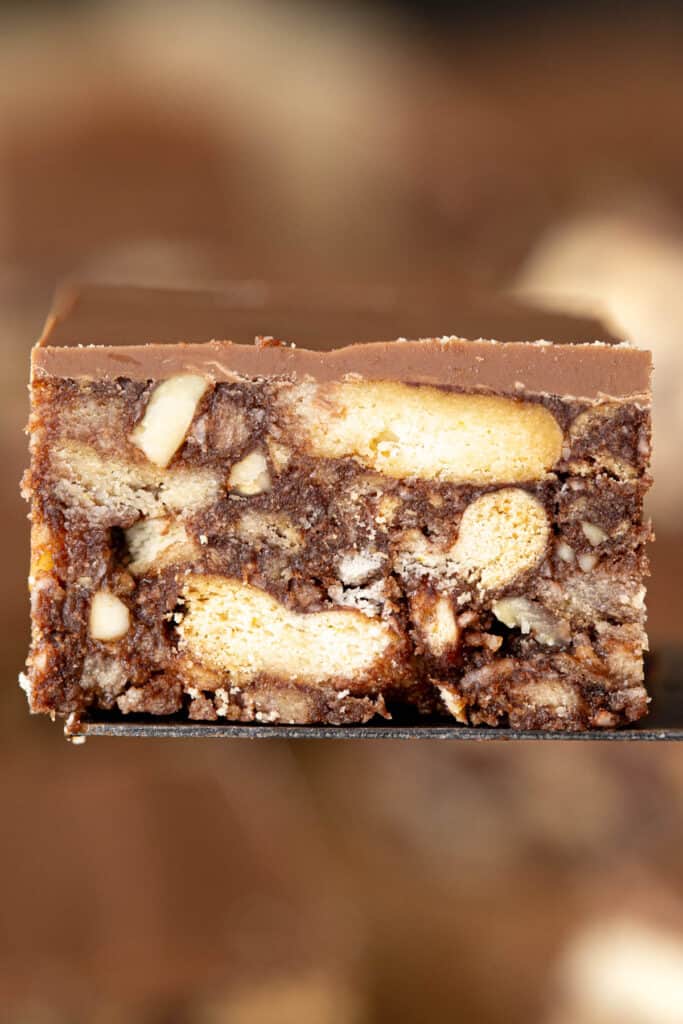
Filled with crushed biscuits, nuts, coconut and cocoa then topped with smooth milk chocolate, hedgehog slice is a sweet no bake treat popular in both Australia and NZ.
You can often find them at a local bakery or supermarket, but probably remember them more at events such as kids parties, school fundraisers or fetes, or festive occasions at family get-togethers for Christmas or Easter.
We grew up with them, and they were another favourite at morning tea on our 4wd trips with family and friends. Right alongside other favourites such as lemon slice, coffee scrolls and vanilla slice.
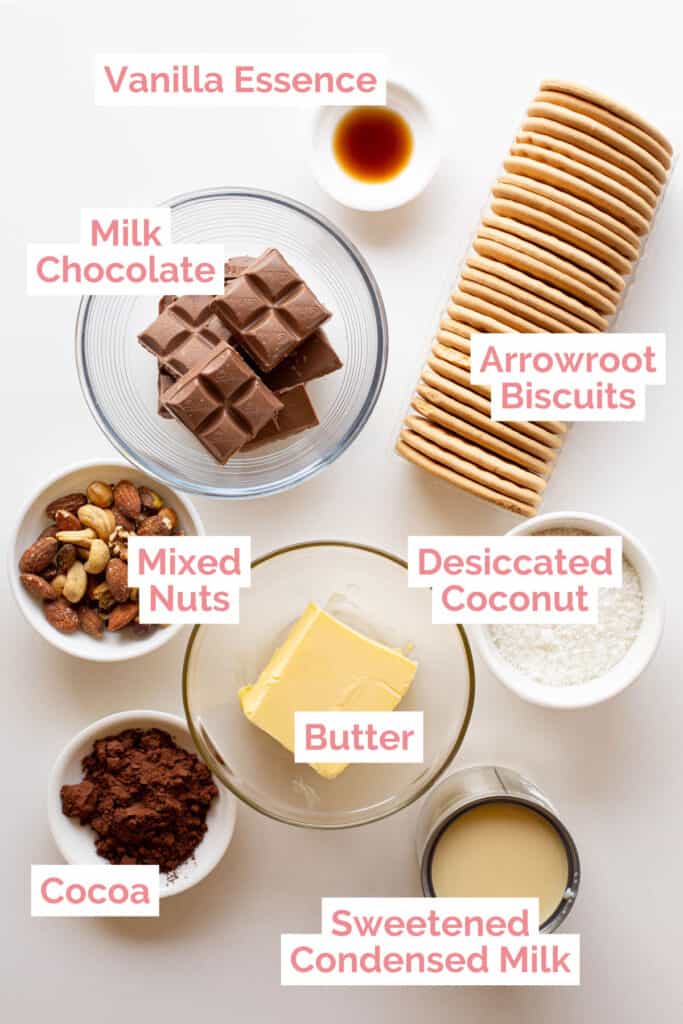
What You’ll Need
- Biscuits – We love using arrowroot biscuits. Doesn’t matter if it’s the cheap homebrand knockoffs or the real deal, they all work well! You can easily substitute with your favourite biscuits here too – try it with milk coffee biscuits, yo-yos, choc ripple or even the more traditional Marie plain biscuits. If you’re in the US or Canada, sub with any packet of 8.8 oz cookies.
- Mixed Nuts – Use any combo of your favourite mixed nuts, you can also add in dried fruit here if you prefer. Just make sure the weights are the same and you’re fine to mix and match.
- Cocoa – We recommend unsweetened cocoa here – not drinking chocolate. If you have to use drinking chocolate, be aware the slice will be even sweeter!
- Desiccated coconut – For extra texture and flavour. You can use also use shredded coconut, quick oats or rice bubbles here.
- Butter – Butter helps bind the slice together, hardening in the fridge for the perfect no bake slice. We use salted to give it that added oomph of taste.
- Condensed Milk – Also known as sweetened condensed milk. Sub with coconut condensed milk.
- Vanilla Essence – Vanilla essence, vanilla extract or vanilla sugar will work here. Whatever you have in the cupboard!
- Milk Chocolate – We love using Cadbury milk chocolate, but you can sub with dark chocolate, white chocolate or even do a cocoa and icing top like we do on our Weetbix slice. Or for something totally different, top with homemade Biscoff spread.
How to Make Hedgehog Slice

First, gather your ingredients: See recipe card below for measurements.
- Place ¼ of the arrowroot biscuits in their bag, leaving the remaining ¾ aside. Loosely twist the top to close. Use a rolling pin to crush the biscuits, then pour into a large mixing bowl. It’s fine to have some bigger chunks left.
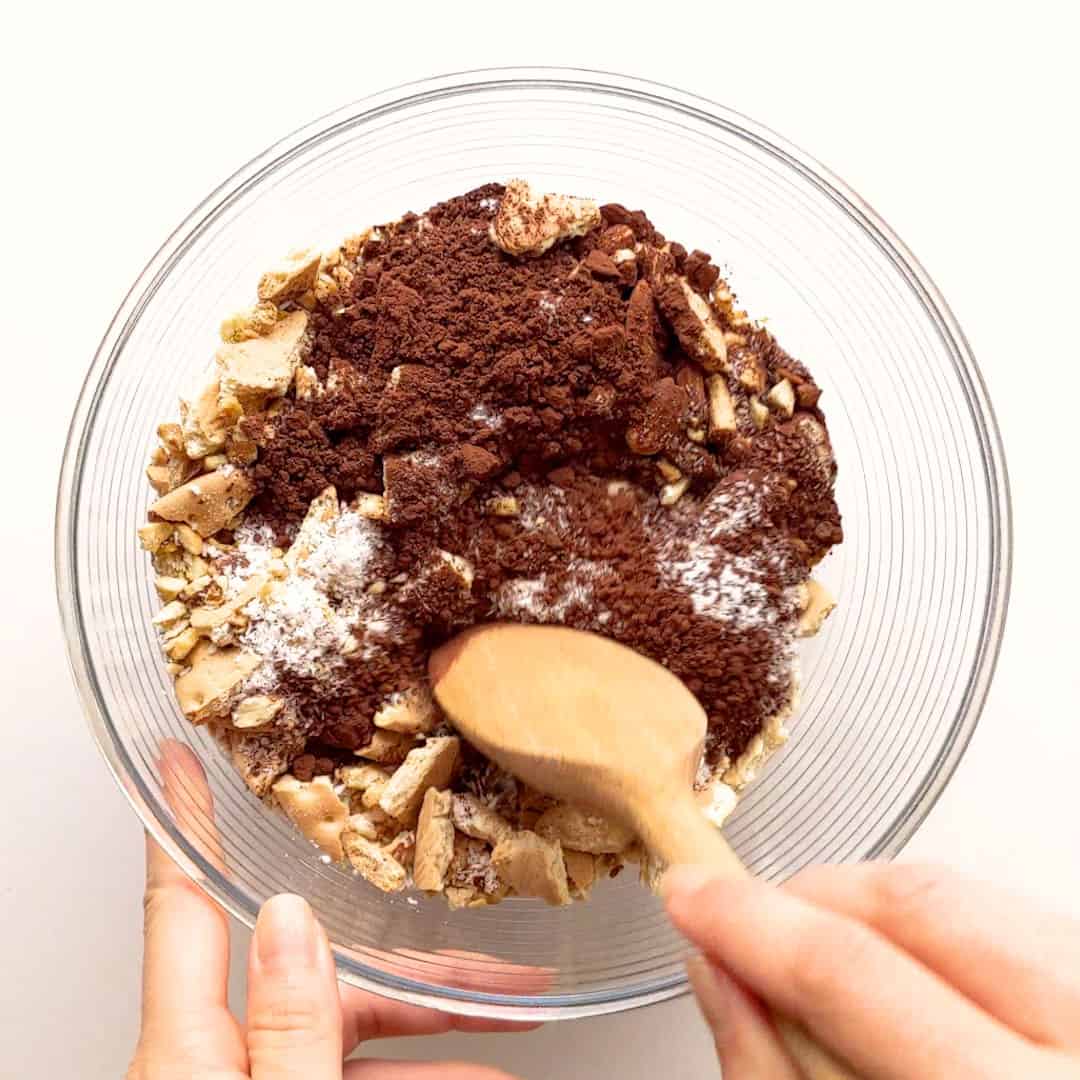
- Repeat in ¼ portions until all biscuits are crushed, then place the mixed nuts in the biscuit bag and crush again before adding to the bowl.
- Add the desiccated coconut and unsweetened cocoa, then give the dry ingredients a good mix.
- Heat butter for 30 seconds in the microwave. Pour in the condensed milk and vanilla essence, giving it a stir until loosely mixed, then microwave for a further 30 seconds.
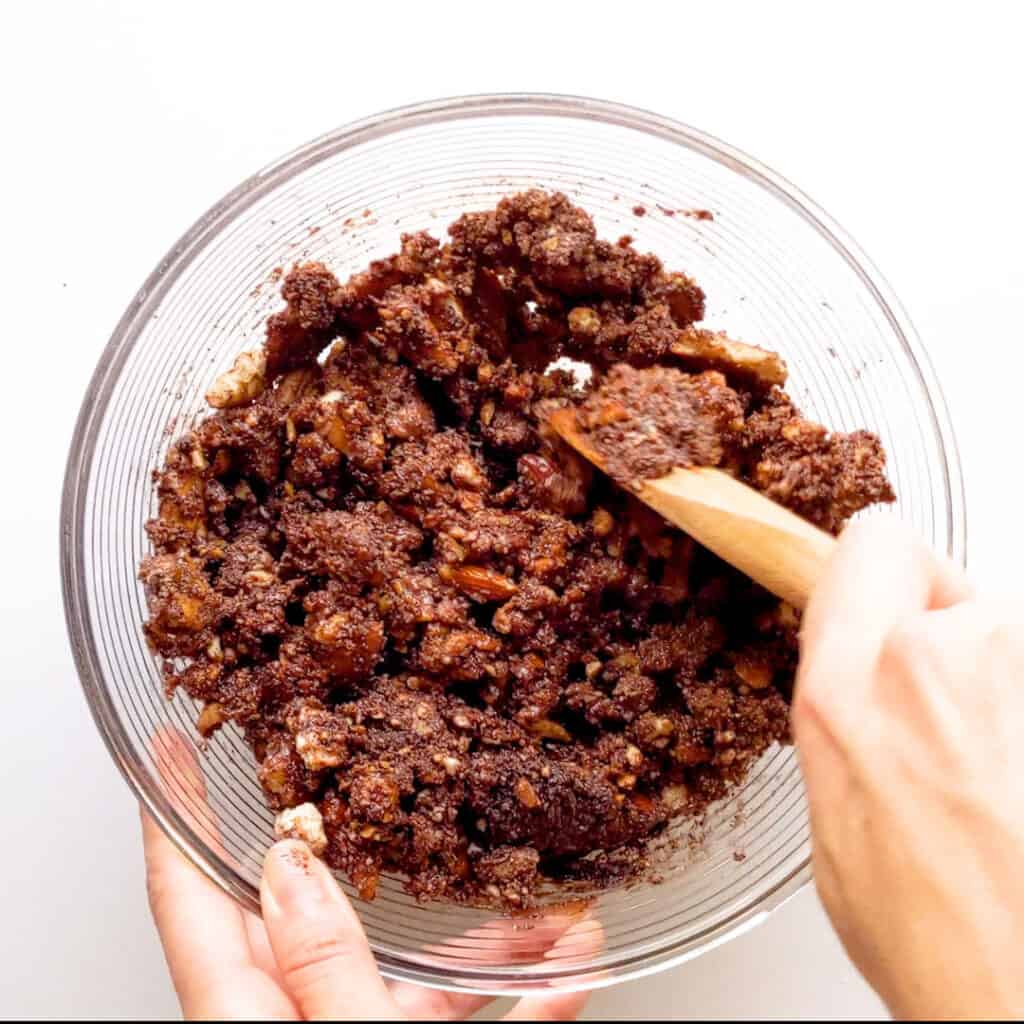
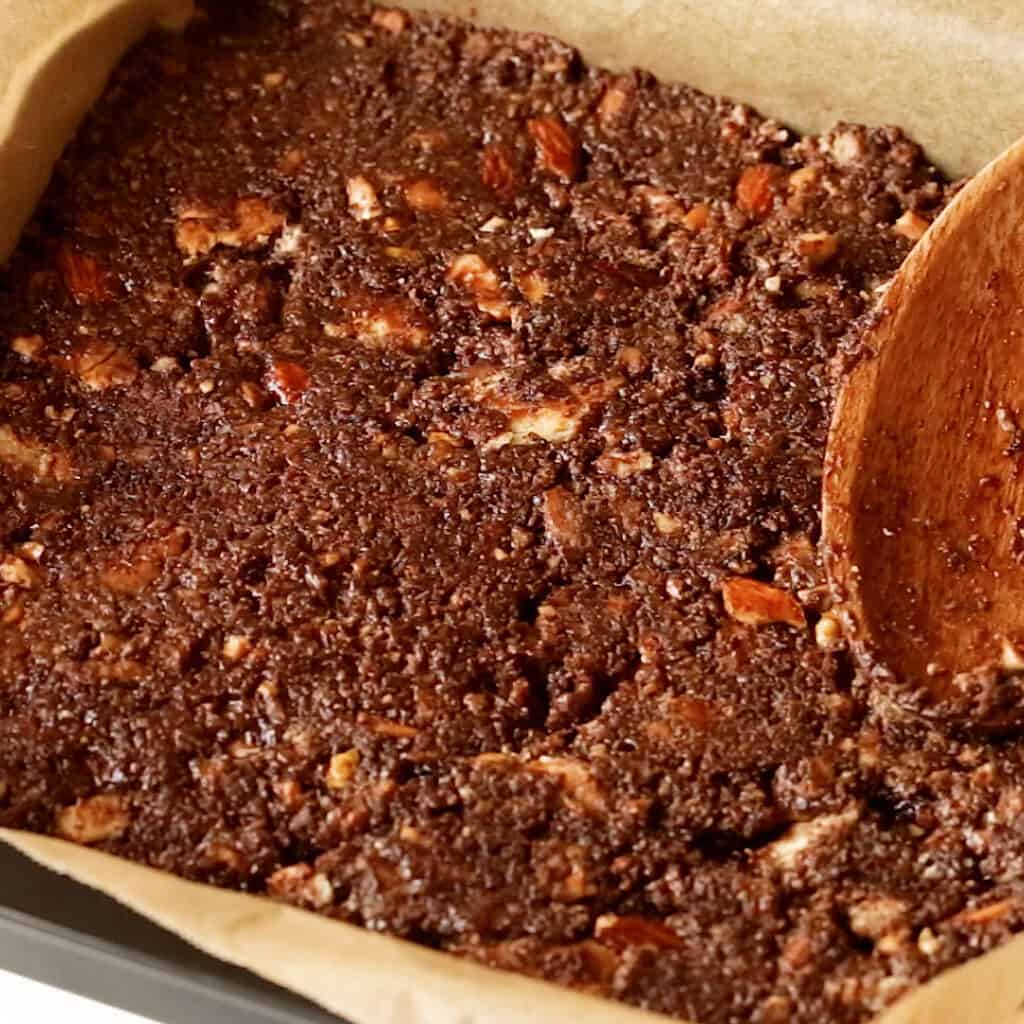

- Pour the warm mixture over the dry ingredients and combine using a wooden spoon. Make sure there are no dry areas left.
- Line a square baking tin with baking paper and pour in the biscuit mixture. Press out firmly with the back of a spoon until packed down and flat.
- Break up the milk chocolate into small squares into a small mixing bowl. Melt in the microwave in 30 second bursts, stirring each time, for around 1-2 minutes or until completely melted.
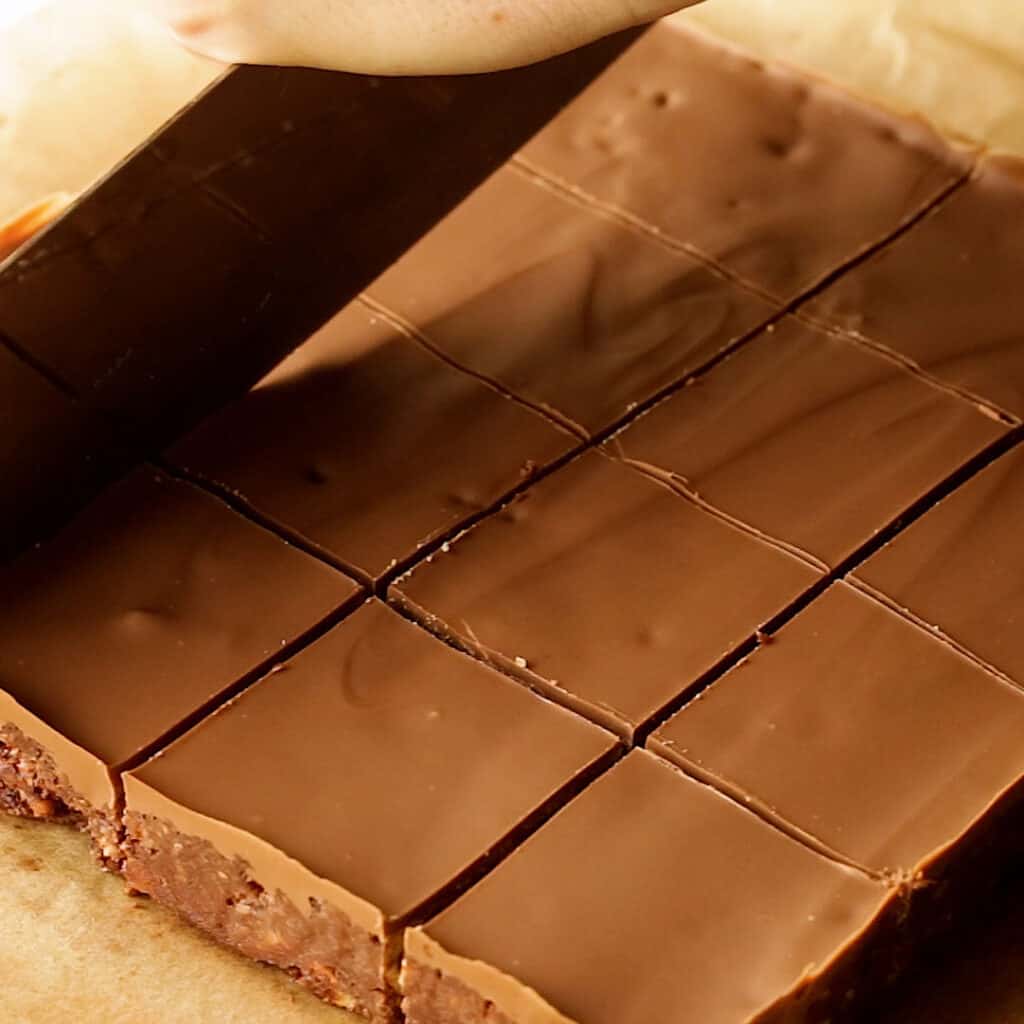
- Pour the melted chocolate over the biscuit base and use a spatula or spoon to smooth out the top.
- Place in the fridge to set for 1-2 hours before slicing.
- Optional: Once set, sprinkle with icing sugar and decorate with maraschino or glacé cherries.
Wandercook’s Tips
- Work Quickly – The chocolate will harden almost immediately, so be ready to stir it through quickly!
- Different Sizes – You can cut your slice into bite size pieces to make it go further, or larger squares if you’re wanting a full sized dessert or take them to a school fundraiser or fair.
- Storage – Slice first, and store in an airtight container in the fridge for up to a week, or pop in the freezer for up to a couple of months!
FAQs
The larger biscuit chunks look great when you cut it into slices, but you may prefer smaller pieces for a better distribution of flavours between the biscuit, nuts and coconut. It’s completely up to personal preference.
You really need to give the slice time to chill in the fridge. This helps the butter to harden and hold everything together. Give it at least a couple of hours before you’re ready to cut it.
Variations
- Garnishes – You can leave the top of the slice as plain chocolate, or top with icing sugar and cherries, hundreds and thousands or sprinkles, desiccated or shredded coconut or crushed chocolate biscuits such as Tim tams or Nestle Mint Crisp.
- Love Slices? – For a different slice flavour, try our Weetbix lemon slice or jelly slice.
Try these amazing recipes next:
★ Did you make this recipe? Please leave a comment and a star rating below!

Ingredients
- 250 g arrowroot biscuits 8.8 oz, sub coffee biscuits
- 1/2 cup mixed nuts 60 g / 2.1 oz
- 1/3 cup desiccated coconut 30 g / 1 oz
- 2 tbsp cocoa powder 15 g / 0.5 oz
- 170 g butter 6 oz
- 1/2 tin condensed milk 200 g / 7 oz
- 1 tsp vanilla essence
- 1 block Cadbury milk chocolate 180 g / 6.3 oz
Optional garnish:
- icing sugar
- maraschino or glacé cherries whole or quartered for each piece of slice
Instructions
- Place ¼ of the biscuits in their bag, leaving the remaining ¾ aside. Loosely twist the top to close. Use a rolling pin to crush the biscuits, then pour into a large mixing bowl. It’s fine to have some bigger chunks left.250 g arrowroot biscuits
- Repeat in ¼ portions until all biscuits are crushed, then place the mixed nuts in the biscuit bag and crush again before adding to the bowl.1/2 cup mixed nuts
- Add the desiccated coconut and unsweetened cocoa, then give the dry ingredients a good mix.1/3 cup desiccated coconut, 2 tbsp cocoa powder
- Heat butter for 30 seconds in the microwave. Pour in the condensed milk and vanilla essence, giving it a stir until loosely mixed, then microwave for a further 30 seconds.170 g butter, 1/2 tin condensed milk, 1 tsp vanilla essence
- Pour the warm mixture over the dry ingredients and combine using a wooden spoon. Make sure there are no dry areas left.
- Line a square baking tin with baking paper and pour in the biscuit mixture. Press out firmly with the back of a spoon until packed down and flat.
- Break up the milk chocolate into small squares into a small mixing bowl. Melt in the microwave in 30 second bursts, stirring each time, for around 1-2 minutes or until completely melted.1 block Cadbury milk chocolate
- Pour the melted chocolate over the biscuit base and use a spatula or spoon to smooth out the top.
- Place in the fridge to set for 1-2 hours before slicing.
- Optional: Once set, sprinkle with icing sugar and decorate with maraschino or glacé cherries.
Video

Recipe Notes
- Work Quickly – The chocolate will harden almost immediately, so be ready to stir it through quickly!
- Different Sizes – You can cut your slice into bite size pieces to make it go further, or larger squares if you’re wanting a full sized dessert or take them to a school fundraiser or fair.
- Storage – Slice first, and store in an airtight container in the fridge for up to a week, or pop in the freezer for up to a couple of months!
- Garnishes – You can leave the top of the slice as plain chocolate, or top with icing sugar and cherries, hundreds and thousands or sprinkles, desiccated or shredded coconut or crushed chocolate biscuits such as Tim tams or Nestle Mint Crisp.
-
Nutrition


No Comments